


Cookies 🍪
By clicking "Accept", you authorize Meilleur du Chef to store cookies on your device to personalize site content, analyze our traffic, and provide social media functionality.
Favourites


In one click, store and find all your favourite recipes.
Add this recipe >
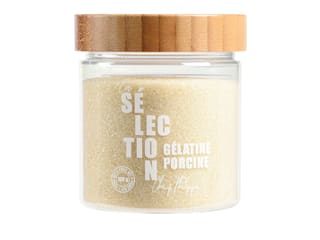
To make this Chocolate and Exotic Fruit Christmas Yule Log, start by preparing all the ingredients for the vanilla whipped ganache. Mix the powdered gelatin with the hydration water (tap or mineral water) and let it hydrate for 15 minutes.

Vanilla whipped ganache (make the day before): Weigh the inverted sugar and glucose syrup directly into the saucepan, then add the small amount of whipping cream.

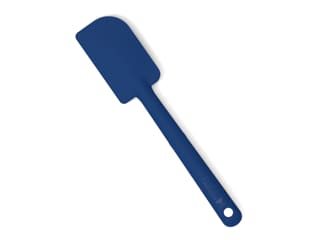
Heat on the stove while gently stirring with a silicone spatula to dissolve both sugars in the cream.

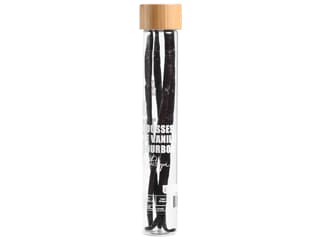
While the cream is heating, split the vanilla pod in half and scrape the inside with the tip of a knife to extract the seeds.

Add the split vanilla pod and the seeds to the cream.

Pour the Opalys white chocolate into a mixing bowl and melt it in the microwave in 20 to 30-second intervals, stirring every time to prevent burning.

When the cream comes to a boil, remove the saucepan from the heat and let the vanilla infuse for a few minutes while the chocolate finishes melting.

Once the white chocolate has melted...

...pour the vanilla cream (without the pod) over the chocolate, mixing with the spatula to create an emulsion.

Add the large amount of cold whipping cream and mix again.

Take the hydrated gelatin and melt it in the microwave.

Pour the melted gelatin into the chocolate mixture while stirring with the spatula.

Blend everything using a hand blender to fully combine the elements.

Place the vanilla pod back into the mixture so it continues to infuse its aroma. Cover the surface of the ganache directly with a sheet of cling film...

...and refrigerate overnight.

Macaé chocolate sponge: Prepare all the ingredients.

Pour the egg whites and caster sugar into the bowl of the stand mixer and begin whipping them with the whisk attachment. The caster sugar should be added from the start.

Whip the mixture until you obtain a smooth and soft meringue. It should still hold its shape.

Place the dark chocolate in a mixing bowl and melt it in the microwave in 20 to 30-second intervals...

...stirring every time until it is completely melted.

Add the egg yolks to the melted dark chocolate...

...as well as the melted butter...

...and mix thoroughly. The mixture should be slightly grainy, as shown in the photo.

Add half of the meringue...

...and gently fold in with the maryse spatula.

Add the remaining meringue...

...and the sifted flour through a fine sieve.

Mix again...

...until the batter for the Macaé chocolate sponge is smooth and homogeneous. Avoid overmixing.

Spread the batter onto a perforated baking tray 40 x 30 cm lined with parchment paper...

...and smooth it into an even thin layer across the entire tray using a offset metal spatula.

You should obtain this result. The ingredient proportions are for a 40 x 30 cm tray.

Bake in a fan-assisted oven preheated to 170°C for about 12 minutes. Baking time may vary depending on your oven.

Once baked...

...remove the tray from the oven.

Transfer the Macaé chocolate sponge, still on its parchment paper, to a cooling rack...

...for optimal cooling.

Let cool at room temperature. Set aside.

Mango & passion fruit compote: Take one mango and peel it. The mango should be ripe but not overripe or too green — the flesh should be juicy.

Using a mandoline, slice the mango into thin strips 3 to 4 mm thick.

Slice the entire mango down to the pit, taking care not to cut yourself.

Stack 2 to 3 slices of mango and cut them into thin sticks...

...then dice those sticks into small cubes to obtain a uniform brunoise of mango.

Take a yule log insert mould, cut it in half with scissors...

...and assemble it so that it measures 22.5 cm in length, as shown in the photo. Secure it with tape.

This length is calculated for the Plein Cœur silicone yule log mould used here, which measures 24cm long (the insert should be slightly shorter).

Mango & passion fruit compote (continued): Prepare all the ingredients. Hydrate the powdered gelatin with the hydration water for 15 minutes.

Mix part of the brown sugar with the NH pectin to prevent lumps from forming.

Pour the mango purée into a saucepan...

...along with the passion fruit purée and the remaining brown sugar...

...and bring to a boil.

When the purées start to simmer, add the brown sugar and pectin mixture while whisking to avoid lumps.

Once it reaches a boil, maintain the boil for at least 1 minute to activate the pectin, whisking continuously.

When the cooking is done, add the hydrated gelatin...

...and whisk vigorously.

Then add the previously diced and weighed mango brunoise...

...and mix gently. Let it cool to room temperature before pouring it into the insert mould, to avoid deforming the thermoformed insert.

Meanwhile, cover the Macaé chocolate sponge with parchment paper...

...and carefully flip it over so that the parchment paper is on top.

Gently peel off the parchment paper. Be careful, as the sponge is delicate. Don't worry if it cracks slightly.

Start by trimming the sponge along its length, cutting off one border so it's perfectly straight.

Measure the insert mould — it is 4 cm wide. Since its sides are curved, we'll need a slightly narrower sponge strip (about 3 cm wide), as it will sit halfway up the insert.

Mark the Macaé chocolate sponge at 3 cm...

...and cut a 3 cm-wide strip using a graduated ruler and a knife.

Trim the top of the strip, then cut a piece 22cm long. Keep the remaining sponge for later.

Check the temperature of the cooled mango & passion fruit compote (it should be lukewarm, not hot). Here, it measures 35.1°C. It should still be pliable.

Pour the compote into the insert mould — 100g of mango & passion fruit compote per cavity.

I made two inserts since I'm preparing two entremets, but at home, you'll only need one insert for a single Yule log.

Take the strip of Macaé chocolate sponge and gently place it in the mould, directly on top of the still-liquid compote.

Do the same with the second insert if, like me, you've made two (in that case, double all ingredient quantities).

Here's a cross-section view. Set aside at room temperature.

Macaé chocolate crémeux: Prepare all the ingredients.

Pour the whipping cream into a saucepan.

Add the milk and bring to a boil.

Pour the egg yolks into a mixing bowl...

...along with the caster sugar.

Blanch the egg yolks and sugar lightly, then add the hot milk and cream while whisking.

Pour everything back into the saucepan...

...and cook 'à la nappe' (until it coats the back of a spoon) without exceeding 82°C, stirring in 8-shaped motions with the maryse spatula. Use a probe cooking thermometer to avoid curdling the eggs.

Melt the dark chocolate in the microwave in 20 to 30-second intervals, stirring every time. It doesn't need to be fully melted.

Strain the hot custard through a fine sieve directly over the partially melted chocolate.

Mix gently with the maryse spatula to form an emulsion...

...until you obtain a smooth, homogeneous Macaé chocolate crémeux.

Blend the mixture with the hand blender for perfect smoothness.

Pour this Macaé chocolate crémeux into the insert mould...

...over the Macaé chocolate sponge. You'll need about 115 to 120g of cream per insert.

Cover with cling film in direct contact and place in the freezer.

Vanilla whipped ganache (continued): The next day, once chilled, remove from the fridge and peel off the cling film. Transfer the ganache to the mixer bowl...

...remembering to remove the vanilla pod, which will have infused its aroma overnight.

Whip the vanilla ganache with the whisk attachment until it reaches a whipped cream texture. It should be firm but not stiff — just hold its shape.

We now have our vanilla whipped ganache.

Transfer this ganache into a piping bag. Here, a nozzle will not be necessary.

Take the silicone yule log insert mould and place it on a baking tray.

Pipe the vanilla whipped ganache into the silicone insert without overfilling it.

Use a mini offset spatula to bring the mixture up along the sides and remove any air bubbles.

Remove the insert made of mango & passion fruit compote, Macaé chocolate sponge, and Macaé crémeux from the freezer and take off the cling film.

Gently release the insert. It must be completely frozen for perfect results.

Trim both ends of the insert with a knife to obtain a length of 22.5cm.

Place the insert in the mould, rounded side down directly against the vanilla whipped ganache, and the flat side facing up.

Smooth the ganache along the edges, but do not cover the insert with the vanilla whipped ganache. You will notice that the silicone insert mould is not completely filled; there should be a gap of about 1cm at the top.

Cover with cling film in direct contact and place in the freezer. Continue with the recipe once this insert is completely frozen.

Macaé dark chocolate mousse: Prepare all the ingredients (if you're starting this step, it means your insert from step 101 is ready and fully frozen!).

Pour the small amount of whipping cream into a saucepan...

...and add the milk. Bring to a boil.

Pour the egg yolks and caster sugar into a mixing bowl...

...and blanch them together until the sugar grains no longer crackle against the bottom of the bowl.

When the cream and milk come to a boil, pour them over the freshly whisked mixture while stirring.

Then pour everything back into the saucepan...

...and cook until it coats the back of a spoon, as for the Macaé cream, without exceeding 82°C.

Pour this hot custard over the dark chocolate previously melted in the microwave, mixing with the spatula to form an emulsion...

...like this.

Continue blending with the immersion blender until perfectly smooth.

Pour the large amount of whipping cream into the bowl of the mixer and whip it with the whisk attachment...

...until you obtain a soft whipped cream.

When the chocolate mixture reaches between 45 and 50°C, add half of the whipped cream...

...and mix vigorously with the whisk.

You should obtain a homogeneous chocolate mixture.

Add the remaining whipped cream.

Finish mixing with the whisk...

...and, if necessary, with the maryse spatula, until you obtain a smooth and homogeneous Macaé dark chocolate mousse. Transfer this preparation into a disposable piping bag (no nozzle).

We're going to cut the base of the yule log into an oblong shape, 22cm long and 8cm wide, from the remaining Macaé chocolate sponge. Here, I'm using a round plain cookie cutter Ø 8cm to create perfectly rounded ends...

...to obtain this result.

Lift off this Macaé chocolate sponge base and set it aside.

Remove the silicone insert mould from the freezer and take off the cling film.

Flip it over and gently release it. It must be frozen solid for easy unmoulding.

To adapt the insert to the shape of our mould (depending on the mould used), round the corners slightly with a knife to create curved ends; otherwise, the insert will not fit properly.

The insert can also be slightly trimmed in width to allow for more chocolate mousse in the finished yule log.

Since I don't have an insert mould perfectly matching the Pleincœur mould, I adjust it by trimming slightly with a knife. Here's the result.

Fill the Pleincœur silicone mould halfway with the Macaé dark chocolate mousse.

Then flip the insert and place it into the silicone mould, rounded side directly in contact with the chocolate mousse (flat side on top).

Gently press the insert into the mousse with your fingertips, leaving just enough space for the sponge base.

Smooth the surface with the mini offset spatula.

Carefully place the Macaé chocolate sponge base using the large offset metal spatula.

Clean the edges of the silicone mould with a paper towel...

...then cover the top with cling film in direct contact. Place in the freezer. This recipe can be prepared up to this stage several days, or even 3 to 4 weeks, in advance and stored in the freezer.

Cocoa mirror glaze (make the day before): Prepare all the ingredients.
Hydrate the powdered gelatin with the hydration water for 15 minutes.

Pour the water into a saucepan...

...and add the caster sugar. Bring to a boil.

Pour the cocoa powder into a mixing bowl.

Once the water and sugar reach a boil, maintain it for 1 to 2 minutes until the sugar is fully dissolved. Check by removing the pan from the heat and ensuring the syrup is clear and bubbling has stopped.

If the sugar is fully dissolved, add the hydrated gelatin to the boiling syrup and stir vigorously.

Then pour the cooked syrup over the cocoa powder.

Meanwhile, heat the whipping cream in a saucepan.

Whisk the cocoa mixture vigorously to fully dissolve the cocoa powder in the syrup. The mixture should be smooth.

Then add the hot cream last, whisking continuously...

...until you obtain a smooth, homogeneous cocoa mirror glaze.

Pour the glaze into a pouring jug (a tall, narrow container)...

...and blend with the immersion blender to achieve a perfectly smooth, bubble-free mixture.

Cover the glaze directly with cling film and refrigerate overnight.

Finishing: The next day, the yule log must be completely frozen (very important!) for perfect unmoulding. Remove the mould from the freezer and take off the cling film.

Gently pull the sides of the silicone mould away to loosen the yule log along its length.

Turn the whole thing over onto a baking tray lined with parchment paper and peel off the silicone mould. If the yule log isn't fully frozen, it will stick to the mould — that's why this step must be done straight from the freezer.

Quickly trim the edges of the yule log with the tip of a knife to remove any excess and achieve a clean finish.

Carefully lift the yule log using the large offset metal spatula...

...and transfer it onto a baking tray covered with cling film. This tray should be set on a turntable to make spraying easier.

Spray the yule log with the caramel velvet-effect spray from a distance of 30 to 40 cm. Shake the can well before use until you hear the ball inside rattle (this means the product is well mixed and ready to spray).

The turntable allows easy access to all sides of the yule log.

Ensure the velvet-effect spray is evenly applied over the surface without excessive buildup, to avoid a coarse finish.

Once the yule log is flocked, carefully lift it with the large offset spatula and place it on its serving platter.

The yule log will need to defrost — either 4 hours in the fridge or 2 hours at room temperature (20/22°C maximum) for faster defrosting. After 2 hours, return it to the fridge.

Remove the cocoa mirror glaze from the fridge and peel off the cling film.

Melt the glaze in the microwave in 20 to 30-second intervals at full power to liquefy it.

Then blend it with the hand blender until perfectly smooth. At first, there will be a gelatinous core, but the texture will even out with blending.

Transfer the smooth, melted cocoa mirror glaze into a piping bag (without nozzle).

Lay the piping bag flat on the work surface and check the temperature with a laser infrared thermometer directly through the plastic. If the glaze is too hot, it needs to cool — laying it flat allows rapid cooling.
Here, it measures 47.4°C.

By keeping the piping bag flat and spreading the glaze in a thin layer, the temperature will drop quickly.

After a few moments, check the temperature again. The glaze now reads 45.2°C.

After 5 to 10 minutes of resting and flipping the piping bag on the work surface, the glaze will drop to 32.2°C — the ideal temperature for use. Above this, it will be too hot and runny; below, it will be too cold and thick due to gelling.

Once the cocoa mirror glaze is at the right temperature, push it toward the tip of the piping bag using the flat side of a rigid pastry scraper...

...and tie a knot at the end of the bag to seal it and prevent leaks.

Here's the piping bag containing the cocoa mirror glaze, properly sealed.

Cut off any excess plastic from the bag...

...like this. If the glaze measures between 30 and 35°C, it's ready to use.

Cut a small opening at the tip of the piping bag to control the flow, and pipe the cocoa mirror glaze into the hollow along the top of the yule log, pressing gently to avoid pouring too much at once.

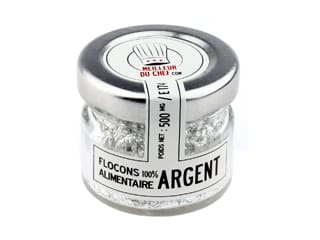
Finish the decoration by placing silver flakes on the glaze using appropriate tweezers.

Here is our Chocolate and Exotic Fruit Christmas Yule log, fully decorated. If necessary, allow the entremets to defrost (or keep it) in the refrigerator until serving. Enjoy!
Please login to post a review