


Cookies 🍪
By clicking "Accept", you authorize Meilleur du Chef to store cookies on your device to personalize site content, analyze our traffic, and provide social media functionality.
Favourites


In one click, store and find all your favourite recipes.
Add this recipe >
Start by preparing the ingredients for the shiny cocoa butter layer.

Shiny cocoa butter layer: Pour the cocoa butter pistoles into a pastry bowl and melt them in the microwave in 20 to 30-second intervals...

...stirring every time. Gradually, the pistoles will start to melt.

Continue alternating between microwave heating and stirring with a maryse spatula. Although the pistoles would melt faster over very low heat in a small saucepan, it is important not to exceed 45°C. The microwave allows for gradual melting.

Check the cocoa butter temperature using a laser thermometer, which here reads 31.1°C.

Continue melting the pistoles in the microwave...

...remembering to stir between each stage and to monitor the temperature.

The cocoa butter pistoles are now almost completely melted, and the mixture has reached 44.9°C.

The melting stage is complete; now begin the cooling stage...

...by continuously stirring the cocoa butter with the maryse spatula and scraping it up the sides of the bowl to help lower the temperature.

Gradually, the temperature of the mixture drops. It now reads 37.6°C.

Continue stirring until the cocoa butter reaches 35°C.

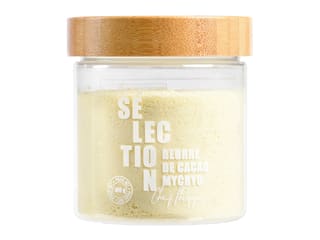
Once it reaches 35°C, sprinkle the Mycryo cocoa butter over the surface. The amount should equal 1% of the total weight of the cocoa butter pistoles. Mix thoroughly.

Add the red and yellow Power Flowers colourings.

To obtain the desired shade, I used the Power Flowers app (available on iOs) and selected the red 5A colour, which requires 2 red Power Flowers and 1/4 yellow Power Flower, as indicated in the app. These quantities correspond to a total mass of 100g of mixture (here, 100g of melted cocoa butter).

Mix until the Power Flowers have melted into the 35°C cocoa butter.

You can finish blending with a hand blender to fully incorporate the colourings...

...and break down the colour molecules. This ensures that no unmelted colouring particles remain. The result is the 5A shade.

Continue stirring with the maryse spatula to help the mixture cool, which now reads 34.6°C.

As the red cocoa butter cools, add the gold sparkling food colouring.

The amount of gold powder will depend on how shimmery you want the result to be.

Mix vigorously until fully incorporated and the temperature reaches 29°C. This is the ideal working temperature for cocoa butter.

Pour the tempered, red, pearlescent cocoa butter into the Advent calendar chocolate mould...

...making sure to fill all the cavities until the mould is completely covered.

Tap the mould on the work surface to release any air bubbles.

Then turn the mould upside down over the bowl to empty the cavities.

Scrape the surface of the mould with a chocolate spatula to level off the edges.

Flip the mould over a sheet of parchment paper and tap the side with the handle of the chocolate spatula so that any excess mixture drains out — the cocoa butter layer must be very thin and translucent.

Turn the mould back over and scrape its surface again with the chocolate spatula to clean off any excess cocoa butter. Place it upside down on the sheet of parchment paper and leave to crystallise at room temperature, ideally in a cool room (18-19°C).

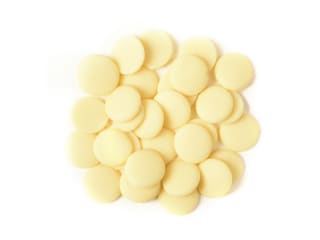
Chocolate shell: Melt the white chocolate in the microwave in 20 to 30-second intervals, stirring every time to prevent burning.

The melted white chocolate should not exceed 45°C, as with the cocoa butter earlier.

Once this temperature is reached, add the red and yellow Power Flowers, which will colour the mixture. These colourings are designed to produce consistent results. For pastry chefs or chocolatiers who wish to obtain identical desserts or chocolates throughout the year, this colouring method ensures a uniform and high-quality finish.

Mix everything thoroughly with the maryse spatula. The Power Flowers will begin to melt and colour the mixture...

...while also lowering its temperature.

Continue mixing until the coloured chocolate reaches 35°C.

The mixture currently reads 38.8°C, so continue stirring...

...scraping the chocolate up the sides of the bowl, then gathering it back with the rubber part of the maryse spatula.

When the coloured chocolate reaches 35°C...

...sprinkle the Mycryo cocoa butter over the mixture to achieve an easy, quick tempering.

Stir vigorously to fully incorporate the Mycryo cocoa butter into the mixture. It will melt just like the Power Flowers.

The temperature of the coloured chocolate continues to drop.

Keep stirring, scraping the mixture up the sides of the bowl, until it reaches 29°C.

Once the red chocolate is at 29°C, pour it into the cavities of the Advent calendar mould, directly over the crystallised cocoa butter.

Tap the mould on the work surface to release air bubbles.

Then turn the mould upside down to empty the cavities, tapping the side with the handle of the chocolate spatula so that the excess mixture drains out.

Scrape the surface of the mould with the chocolate spatula to level the edges.

Place the mould upside down on a sheet of parchment paper and leave to crystallise in a cool room. Keep the remaining tempered red chocolate in an oven preheated to 30°C to maintain its temperature — if it cools too much, you'll need to temper it again from scratch as if it had never been tempered.

Salted butter caramel: Prepare all the ingredients.

Weigh the glucose syrup and inverted sugar directly into the saucepan.

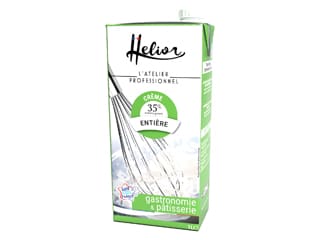
Add the whipping cream and heat...

...stirring with the maryse spatula until both sugars have completely dissolved in the cream.

Bring this mixture to a boil, then remove the saucepan from the heat and set aside.

Place a second saucepan on the heat and warm it dry over medium heat for about 20 seconds. Then add the caster sugar to make a dry caramel (without adding water).

Gradually, the sugar turns into syrup...

...and then into caramel. Stir the caramel carefully with the spatula until all the sugar has dissolved, as it may form lumps. Be careful not to make the caramel too dark, as this would bring bitterness to the mixture.

Once the caramel is ready, pour in the sweetened cream prepared earlier, being careful not to burn yourself — splashes can occur due to thermal shock.

Stir continuously with the spatula until the caramel is completely dissolved into the cream.

Place the Caramélia milk chocolate and the Mycryo cocoa butter into a pouring jug.

Pour the caramel sauce you just made into the jug...

...and blend using the hand blender until smooth.

Add the butter...

...and blend again...

...until the mixture is smooth and homogeneous.

Finally, add the fleur de sel...

...and mix with the maryse spatula. You'll notice the caramel has a rather firm consistency — this is completely normal.

Transfer the salted butter caramel into a piping bag. A nozzle will not be needed here. The ideal working temperature for this caramel is 30°C. Set aside.

Take the Advent calendar mould...

...and turn it over. The red chocolate has now crystallised.

Cut the tip of the piping bag to make a very small opening so you can control the flow. Pipe 60g of salted butter caramel into the mould cavities, without going above the edges.

Once all the cavities are filled, leave to crystallise at room temperature while you prepare the praline filling.

Praline filling: Prepare all the ingredients.

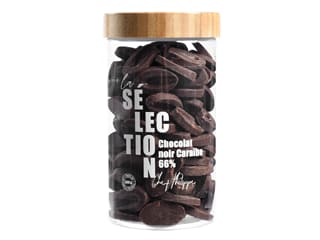
Place the Caramélia milk chocolate and the dark chocolate into a mixing bowl, and melt them in the microwave in 20 to 30-second intervals...

...stirring between each melting stage to prevent burning. The melted chocolate should not exceed 45°C.

Add the Mycryo cocoa butter...

...and mix carefully with the spatula to dissolve it into the melted chocolate.

Then add the peanut praline...

...and mix again until smooth and homogeneous.

Using a knife, finely chop the unsalted peanuts on a cutting board.

The peanuts must be very finely chopped into tiny pieces.

Add the finely chopped peanuts to the melted chocolate and praline mixture...

...and mix with the spatula.

Finally, add the feuilletine flakes...

...and mix until the preparation is homogeneous.

Transfer the praline filling into a piping bag (no nozzle). Cut the tip of the bag to make a larger opening than before (about 1 cm or slightly more) to allow the mixture to flow easily. Use your left hand to help guide it out.

Pipe 60g of praline filling into the Advent calendar mould, directly on top of the salted butter caramel...

...and smooth the surface with a mini angled spatula...

...to an even thickness. Leave a 1 to 2 mm gap to allow for the final chocolate sealing layer.

Pour the tempered red chocolate that was kept at temperature in the oven (step 47) into a piping bag (without nozzle).

Cut the tip of the piping bag and pipe the tempered chocolate into the mould, directly over the praline filling, to seal the bar.

Tap the mould on the work surface to release air bubbles and smooth the chocolate surface.

Run the chocolate spatula over the mould to level and remove any excess chocolate.

Let the chocolate crystallise at room temperature in a cool room (18-19°C), for as long as needed.

Once the red chocolate has crystallised, you can proceed to unmould the chocolate tablet.

Turn the mould upside down over a sheet of parchment paper, holding the chocolate tablet gently with your fingertips to prevent it from falling and breaking.

If unmoulding is difficult and the tablet sticks to the mould, place it in the fridge for up to 15 minutes (or in the freezer for up to 10 minutes). The chocolate will contract slightly, making it easier to release.

The chocolate tablet is now done.

Finish: Decorate your chocolate tablet using a gold double-tip food pen, delicately colouring all the numbers and motifs of the Advent calendar. If the tempering has been done correctly, the chocolate bar will have a perfectly shiny finish with a pearlescent surface that gives the illusion of metallic paint. Enjoy!

Shine: The layer of gold-flecked cocoa butter adds a lot of shine to the chocolate bar and allows the gold glitter to be revealed through a transparency effect. It is possible to omit it by performing a perfect tempering of the white chocolate tinted red, but the shine will still be lower. As for the gold glitter, if you skip the cocoa butter layer and add it directly into the red chocolate, it risks being absorbed into the chocolate mass and not being visible when unmoulded.
Crystallization: For better crystallization of the chocolate, I let it set quietly in a cool room (around 18°C). I avoid putting it in the fridge for a long time, as this will only bring humidity and therefore damage it (except in the case below for unmoulding).
Unmoulding: If your chocolate bar is difficult to unmould, the problem likely comes from improper tempering. The temperature curves were not followed precisely. To try to salvage the work and still allow unmoulding, I place my mould in the fridge for a maximum of 10 minutes (no longer). As soon as it comes out of the fridge, I attempt unmoulding by carefully turning the mould over onto a sheet of parchment paper while holding the bar in place with my fingers to prevent it from falling and breaking. If it still resists, I gently twist the rigid mould with both hands to help release the chocolate casting.
Please login to post a review