


Cookies 🍪
By clicking "Accept", you authorize Meilleur du Chef to store cookies on your device to personalize site content, analyze our traffic, and provide social media functionality.
Favourites


In one click, store and find all your favourite recipes.
Add this recipe >
To make this Pear, Chocolate & Pecan Yule Log recipe, start by preparing all the ingredients for the pecan streusel.

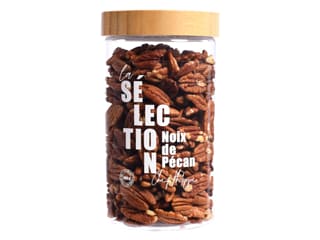
Pecan streusel: Place the pecan nuts on a baking sheet and bake them in a fan-assisted oven preheated to 160°C to toast them for 15 minutes.
Since you'll need more pecans for other preparations, you can toast them all at once, keeping them in three distinct piles to avoid mixing them.

Once the pecans are toasted, remove them from the oven. Take the portion for the pecan streusel if you toasted all the pecans together...

...and transfer them into the bowl of a food processor.

Blend finely...

...until you obtain a powder.

Add the caster sugar...

...and blend again.

Add the fleur de sel...

...the softened butter...

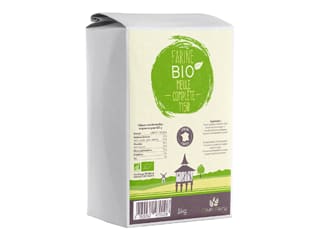
...the flour...

...and the egg whites.

Blend all these ingredients together...

...until the dough becomes smooth and homogeneous.

Spread the pecan streusel dough onto a baking sheet lined with parchment paper...

...and cover it with another sheet of parchment paper.

Flatten the dough with the palm of your hand...

...as shown in the photo.

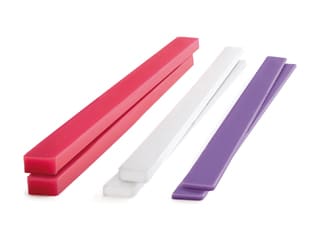
Roll out the pecan streusel dough with a rolling pin to a uniform thickness of 3mm. You can use two leveling guides to help achieve even thickness.

Roll the dough in one direction and then the other...

...to obtain an even thickness for uniform baking.

Bake in a fan-assisted oven preheated to 150°C for about 20 minutes (depending on your oven).

Once baked...

...remove the pecan streusel from the oven and place the tray on the work surface.

Immediately remove the top sheet of parchment paper so the streusel can cool properly in open air.

You can also slide the biscuit and its parchment paper onto a wire rack to cool faster.

Let the pecan streusel cool completely at room temperature.

Pressed pecan streusel: Prepare all the ingredients. Once the pecan streusel has cooled, cut it into pieces and weigh the required amount.

Place the pecan nuts on a baking sheet and bake them in a fan-assisted oven preheated to 160°C to toast for 15 minutes, unless you already did so in step 2.

Once toasted, remove the pecans from the oven.

Place the dark chocolate in a mixing bowl and melt it in the microwave in 20 to 30-second intervals, stirring every time to prevent burning.

Meanwhile, chop the toasted pecans with a knife.

The pecans should be evenly chopped—not too fine, not too coarse.

Add the pecan praline to the melted dark chocolate...

...and mix well.

Add the fleur de sel...

...the pailleté feuilletine (crushed crêpes dentelles)...

...the chopped pecans...

...and the previously ground pecan streusel.

Mix everything together using a spatula (maryse)...

...until the mixture is smooth and homogeneous.

You should get this result.

Transfer the pressed pecan streusel mixture onto a sheet of parchment paper...

...and cover it with another sheet of parchment paper.

Roll out lengthwise with a rolling pin to an even thickness of 5mm. Place it in the fridge to firm up.

Light pecan biscuit: Toast the pecan nuts in a fan-assisted oven preheated to 160°C for 15 minutes (unless already done in step 2). Then place the toasted pecans in the bowl of a food processor...

...and blend finely...

...until you obtain a smooth, even powder, like in the photo.

Place the egg white and fine salt in the bowl of a stand mixer.

Add the first amount of caster sugar right from the start and whisk the egg white until stiff peaks form.

Transfer the ground pecan powder into a mixing bowl.

Add the flour...

...and the second quantity of caster sugar...

...and mix the dry ingredients with a spatula (maryse).

Add the whole eggs. (Don't be misled by the quantity shown in the photo—it was taken while making several Yule logs that day.)

Mix until the preparation is smooth and homogeneous.

When the egg whites are fully whipped and stiffened...

...add them to the previous mixture...

...and gently fold with a maryse spatula...

...until smooth and uniform.

The pecan light biscuit batter is now done.

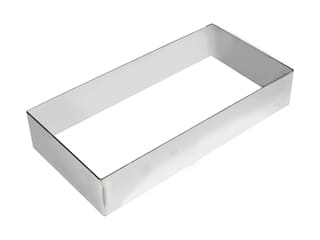
Place a stainless steel rectangle 20 x 10 x 4.5 cm on a baking sheet lined with parchment paper and grease it with a release spray.

Pour the pecan light biscuit batter into the mould, filling it up to 3/4 full...

...as shown in the photo.

Bake in a fan-assisted oven preheated to 150°C for about 15 minutes (baking time may vary depending on the oven).

Once baked, remove the pecan light biscuit from the oven...

...and let it cool at room temperature. It will shrink slightly as it cools since it's an extremely airy biscuit.

Pecan praline: Prepare the ingredients.

Melt the Mycryo cocoa butter in the microwave in 20 to 30-second intervals, stirring every time.

Pour the melted Mycryo cocoa butter into the pecan praline...

...and mix thoroughly...

...until smooth and homogeneous. Set aside.

Pear compote: Prepare all the ingredients. Combine the powdered gelatine with the hydration water (tap or mineral) and let it bloom for 15 minutes.

Peel the pears...

...and slice them evenly into 3mm thick slices using a mandoline.

Start by slicing the two larger sides of the pear parallel to the core, then the two narrower sides, to get as much flesh as possible.

Stack the pear slices 3 or 4 at a time to cut them into sticks...

...and dice these sticks evenly to obtain a pear brunoise.

Pour the pear purée into a saucepan.

Add the diced pears immediately after weighing them.

Also add the glucose syrup, warmed in the microwave to soften and make it more workable.

Combine all these ingredients and heat them together.

Pour 90% of the caster sugar into the saucepan.

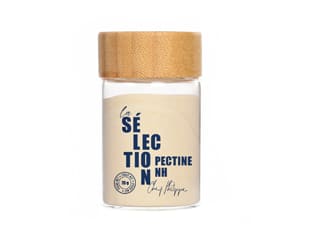
The remaining 10% of sugar will be mixed with the pectin NH coating...

...to prevent the formation of lumps.

When the pear preparation reaches between 40 and 45°C...

...add the pectin mixed with sugar, whisking constantly to avoid lumps.

Bring everything to a boil...

...without stopping whisking.

Once boiling, maintain the boil for at least 1 minute to activate the pectin's properties (continue whisking throughout).

At the end of the cooking process, remove the saucepan from the heat, add the hydrated gelatin...

...and stir vigorously with a spatula until fully incorporated. Set this pear compote aside.

Our light pecan sponge is now completely cooled. Since it is very spongy, it has shrunk slightly, which is perfectly normal.

Remove the stainless-steel frame and trim the sponge on the ends...

...and along the sides.

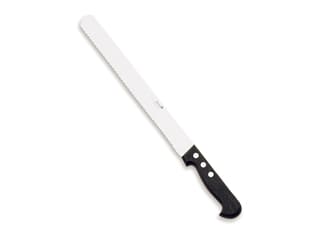
Then cut a strip of light pecan sponge to a width of 6cm (if using the winter cottage silicone yule log mould). If using another mould, adjust the size of the sponge accordingly. Cut the sponge using a sponge cake knife, which will allow you to cut it cleanly without compressing it as a smooth blade would.

Trim the sponge on the top...

...and on the bottom.

Finally, divide the light pecan sponge in half to obtain two strips of sponge 1cm thick.

Align the two strips end to end and cut a sponge base measuring 22cm long by 6cm wide, formed of two pieces.

Take the insert silicone mould and fill it with the pear compote.

Prepare the soaking syrup by mixing the cane sugar syrup with the Williams pear brandy. Using a pastry brush, soak the light pecan sponge base with this syrup.

Place the first strip of sponge in the silicone mould, directly in contact with the pear compote. The sponge should come flush with the edge of the mould.

Place the second strip to fill the remaining space.

Cover everything with a sheet of plastic film and place in the freezer.

Remove the pressed pecan streusel from the fridge and take off the top sheet of parchment paper.

Measure your mould. Here, the cottage mould is 21cm long...

...and 10cm wide.

Start by trimming one side along the length of the pressed pecan streusel using a knife and a ruler.

From this cut, measure 10cm in width...

...then cut the biscuit.

Trim one end at a right angle.

Cut out a rectangle of biscuit 21cm long.

We now have our rectangle of pressed pecan streusel measuring 21 x 10cm.

Pour 65g of pecan praline over the streusel...

...and spread it in a thin, even layer using a mini offset spatula and a scraper, which acts as a stop to prevent the praline from running off the tray.

Smooth the praline evenly over the entire surface of the streusel.

It should look like this. Place in the fridge.

Chocolate whipped cream: Prepare the ingredients.

Pour the small quantity of whipping cream into a saucepan and heat it.

Meanwhile, partially melt the dark chocolate in the microwave, heating for 20 to 30 seconds at a time and stirring every time.

When the cream comes to a boil, pour it over the partially melted chocolate while stirring with a spatula...

...to form an emulsion. The chocolate will continue melting from the heat of the boiling cream.

You may whisk briefly to obtain a smooth, homogeneous chocolate mixture.

Pour the larger quantity of whipping cream into the bowl of a mixer and whip it with the whisk attachment...

...until you get a soft whipped cream. The fact that it's soft is not a problem; it will just be easier to mould.

Add one spatula of whipped cream to the chocolate mixture, which should not exceed 40°C...

...and whisk vigorously. This first addition will loosen the chocolate mixture and lower its temperature.

Do not wait before folding in the remaining whipped cream (to avoid premature crystallisation of the chocolate) and gently combine with a spatula...

...until the chocolate whipped cream is smooth and homogeneous. Optionally, give it a final quick whisk to perfect the texture.

Transfer the chocolate whipped cream to a piping bag. A nozzle will not be needed. Set aside.

Assembly: Remove the insert from the freezer and peel off the plastic film.

Turn it over and peel back the silicone mould to release the insert onto a board. It must be frozen solid for a clean unmoulding.

Measure the length of your mould. The cottage mould is 21cm long, as noted earlier.

Cut the insert slightly shorter than the mould, about 19cm long, leaving a gap of 1cm on each side...

...like this. Warm your knife blade with a kitchen torch if necessary.

Pipe the chocolate whipped cream into the mould...

...and press it well against the sides using the mini offset spatula so it fills every ridge and detail of the mould.

Place the insert in the silicone mould, rounded side down, directly against the chocolate whipped cream (flat side facing up).

Press the insert gently into the whipped cream with your fingertips, making sure it is well centred and straight. The excess whipped cream will rise up the sides.

Cover the insert with the chocolate whipped cream that has risen...

...and smooth the surface.

Remove the pressed pecan streusel base from the fridge and place it in the mould, pecan praline side down, directly in contact with the chocolate whipped cream, and the streusel side facing up.

Adjust the base so it fits perfectly into the mould.

Coat the surface of the streusel with melted dark chocolate, applied with a pastry brush in a thin layer.

This is what the result should look like. Allow the chocolate layer to crystallise in the fridge for 5 minutes...

...before covering everything with plastic film in contact, and place in the freezer. The yule log can be prepared up to this stage several days or even weeks in advance.

Finish: On the day, remove the yule log mould from the freezer and peel off the plastic film.

Immediately after removing it from the freezer (do not wait), gently release the sides of the mould.

Then turn the mould over onto a baking tray and peel it back to release the yule log. It must be completely frozen for optimal results.

Place the yule log on a tray lined with plastic film and set it on a turntable to make spraying easier.

Shake the caramel velvet spray until the ball inside rattles (a sign it's well mixed and ready to use), then spray it onto the dessert from a distance of 30/40cm...

...while rotating the tray so all sides are evenly coated. Be careful — the layer of spray should be thin, as too thick a coat will look rough and may crack as it thaws.

Here is our pear, chocolate, and pecan yule log completely finished. All that's left is to transfer it onto its serving platter using two offset spatulas. Allow 4 to 5 hours of defrosting in the fridge before serving. Optionally, finish the decoration with a light dusting of Codineige icing sugar over the surface to imitate snow. Enjoy!
Please login to post a review