You can always send us your messages, comments or suggestions.
In one click, store and find all your favourite recipes.
Add this recipe >Before starting this Birthday Cake recipe, you will need to make the génoise sponge cake using a 40 x 30cm baking sheet.
Combine the eggs and sugar in a mixing bowl or in the stand mixer recipient.
Using a hand whisk, whip over a bain-marie. The temperature should reach roughly 40°C.
Finish beating with an electric mixer until cooled down completely. If you do not have a food mixer, you can finish beating manually. The preparation is ready when doubled in volume.
Using a rubber spatula, gently incorporate the sifted flour in circular motions.
Pour the preparation on a baking sheet (40 x 30cm), slightly greased with cooking spray. Spread the preparation...
... and bake at 180°C (gas 4) for 10-15 minutes.
When cooked, remove from the oven and leave to cool. This sponge cake rectangle will be divided in 2 when assembling the cake.
For the chocolate mousse: Organise all the necessary ingredients.
In a saucepan, pour the sugar and a little water (5 or 10 cl). Bring to a boil.
In the meantime, crack the whole eggs in the stand mixer recipient.
When the boiling intensity starts reducing, check the temperature with a laser thermometer. When the temperature is 121°C, take the saucepan away from the heat.
Beat the whole eggs in the stand mixer, then reduce the speed and gradually add the boiling sugar.
Increase to maximum speed and continue beating until cooled down completely.
Melt the dark chocolate in the microwave. Melt over medium heat and stir every 20 seconds for the chocolate not to burn.
Add the melted dark chocolate to the preparation...
... and combine until completely incorporated.
Beat the cold whipping cream to obtain a whipped cream.
Add the whipped cream to the chocolate preparation. Combine gently.
Using a stackable frame set (household dimensions), place a rectangle of sponge cake at the bottom, cut to the dimensions of the frame. Use the frame with the black corners at the bottom (2cm high), then place the one with the yellow corners on top (1cm high).
If you wish, you can steep the sponge cake with a preparation made of cane sugar syrup and dark rum. Spread the chocolate preparation on top of the biscuit.
Reserve in the fridge to set.
For the crunchy praline: Organise all the necessary ingredients.
Work the almond and hazelnut praline with a spatula to soften it, then pour over the melted chocolate.
Gently combine with a spatula.
Add the pailleté feuilletine flakes. Combine well.
Spread the crunchy praline on top of the chocolate mousse, into a regular layer.
Even the surface with the back of a spoon.
Place the second sponge cake rectangle (this one should be slightly smaller than the frame).
Steep the génoise sponge with the remaining rum preparation (optional). Place another frame with black corners on top. Reserve in the fridge.
For the raspberry bavarian cream: Organise all the necessary ingredients.
Soak the gelatine sheets in cold water to soften them.
In the meantime, heat the raspberry coulis with the sugar, until warm.
Drain the gelatine to extract as much water as possible...
... and add to the warm coulis.
Combine gently until the gelatine is fully incorporated to the coulis.
Transfer the coulis into a separate recipient and leave to cool at room temperature, stirring frequently.
When the coulis has a temperature of 25°C...
...add 1/4 of the whipped cream...
...and whisk vigorously.
Add the remaining whipped cream and combine well with a rubber spatula, making circular motions.
Pour the raspberry preparation on top of the génoise sponge.
The quantities provided in this recipe will fill up the frames to the rim.
Even the surface with a cranked spatula...
... and place in the freezer.
For the red glaze: (make the day before) Organise all the necessary ingredients.
Hydrate the gelatine with 36 grams of water.
Pour the water and sugar in a saucepan.
Add the glucose syrup. (It can be melted in the microwave for a few seconds to give it a liquid consistency that will be easier to work.)
Heat the preparation until the temperature reaches 103°C. Basically, the temperature is right when you reach a gentle boil.
Pour the sweetened condensed milk and while chocolate pistoles in a separate recipient.
When the syrup is at 103°C...
... pour over the condensed milk and white chocolate...
... and combine with a whisk.
Add the gelatine last. It will melt quickly in the warm glaze.
Add some red colouring powder with the tip of a knife...
... and combine well with a whisk. Colouring powders are very effective. I recommend working with very small quantities, then adjust the colour by adding more powder if needed. Refrigerate overnight.
The next day, take the cake out of the freezer.
Gently remove the frames. Use a warm blade and slide between the cake and frame...
...then gently lift each frame one by one. Gently remove the cake from the stainless steel base tray and transfer onto a cake board. Return the cake to the freezer.
The following day, process the red glaze, using a hand blender (such as Bamix). You should use a deep, narrow recipient. This will allow to remove any air bubbles and obtain a smooth consistency.
Place the cake on a cooling rack. The grid should be placed on a deep baking tray in order to collect the glaze excess.
Pour the glaze on the surface of the glaze, starting from the centre outwards.
The sides should be coated with an even layer of glaze.
Let the excess drip. You may use a palette knife to even the surface. Make sure this operation is very gentle, as you don't want to go through the glaze.
Place in the fridge for the glaze to set and for the cake to defrost slowly.
For the chocolate fence decoration: Melt the chocolate in the microwave. Melt over medium heat and stir every 20 seconds for the chocolate not to burn.
When the chocolate reaches 40°C (do not exceed this temperature)...
...stir with a spatula until all the pistoles are completely melted.
Let the chocolate cool down to 35°C, stirring frequently.
Add 1% of Mycryo cocoa butter. For 200 grams of dark chocolate couverture, you will need 2 grams of Mycryo cocoa butter.
Combine until completely incorporated.
Let the chocolate cool down to 29°C, stirring regularly.
The chocolate is now tempered and ready to use. It is essential to maintain the chocolate at a temperature of 29°C.
Transfer the chocolate into a piping bag (the use of a nozzle is not necessary). Cut the end of the piping bag and pipe thin lines of chocolate in a criss-cross pattern on a sheet of greaseproof paper. Create 4 strips, to the same dimensions as the sides of the cake.
Let set at room temperature. It should take a few minutes only.
Flip the greaseproof paper onto your workbench and remove the chocolate gently. The chocolate strips should come off easily.
If the tempering process was done properly, the chocolate should be glossy and easy to release from the paper.
Trim the ends with a knife to create a straight base.
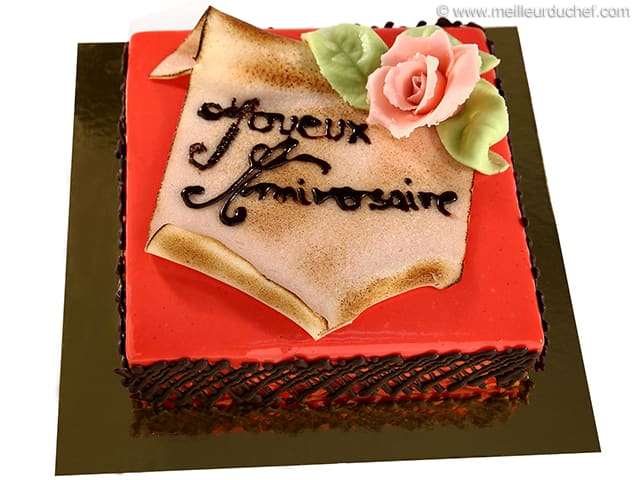
Gently stick the four chocolate fences on the four sides of the cake.
Use a spatula for this operation.
I recommend using pastry gloves to prevent the chocolate from melting when in contact with fingers.
Make sure the base of each strip is even and straight, and that the corners are perfectly jointed.
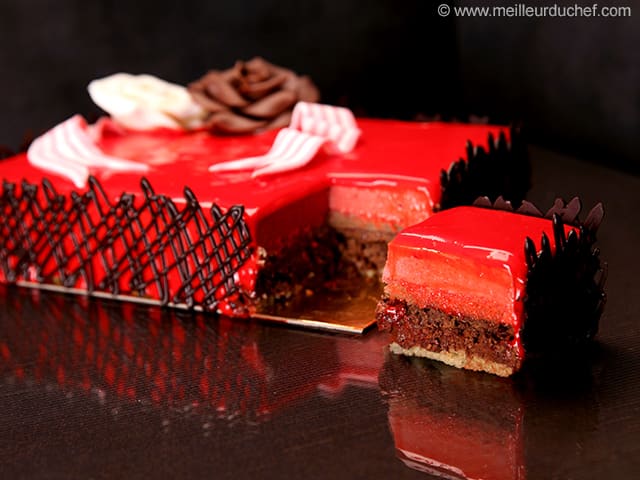
To finish decorating the cake, add a few shapes made from sugarpaste icing (I made striped ribbons here)...
... and a few roses made from chocolate modelling paste.
Please login to post a review