


Cookies 🍪
By clicking "Accept", you authorize Meilleur du Chef to store cookies on your device to personalize site content, analyze our traffic, and provide social media functionality.
Favourites


In one click, store and find all your favourite recipes.
Add this recipe >
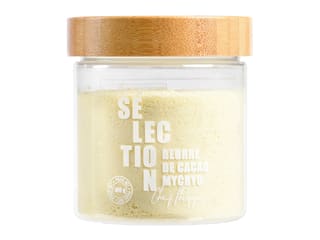
To make this Christmas Tree Entremets with Redcurrant, Blackcurrant & Vanilla, begin by preparing the ingredients for moulding the tree. We will start by tempering the chocolate using Mycryo cocoa butter.

Chocolate shell: Place the white chocolate in a pastry bowl and melt it in the microwave in 20 to 30 second intervals, stirring every time to prevent burning.

Gradually, the chocolate begins to melt.

Check the temperature of the white chocolate continuously to make sure it does not exceed 45°C (+/- 1°C).

Once it reaches 45°C, stir the melted white chocolate to lower its temperature to 35°C.

Little by little, the temperature decreases. To speed up the cooling process, it is possible to change containers, pouring the chocolate from one bowl to another to help reduce the temperature. It is important to keep the chocolate continuously in motion until it reaches 35°C.

Continue mixing, bringing the chocolate up the sides of the bowl and back into the centre.

Progressively the temperature drops. Here the white chocolate reads 36.8°C. It is important to strictly respect the indicated temperatures. For this, using a laser infrared thermometer is recommended (the most practical and fastest tool to measure the temperature of melted chocolate).

Continue mixing the white chocolate with a maryse spatula.

Once the melted white chocolate reaches 35°C, sprinkle the Mycryo cocoa butter over the surface. The weight of Mycryo corresponds to 1% of the weight of chocolate.

Mix everything with the spatula until the Mycryo cocoa butter is fully melted. At 35°C it will melt and blend perfectly with the chocolate, ensuring ideal tempering and optimal crystallization later.

Now the melted white chocolate reads 31.4°C.

Keep mixing the chocolate until it reaches 29/30°C, which is the ideal working temperature for tempered white chocolate.

When it is almost at 29/30°C...

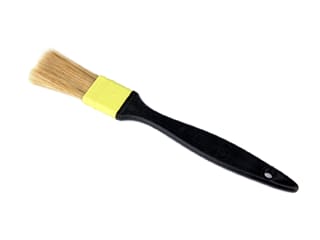
...dip a pastry brush into the tempered white chocolate...

...and apply a thin layer into the first cavity of the Christmas tree chocolate mould.
(Due to the possible permanent discontinuation of this mould, I recommend replacing it with this Christmas tree chocolate mould.)

This first layer of chocolate ensures a perfect finish without any air bubbles. To achieve this, carefully apply the chocolate with the pastry brush, reaching into all corners and raised areas of the mould.

Do the same with the second cavity of the Christmas tree mould. Leave to crystallize at room temperature, preferably in a cool room (18/19°C). Keep the remaining tempered white chocolate in an oven preheated to 30°C to prevent crystallization, saving you from having to temper it again.

Madeleine biscuit: Prepare all the ingredients.

Weigh the honey directly into the pastry bowl. Then split the vanilla bean in half and scrape out the seeds with the tip of a knife.

Add the vanilla seeds to the bowl.

Zest a yellow lemon using a Microplane Classic zester-grater...

...and only add the yellow part of the lemon zest into the pastry bowl.

Add the whole eggs...

...as well as the caster sugar...

...and blanch this mixture using a whisk.

You will obtain a smooth mixture.

Add the flour...

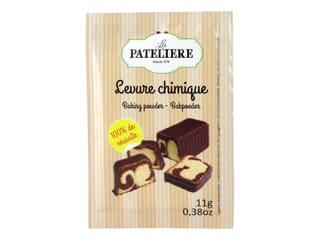
...and the baking powder.

Whisk vigorously...

...until the mixture is smooth and homogeneous, with no lumps.

Pour the egg whites into the bowl of the stand mixer...

...add a pinch of fine salt...

...and whip the egg whites using the whisk attachment.

You should obtain stiff egg whites.

Add these egg whites to the previous preparation...

...and gently fold them in using a maryse spatula...

...until you reach a semi-homogeneous batter. The egg whites should only be partially incorporated.

At this stage, add the melted and cooled butter...

...and finish mixing to incorporate both the melted butter and the egg whites that were not completely blended into the mixture.

You now have a smooth and homogeneous madeleine biscuit batter.

Place a silicone baking mat on a perforated baking tray, and grease it with a release spray (for optimal unmoulding). If you are using parchment paper instead of the mat, it must also be greased.

Spread the madeleine biscuit batter onto the baking mat...

...and smooth it out using an offset metal spatula, making sure to reach the edges of the tray, which serve as guides to achieve a consistent thickness.

This is what the result should look like.

Bake the tray in a fan-assisted oven, preheated to 180°C, for 10 minutes. Baking time may vary depending on the oven.

Once baking is complete, remove the madeleine biscuit from the oven...

...and let it cool at room temperature. The release operation should be done once completely cooled.

Redcurrant mousse: Start by mixing the powdered gelatine with the hydration water (tap water or mineral water) and let it hydrate for 15 minutes. Then remove all the fresh redcurrants from their stems...

...and place them in the bowl of a blender.

Finely blend the redcurrants...

...to obtain a purée (pulp).

This purée contains seeds and skin, so it is important to pass it through a sieve to filter and collect only the fruit pulp.

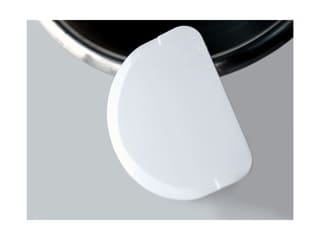
I used a dough scraper to help the pulp pass through the sieve, which should still have large holes, otherwise you will struggle to obtain the 135 grams of purée. If you have a juicer, you can use it.

Once all the fruit has passed through the sieve, scrape the underside to collect the pulp that remains stuck.

Inside the sieve, we have all the seeds and skin of the redcurrants, which we will not keep. Note: One 125 g punnet of fresh redcurrants yields approximately 80 g of pulp.

Prepare all the ingredients for the redcurrant mousse, weighing the redcurrant purée directly into a saucepan.

Add the caster sugar to the redcurrant purée and start heating while whisking.

Bring to a simmer.

When simmering, remove the saucepan from the heat, add the gelatine previously hydrated and melted.

Mix vigorously with a whisk to fully incorporate the gelatine into the preparation. Set aside at room temperature.

Chocolate shell (continued): Take the Christmas tree mould containing the thin layer of crystallised white chocolate, and level the surface with a metal spatula for a neat finish.

Take out the tempered white chocolate that has been kept in the warm oven at the right temperature and pour it into the cavities of the mould. Before pouring it into the mould, carefully mix the chocolate to ensure an even temperature.

Tilt the mould in all directions to bring the chocolate up to the edges, so that it coats the entire inside of the cavities.

Turn the mould over the mixing bowl to remove the excess white chocolate.

Tap the mould with the handle of a chocolate spatula over a sheet of parchment paper...

...so that all the excess tempered chocolate drips off, allowing you to obtain a very thin shell (as thin as possible).

Run the chocolate spatula across the surface of the mould to level the edges.

Then turn the mould over and place it flat (and upside down) on a sheet of parchment paper. Leave to crystallise at room temperature, ideally in a cool room (18/19°C).

Blackcurrant confit: Prepare the ingredients.

Pour the blackcurrant purée into a saucepan and add 90% of the caster sugar. Heat over medium heat.

Mix the remaining 10% of caster sugar with the pectin NH coating, to prevent lumps.

Whisk the blackcurrant purée so that the sugar melts as the purée heats.

When the blackcurrant purée reaches about 50°C, add the pectin mixed with sugar, whisking to prevent lumps.

Bring this preparation to a boil, continuing to whisk...

...and maintain the boil for at least 1 minute, to activate the pectin and obtain jellification. This step is crucial.

After boiling for one minute, pour the blackcurrant preparation into a food container in a thin layer for optimal cooling.

Cover the blackcurrant confit directly on the surface with a piece of cling film...

...and refrigerate to set.

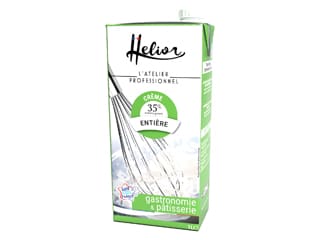
Redcurrant mousse (continued): Whip the very cold heavy cream into a soft whipped cream.

Transfer the jellified redcurrant purée into a mixing bowl...

...and add the whipped cream. The fruit purée must not exceed 30°C to avoid deflating the whipped cream.

Gently fold with a maryse spatula...

...until you obtain a smooth and homogeneous redcurrant mousse. Set aside.

Vanilla crémeux: Prepare the ingredients. Hydrate the powdered gelatine with the hydration water for 15 minutes.

Heat the whole milk in a saucepan.

Split a quarter of a vanilla bean in half and scrape the inside with the tip of a knife to extract the seeds.

Add the pod and seeds to the saucepan.

Bring the milk to a boil.

Meanwhile, melt the white chocolate in the microwave, in 20 to 30 second intervals, stirring every time.

Pour the boiling milk over the melted or partially melted white chocolate, stirring with a maryse spatula to form an emulsion. The heat of the milk will finish melting the chocolate.

Add the hydrated gelatine to the hot mixture...

...and mix thoroughly to fully incorporate it.

You may mix with a whisk to obtain a smooth and homogeneous preparation. Set aside.

Once the white chocolate shells have crystallised, gently twist the mould...

...so that the release is easy. If the tempering has been done correctly, the shells will unmould on their own. To facilitate unmoulding, you can place the mould in the fridge for up to 10 minutes, so the chocolate slightly contracts, and the release will be even easier.

We now have our white chocolate shells which are perfectly smooth and glossy.

Partially melt the flat side of one half of the mould on a baking tray previously heated either in an oven at 100°C for 10 minutes, or with a kitchen blowtorch.

Then align and join the two shells edge to edge and leave to crystallise at room temperature.

Slightly heat a mousse ring Ø 10cm using a kitchen blowtorch or in the oven at 100°C.

Place the chocolate tree on its side and open its base by gently positioning the warm ring over the bottom of the mould. If the ring is warm, the chocolate will melt easily...

...to create an opening.

Then remove the bottom part of the chocolate tree.

We now have a chocolate mould that can be filled with our different preparations. For better stability, I recommend reinforcing the seam from the inside using a little melted white chocolate, which should be applied to the joints with a pastry brush or by placing a bead of chocolate on the seam and slightly flattening it with your fingertip. Set aside.

Vanilla crémeux (continued): When the vanilla preparation has cooled down (room temperature)...

...add the heavy cream that you will have previously whipped into a soft whipped cream.

Then gently whisk...

...until obtaining a smooth and homogeneous crémeux. Set aside.

Blackcurrant confit (continued): Remove the food container from the fridge and discard the cling film. We can see that the blackcurrant confit has set. Transfer this preparation into a mixing bowl...

...and whisk vigorously to smooth it...

...and obtain a confit without any lumps.

Transfer this blackcurrant confit into a piping bag. Here, using a nozzle will not be necessary.

Also transfer the vanilla crémeux into a piping bag (without nozzle)...

...as well as the redcurrant mousse. Set these three piping bags aside on the work surface.

Raspberry crunch: Prepare all the ingredients.

Melt the white chocolate in the microwave, in 20 to 30 second intervals, stirring every time.

Add the previously melted butter...

...and mix with a maryse spatula.

Add the freeze-dried raspberries, which should be crushed between your fingers.

Also add the feuilletine flakes...

...and mix all these elements together until obtaining a homogeneous preparation. It is important that all the dry elements are coated with melted white chocolate.

Transfer this raspberry crunch onto a sheet of parchment paper...

...and cover it with a second sheet of parchment paper, flattening it with your fingertips.

Then roll it out with a rolling pin to obtain an even thickness of 2 to 3mm.

Remove the top sheet of parchment paper.

Cut out discs of raspberry crunch using a round plain cutter Ø 10cm. This must be done while the crunch is still soft. I recommend making 2 or 3 discs in case one breaks during use.

Refrigerate to crystallise.

Once the madeleine biscuit has cooled, detach it from the edges of the tray with the blade of a knife, following the slightly pinched border.

Cover the biscuit with a sheet of parchment paper and turn it over in one move onto the work surface, to release the biscuit.

Remove the silicone mat. Greasing it before baking allows for easy unmoulding.

Our madeleine biscuit is unmoulded.

Cut out discs of madeleine biscuit using a round plain Ø 10 cm cutter, a round plain cutter Ø 7cm and a round plain cutter Ø 3cm. This way, we have all sizes, from the top of the tree (the smallest disc) to the base of the tree (the largest disc).

Assembly: Place the white chocolate shell in a piping bag holder to work easily with free hands.

Pipe a base of vanilla crémeux into the tip of the tree. It is perfectly normal for the crémeux to be very liquid due to the cream not being whipped. But it will set and hold properly after cooling.

Place the smallest madeleine biscuit disc inside the chocolate shell...

...pressing it gently into the surface of the vanilla crémeux.

Pipe the redcurrant mousse over the madeleine biscuit. Lightly tap the piping bag holder on the work surface to smooth the surface of the mousse.

Pipe the blackcurrant confit over the redcurrant mousse. Each layer should be 1 to 1.5cm thick.

This is what the result should look like.

Pipe another layer of vanilla crémeux.

Take a Ø 7cm madeleine biscuit disc...

...and place it over the vanilla crémeux.

Pipe the redcurrant mousse over the madeleine biscuit...

...then the blackcurrant confit...

...to obtain this.

Take a Ø 10cm madeleine biscuit disc...

...and place it over the blackcurrant confit, pressing it down firmly. Be careful, if your chocolate shell is not strong enough, you may have a separation at this stage of the recipe. That is why I mentioned in step 104 to reinforce the tree joint from the inside with melted white chocolate.

Take the raspberry crunch discs out of the fridge and separate them.

Finish filling the chocolate shell with vanilla crémeux, piping it almost to the edges of the mould. Smooth the surface by gently tapping the holder on the work surface.

There should remain an empty space of 1 to 2mm for the raspberry crunch.

Take a raspberry crunch disc...

...and place it on top of the vanilla crémeux. Smooth all around the edges and refrigerate for at least 2 to 3 hours.

Finish: When the preparations are set, remove the tree from the holder...

...and turn it over onto a baking tray.

We can really see through the surface the different layers composing the entremets. The Christmas tree must be very cold for the coating operation. Place it in the freezer for 20 minutes to make sure the velvet coating adheres properly to the chocolate surface.

Remove the entremets from the freezer and, without waiting, place it on a baking tray covered with cling film. Place everything on a turntable to make the coating process easier. Shake the white velvet spray before use, until the ball inside the aerosol rattles (a sign that the colouring is homogeneous and ready to be used), and spray it onto the entremets from a distance of 30/40 cm.

While spraying, rotate the turntable at the same time so that all sides of the entremets are covered with the colouring, obtaining a fine and even coating.

Red stars: Place a silicone stencil 60 stars on a polyethylene sheet or acetate sheet.

We are going to colour our white chocolate with the Power Flowers food colour system. I selected colour red 5A, which requires 3 red Power Flowers and 1/4 yellow Power Flower, as indicated by the mobile application. These quantities correspond to a total mass of 150 g of chocolate. Do not rely on the quantities shown in photo 162; that day I made several entremets.

Melt the white chocolate in the microwave, in 20 to 30 second intervals, stirring every time.

The melted white chocolate must not exceed 45°C, just as previously done with the cocoa butter.

Once this temperature is reached, add the red and yellow Power Flowers, which will colour your mixture. The advantage of these food colours is to get consistent results every time. For pastry or chocolate professionals who want identical entremets or chocolates all year long, this colouring technique ensures a consistent and high-quality result.

Mix thoroughly with the maryse spatula. The Power Flowers will gradually melt to colour the mixture...

...which will then start to cool down.

Continue mixing until the coloured chocolate reaches 35°C.

The preparation is at 38.8°C, so mixing must be continued...

...making sure to bring the chocolate up the sides of the bowl, then gather it back with the silicone part of the maryse spatula.

When the coloured chocolate reaches 35°C...

...sprinkle the Mycryo cocoa butter over the preparation, which will allow us to perform an easy and quick tempering.

Mix vigorously to fully incorporate the Mycryo cocoa butter into the mass. It will melt just like the Power Flowers.

The temperature of the coloured chocolate continues to drop.

Mix, always bringing the preparation up the sides of the bowl, until it reaches 29°C.

When the red chocolate reaches 29°C, transfer it into a piping bag (without nozzle).

Close the piping bag at the top by making a knot and cut the tip with scissors to obtain a narrow opening to control the flow. Then pipe a large drop of tempered red chocolate into each star cavity of the stencil. This operation must be done quickly to prevent the first ones from setting before reaching the last star.

Smooth the surface of the stencil by spreading the chocolate using an angled metal spatula...

...scraping the silicone surface in one direction, then the other...

...to ensure that all cavities are well filled.

Once all the star cavities are filled...

...cover everything with a sheet of parchment paper...

...and a cutting board (or baking tray) heavy enough to prevent the chocolate from warping during crystallisation, so the stars will remain perfectly flat. Let crystallise at room temperature, ideally in a cool room (18/19°C).

When the chocolate is set, remove the board and the parchment paper.

Then turn over the stencil, remove the polyethylene sheet...

...and gently release the stars.

We now have our red stars, glossy and shiny—a sign that the chocolate was properly tempered. Set aside.

Finish (continued): Melt a little white chocolate (30 to 40 g) in the microwave without exceeding 45°C and transfer it into a decorating cone.

Pipe a drop of melted white chocolate onto the tree...

...and place a red star on top. The white chocolate serves as glue here.

Pipe a second drop of melted white chocolate...

...to affix another red chocolate star.

Continue this process...

...all around the entremets...

...going all the way up to the top of the tree...

...like this.

Here is our Christmas tree entremets with red stars, redcurrants, blackcurrants & vanilla, fully decorated and ready to be enjoyed. This entremets must be stored in the fridge until ready to serve. Enjoy!

The Christmas tree mould featured in this recipe is unfortunately permanently discontinued. I recommend replacing it with this Christmas tree mould chocolate with a slightly different shape, which will allow you to make a very pretty Christmas tree to give as a gift, using exactly the same method.
Please login to post a review