


Cookies 🍪
By clicking "Accept", you authorize Meilleur du Chef to store cookies on your device to personalize site content, analyze our traffic, and provide social media functionality.
Favourites


In one click, store and find all your favourite recipes.
Add this recipe >
Candied lemon: To make this lemon & strawberry mini entremets recipe, start by preparing the candied lemon. To do this, fill a saucepan with water...

Squeeze the juice from the lemons (set it aside) and weigh out 120g of peel.

Add the lemon peels to the saucepan...

...bring to a boil and maintain the boil for 2 to 3 minutes.

Drain the lemon peels in a sieve over the sink.

Then repeat steps 1 to 5 three more times. This blanching process removes as much bitterness as possible from the lemon peels. Once blanched, let them cool slightly.

Strawberry/raspberry mousse: Mix the powdered gelatine with the hydration water (tap or mineral water) and let it hydrate for 15 minutes. Then pour the strawberry purée and raspberry purée into a saucepan.

Add the caster sugar while whisking.

Heat this mixture until it reaches about 55 to 60°C.

Take the hydrated gelatine and melt it in the microwave for a few seconds.

Pour the melted gelatine into the fruit purées (which should be no hotter than 60°C), and whisk vigorously.

Transfer the strawberry and raspberry mixture to a food container and let cool to room temperature.

Candied lemon (continued): Once the lemon peels have cooled, place them on a cutting board and cut into thin strips.

Place these strips into a saucepan and add the lemon juice.

Also add the caster sugar...

...and mix thoroughly with a spatula.

Bring to a boil, then reduce the heat so the cooking continues at a gentle simmer to avoid excessive evaporation. The lemon peels need to cook slowly at a low simmer for 40 to 45 minutes. Be sure to stir them regularly during cooking. If the reduction happens too quickly, lower the heat.

Strawberry/raspberry mousse (continued): Pour the whipping cream into the stand mixer bowl and beat it into whipped cream.

You should obtain a soft whipped cream.

Pour the cooled (room temperature) strawberry and raspberry mixture into a pastry bowl.

Add half of the whipped cream to the fruit mixture.

Quickly mix using a spatula or whisk.

Add the remaining whipped cream...

...and gently fold it in with a spatula until smooth and homogeneous.

Transfer the mousse into a piping bag. A nozzle is not necessary.

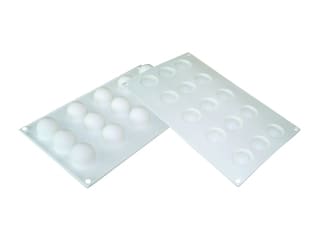
Pipe the mousse into the cavities of a mini truffle mould Ø 3.2 cm up to the top.

Tap the mould on the work surface to release any trapped air bubbles...

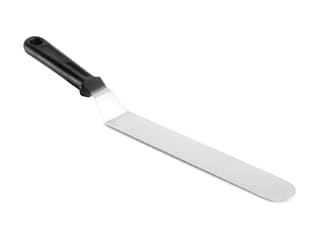
...and smooth the surface with an offset metal spatula.

Cover with cling film in contact with the mousse and place in the freezer.

The lemon peel continues cooking gently.

Shortbread biscuit: Place the butter and caster sugar in the mixer bowl.

Work the two ingredients with the paddle attachment. Here, the paddle has a silicone edge that scrapes the sides of the bowl.

When the butter and sugar are nearly combined, add the egg yolks and continue mixing.

Add the flour, baking powder, and fleur de sel.

Mix until a homogeneous dough forms.

Meanwhile, the candied lemon continues cooking. You'll notice the syrup becomes increasingly yellow. Be careful it doesn't turn into caramel.

Take the shortbread dough and press it through a spaetzle grater, to form even bits of dough like a crumble, which should fall directly onto a baking sheet lined with parchment paper...

Bake in a fan-assisted oven preheated to 170°C for 10 to 12 minutes, depending on your oven.

Once baked, remove the shortbread from the oven and let it cool at room temperature.

The lemon syrup thickens as it cooks. Use your senses—especially smell and sight—to judge when it's done.

Once the candied lemon is cooked, transfer it to a food container and let it cool to room temperature.

Lemon mousse: Start by hydrating the powdered gelatine with the hydration water for 15 minutes. Then pour the 60g of whipping cream into a saucepan...

...and bring to a boil.

Once the cream is hot, add the hydrated gelatine and mix vigorously to fully dissolve it in the cream.

Add the fresh lemon juice and mix thoroughly. Set aside.

Melt the white chocolate in the microwave in 20 to 30 second intervals, stirring every time to avoid burning.

When the chocolate is fully melted, or at least 90% melted...

...add the 25g of previously melted butter while stirring with a spatula.

Then add the warm cream with gelatine and lemon juice, and stir vigorously.

Add the zest of half a lemon. Mix and set aside.

Reconstituted biscuit: Crumble 100g of the shortbread with your fingers.

Melt the 100g of white chocolate in intervals of 20 to 30 seconds, stirring every time.

Add the crumbled shortbread...

...and mix vigorously with a spatula to further break the biscuit and coat it with white chocolate.

Add the crispy raspberry chunks...

...and continue mixing.

Spread the mixture onto a sheet of parchment paper...

...and flatten it with a spatula.

Cover it with another sheet of parchment paper...

...and roll it out evenly to a thickness of about 4mm using a rolling pin.

You should have a reconstituted biscuit layer that is even in thickness and texture. Chill in the fridge.

Candied lemon (continued): Once the confit lemon has cooled, it will become gelatinous and orange in colour. Transfer this mixture to a blender bowl...

...and blend thoroughly.

As you blend, the mixture will lighten in colour as air is incorporated and the lemon is chopped.

Transfer the mixture to a fine mesh sieve...

...and press using a dough scraper.

Collect the lemon peels that didn't pass through the sieve, place them on a cutting board...

...and finely chop them with a knife (as fine as possible).

Add the chopped lemon peels to the lemon confit...

...and quickly mix with a spatula.

Pour this preparation into a piping bag and set aside.

Remove the reconstituted biscuit from the fridge and peel off the baking paper. The biscuit will have set.

Take the cutter sold with the Daisy mould. We'll use the narrower round side.

Cut out small discs of reconstituted biscuit. You'll need 8 biscuit discs, but feel free to make a few extra in case some break.

This is what the result should look like.

Place the lemon confit on the reconstituted biscuit discs, as shown in the photo...

...and cover everything with a sheet of cling film.

Gently flatten the lemon confit with a spatula so the surface is even and does not exceed the diameter of the biscuit.

Lemon mousse (continued): Whip the cold heavy cream until it becomes whipped cream. It must be very cold to whip properly.

We should obtain a soft whipped cream.

Pour half of this whipped cream into the lemon mixture, which should be at room temperature...

...and mix quickly with a whisk.

Add the remaining whipped cream...

...and finish folding it in gently with a rubber spatula until smooth and homogeneous.

Transfer this mousse into a piping bag (no nozzle needed).

Take the inserts out of the freezer and remove the cling film.

Release the 8 inserts by peeling back the silicone mould. If you're not making the rest of the recipe on the same day, place them back in the freezer before they start to defrost.

Fill the cavities of the Daisy silicone mould with lemon mousse, filling each about 3/4 full.

Use a small offset spatula to bring the mousse up the sides.

Then pipe a generous dollop of lemon mousse into each cavity.

Take the strawberry/raspberry inserts and press them into the cavities, flat side facing up and in contact with the lemon mousse.

The excess mousse will rise around the sides — this is normal. Smooth the surface with the offset spatula.

Continue the assembly by placing a disc of reconstituted biscuit into each cavity, over the lemon mousse.

Cover everything with cling film and place in the freezer.

Chocolate petal crowns: Melt the white chocolate in the microwave in 20-30 second intervals, as done previously.

The chocolate must be fully melted and not exceed 45°C. Then cool it by stirring continuously with a spatula.

The temperature of the chocolate will gradually drop.

Keep stirring to bring the temperature down to 35°C. You can spread the melted white chocolate against the sides of the bowl to speed up the cooling.

Here I'm using a laser thermometer to check the temperature of the chocolate.

Stir the melted white chocolate...

...until it reaches 35°C.

At this point, add the Mycryo cocoa butter — 1% of the total weight of the chocolate. This is the standard rule for tempering chocolate with Mycryo.

Mix thoroughly to fully incorporate the Mycryo cocoa butter and further cool the chocolate.

Gradually, the chocolate's temperature will drop. It should reach 29°C — the ideal working temperature for tempered white chocolate.

Once the chocolate is nearly at the right temperature, dampen the work surface with a wet cloth.

Place a polyethylene sheet on the damp surface, pressing it down with a soft cloth so it adheres well.

Pour the tempered white chocolate (at 29°C) onto the plastic sheet...

...and spread it out to a uniform thickness of 2 to 3mm.

Let the chocolate partially crystallise at room temperature (18°C). As soon as it no longer sticks to your fingers, it is semi-set. It should feel dry to the touch but still soft, so it's flexible and easy to cut. If the chocolate is fully crystallised, you won't be able to proceed with step 110.

Using the cutter (petal side), press firmly to mark 8 flower-shaped discs in the white chocolate.

This is what the result should look like.

Repeat with the rest of the chocolate. Don't hesitate to make more than 8 flowers in case some break.

Place a sheet of baking paper over the top, then a baking tray to keep the chocolate flat as it crystallises. Leave to set in the fridge.

Once the chocolate is fully crystallised, remove it from the fridge, flip the baking tray over...

...and remove the tray to reveal this result.

Remove the polyethylene sheet...

...and gently peel off the white chocolate flowers. They should come off easily if the tempering was done correctly.

Here are the finished chocolate petal crowns.

If necessary, trim the edges with a knife to remove any excess.

Our petal crowns are now ready. Store them in the freezer.

Finish: When the entremets are completely frozen, remove the mould from the freezer and peel off the cling film.

Release the entremets by peeling back the silicone mould...

...and place them on a baking tray lined with cling film. Set this tray on a turntable.

Spray the entremets with yellow velvet icing. These steps must be done quickly — the entremets should remain frozen while being sprayed.

Our entremets are now fully coated with yellow spray. Set aside.

Take the petal crowns out of the freezer and place the tray on the turntable. Spray them with neutral (white) velvet icing. The chocolate must be very cold, freshly out of the freezer, so the spray adheres well.

Here are the crowns with the velvety finish.

Carefully place one petal crown on each mini-entremets before they are fully defrosted.

This is what the result should look like.

Repeat for all the mini entremets.

You can change the colour using light pink velvet spray, as shown here, while keeping the petal crowns white.

Here are our lemon & strawberry mini entremets. Allow them to defrost in the fridge for 3 to 4 hours. Enjoy!
Please login to post a review