


Cookies 🍪
By clicking "Accept", you authorize Meilleur du Chef to store cookies on your device to personalize site content, analyze our traffic, and provide social media functionality.
Favourites


In one click, store and find all your favourite recipes.
Add this recipe >
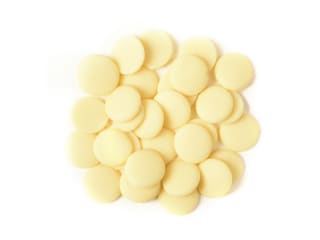
Decorations on the shell: To make this marshmallow, chocolate & crunchy praline recipe, start by preparing the chocolate that will be used for all the decorations (eyes, buttons, bow tie, mouth, scarf, etc.). We'll begin with the red chocolate. Pour the first half of the white chocolate (50 g) into a mixing bowl preferably plastic, and melt it in the microwave in 20 to 30 second intervals, stirring every time to prevent burning.

Add the red and yellow Power Flowers colourings to the melted chocolate. Don't rely on the photo — that day I tempered more red chocolate; you should follow the proportions indicated in the ingredient list above.

Using a maryse spatula, mix the preparation to melt the colours into the warm chocolate.

Continue melting until the chocolate reaches 45°C, but do not exceed this temperature. Gradually the colours melt, giving you a red-coloured chocolate.

Once 45°C is reached, stir the chocolate continuously to lower its temperature to 35°C. Don't hesitate to spread the chocolate up the sides of the bowl, then bring it back down to the centre to help it cool faster. Repeat this as needed.

When the chocolate reaches 35°C...

...sprinkle the Mycryo cocoa butter over the surface and mix to incorporate it and let it melt into the chocolate mass...

...and continue mixing carefully, bringing the melted chocolate up the sides of the bowl to help lower its temperature.

The ideal working temperature for tempered white chocolate is 29/30°C.

When this temperature is reached, transfer the tempered chocolate into a decorating cone. Take one of the four thermoformed Gingerman moulds from the kit and start filling the bow tie cavity with red chocolate (here I'm only filling the wings of the bow tie)...

...and also fill in the mouth.

Take a second mould (the one with the scarf) and fill the cavities of the mouth and the scarf, colouring one stripe out of two, as shown in the photo. Keep your decorating cone with red chocolate in an oven preheated to 30°C — you may need it later for touch-ups or forgotten spots.

Turn the mould over to check the final look. This is the result obtained.

Now melt the second half of the white chocolate (50 g) in the microwave in 20 to 30 second intervals, stirring every time, until it reaches 45°C maximum. No colour will be added here.

As before, lower the chocolate temperature to 35°C to incorporate 1% Mycryo cocoa butter, then stir continuously until the white chocolate reaches 29/30°C.

Pour this tempered white chocolate into a decorating cone.

Fill the scarf cavities by completing the stripes not yet filled, alternating between red and white chocolate. You can be a bit less precise here and slightly overlap the red chocolate.

Also fill the button cavities of the second Gingerman.

Go back to the first mould to fill the cavities representing the centre of the bow tie and the outline of the clothes.

Do the same for all the moulds. Here I'm making four Gingermen. The colour placement can be adapted to your taste — there's no need to make them identical.

Here's a closer look at our first Gingerman with a bow tie...

...and our second Gingerman with a scarf. You can colour the mouth, buttons, and other details as you wish. I'm simply giving examples — everyone can add their own creative touch. Always check the front side of the mould for the result. In case of overflow, remove the excess chocolate once it has crystallized using a knife tip and/or a cotton swab. Keep the decorating cone with white chocolate in the oven for any touch-ups or forgotten details.

Now we'll temper the dark chocolate. Melt it in the microwave in 20 to 30 second intervals, stirring every time, until it reaches 50°C but without exceeding that. Stir continuously to bring the temperature down to 35°C so you can add the Mycryo cocoa butter. Then continue stirring until the chocolate reaches 31/32°C (the ideal working temperature for tempered dark chocolate).

Transfer this tempered dark chocolate into a decorating cone...

...and pipe it into the eye cavities of the Gingerman with the striped scarf.

Fill in the button cavities of the character with the bow tie using the tempered dark chocolate.

Check the results as you go by flipping the mould. Here's the bow tie gingerman; the eyes still need to be done...

...and here's the result for our Gingerman with the striped scarf.

Repeat this process with all four thermoformed moulds from the kit. Keep the dark chocolate cone in the oven in case you need it for touch-ups.

Temper the milk chocolate by melting it in the microwave in 20 to 30 second intervals, stirring every time, until it reaches 45°C maximum. Then stir regularly to bring the temperature down to 35°C.

Once the milk chocolate is at 35°C, sprinkle the Mycryo cocoa butter over it and stir continuously until it reaches 29/30°C (the ideal working temperature for tempered milk chocolate).

When the milk chocolate is at the right temperature, pour it into a decorating cone.

Pipe along the outline of the Gingerman with the scarf and red mouth...

...and add the eyebrows.

Fill the eye cavities of the Gingerman with the bow tie and continue filling all remaining decorative details. Keep the milk chocolate cone in the oven in case you need it later.

Once finished, this is what the result should look like. Let crystallize at room temperature, preferably in a cool room (18/19°C).

Dulcey chocolate shell: Prepare the ingredients.

Place the Dulcey blond chocolate in a plastic mixing bowl and melt it in the microwave in 20 to 30 second intervals...

...stirring every time until it reaches 45°C, without exceeding this temperature.

Stir continuously to lower the chocolate to 35°C.
This tempering step will take longer than the previous ones, as we're working with a larger amount of chocolate.

Sprinkle 1% Mycryo cocoa butter on the surface of the Dulcey blond chocolate when it reaches 35°C...

...and stir continuously to incorporate the Mycryo cocoa butter...

...and continue stirring to lower the temperature of the preparation.

The Dulcey blond chocolate should reach 29/30°C, its ideal working temperature, just like white or milk chocolate.

Place one of the Gingerman moulds on your work surface...

...and pour the tempered Dulcey blond chocolate inside.
Be sure that all the coloured chocolate decorations have fully crystallized before this step.

Tap the mould on the work surface to remove any air bubbles and smooth the surface.

Then turn the mould upside down over the bowl to empty it, tapping the sides with the handle of a chocolate spatula to help the excess chocolate flow out.

Finish by scraping the surface of the mould with the chocolate spatula to remove any drips and obtain a clean finish.

Place the mould on a sheet of parchment paper, hollow side down, as shown in the photo, and let it crystallize in a cool room (18/19°C) or air-conditioned space.

Take another Gingerman mould and repeat the same steps, filling it entirely with tempered Dulcey blond chocolate.

Tap the mould on the work surface to release air bubbles and smooth the surface.

Turn the mould over the mixing bowl...

...tapping the sides with the spatula handle to let the excess chocolate flow out.

Then scrape the surface with the chocolate spatula to clean the edges and achieve a neat finish.

Place the mould on the parchment paper near the first one and let crystallize. Repeat the same for the remaining two moulds.

During crystallization, when the Dulcey blond chocolate is semi-crystallized, scrape the surface of all moulds once more...

...to clean and even out the edges of each cavity. Let crystallize at room temperature, in a cool environment (18/19°C).

Crunchy praline: Prepare all the ingredients.

Place the milk and dark chocolates in a mixing bowl...

...and melt them in the microwave in 20 to 30 second intervals, stirring every time, without exceeding 45°C.

Add the Mycryo cocoa butter and the hazelnut praline.

Mix with the maryse spatula until homogeneous.

Add the pailleté feuilletine...

...as well as the caramelized chunks...

...and mix thoroughly so both elements are well coated with the praline chocolate. Set aside in a piping bag at room temperature (do not refrigerate).

Vanilla marshmallow: Prepare all ingredients. Mix the powdered gelatin with the hydration water (tap or mineral water) and let sit for 15 minutes.

Pour the larger amount of inverted sugar (1) into a saucepan. Add the water...

...and the caster sugar...

...and bring to a boil...

...until the mixture reaches 110°C. Use a thermometer to monitor the sugar's temperature.

While the sugar cooks, pour the smaller amount of inverted sugar (2) and the hydrated gelatin (gelatin mass) into the bowl of the stand mixer.

When the syrup reaches 110°C, let it rest briefly to let bubbles dissipate, then pour it into the mixing bowl while whisking on low speed. The heat will melt and incorporate the gelatin, forming an emulsion. Gradually increase the mixer speed to maximum.

During mixing, add some vanilla powder. Adjust the amount based on your preferred flavour intensity.

Continue mixing at high speed to whip the marshmallow like a classic meringue.

Your vanilla marshmallow is now ready. Be careful not to overwhip — it should stay soft enough to be piped. The cooler it gets, the more elastic it becomes, so it must be piped while still warm (but not too warm, or it will melt the chocolate).

Place a piping bag on a piping bag holder.

Transfer the vanilla marshmallow into this pastry bag. No nozzle is needed here.

Pipe the marshmallow into the Gingerman mould cavities...

...leaving a gap of about 5mm at the top.

Smooth the surface of the marshmallow using a slightly greased mini offset spatula (use oil or a grease spray) so it glides easily over the sticky marshmallow.

Transfer the crunchy praline mixture into a second piping bag (no nozzle). Cut a medium opening at the tip to control the flow while allowing the pailleté feuilletine to pass through.

Pipe the crunchy praline directly over the vanilla marshmallow in the Gingerman mould...

...leaving a space of about 1 to 2mm.

Smooth the surface with the mini offset spatula to ensure there's enough space left for sealing the mould.

Here's what you should get. Make sure nothing sticks out of the mould cavities to ensure perfect sealing later.

Let the crunchy praline crystallize overnight at room temperature, ideally in a cool room (18/19°C) or an air-conditioned one, before continuing. (Do not refrigerate to speed up crystallization — the chocolate could crack.)
The praline's surface becomes opaque once crystallized.

The next day, melt the remaining Dulcey blond chocolate, temper it again (using the same technique as before), and transfer the tempered chocolate into a piping bag (no nozzle).

Cut a small opening and pipe the tempered Dulcey chocolate directly over the crystallized crunchy praline...

...as shown in the photo.

Tap the mould on the work surface to remove air bubbles and smooth the surface of the chocolate.

Then smooth the surface with the chocolate spatula. Let crystallize for several hours before unmoulding.

Unmoulding: Turn the mould over on the work surface and gently twist it.

If the mould doesn't release on its own, turn it over as shown and gently loosen the edges while twisting slightly.

Turn the mould upside down over a sheet of parchment paper to release your Gingerman. If the tempering was done correctly, unmoulding should be very easy. Be careful not to let the figure fall out too quickly and break. If unmoulding is difficult, place the mould in the fridge for 10-15 minutes maximum. This slight contraction will help release the chocolate.

Here is your marshmallow, chocolate & crunchy praline Gingerman, perfectly smooth and shiny — proof of successful tempering. These delicious treats can be stored for up to 10 days at room temperature. Enjoy!
Warning: highly addictive :-p
Please login to post a review