


Cookies 🍪
By clicking "Accept", you authorize Meilleur du Chef to store cookies on your device to personalize site content, analyze our traffic, and provide social media functionality.
Favourites


In one click, store and find all your favourite recipes.
Add this recipe >
To make this gift-shaped chocolate dessert, start by preparing the ingredients for the hazelnut-peanut feuilletine.

Hazelnut-Peanut Feuilletine: Place the milk chocolate in a mixing bowl and melt it in the microwave in 20 to 30-second intervals...

...stirring between each step to prevent it from burning.

Once the chocolate is completely melted, add the smooth peanut praliné and the peanut paste...

...and mix thoroughly using a maryse spatula.

Finally, add the crunchy feuilletine flakes...

...and mix again until you obtain a smooth, even mixture.

Your hazelnut-peanut feuilletine is now ready.

Spread this mixture onto a sheet of parchment paper.

Cover it with another sheet of parchment paper and roll out the hazelnut-peanut feuilletine using a rolling pin...

...to an even thickness of 2 to 3mm, keeping a rectangular shape.

Slide everything onto a baking tray and refrigerate.

Soft banana and peanut caramel: Prepare all the ingredients.

Peel the banana and cut it into slices. Place the slices in the bowl of a blender.

Add the lime juice...

...and blend until smooth.

You should obtain a banana purée. If you don't have fresh bananas, you can use ready-made banana purée instead.

Pour the whipping cream into a saucepan...

...and bring it to a boil.

Split the vanilla pod in half and scrape out the seeds with the tip of a knife. Add both the seeds and pod to the boiling cream. Remove from the heat and set aside to infuse while making the caramel.

In another saucepan, combine the glucose syrup and caster sugar.

Heat gently until the mixture turns into a caramel. First, the sugar will dissolve into a syrup, and then the syrup will turn into caramel.

Add the banana purée to the vanilla cream...

...and mix with a silicone spatula until smooth. Set aside.

The caramel will gradually form. Keep the heat low to avoid browning it too quickly, which would make it bitter.

At this stage, mix gently with a spatula to ensure the texture is even.

As the caramel starts to colour and all sugar crystals have melted, continue cooking over low heat. The tiny bubbles forming on the surface indicate the caramel is nearly ready.

Once the caramel is ready, deglaze it by adding the banana and vanilla cream mixture.

Stir quickly with the spatula—be careful of splashes and steam, which can cause burns.

You should now have a banana caramel. Let it cook briefly until the mixture becomes smooth and homogeneous. The key is to ensure the caramel fully melts into the banana-cream base.

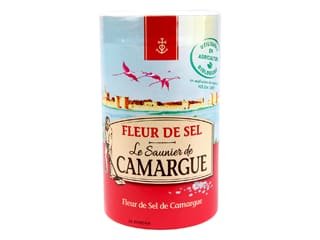
When fully combined, add the butter pieces and the fleur de sel...

...and mix until fully incorporated.

Pour the banana caramel into a measuring jug (a tall, narrow container), removing the vanilla pod.

Add the milk chocolate pistoles to the hot caramel...

...and blend with a hand blender...

...until the mixture is perfectly smooth and even.

Chop the peanuts with a knife into small, even pieces...

...like this.

Pour the banana caramel into a mixing bowl...

...and add the chopped peanuts.

Mix thoroughly with a spatula until you obtain a smooth banana and peanut soft caramel. Set aside.

Using an oil spray, grease the Pavoflex sphere mould Ø 3cm. Make sure to coat the inside of each cavity well, as the caramel won't harden completely and will remain soft, making the release process difficult if the cavities aren't greased properly.

If you've applied too much spray, place the mould upside down on a wire rack over a baking tray to drain the excess.

Transfer the soft banana and peanut caramel into a piping bag. It can still be slightly warm.

Seal the piping bag with a knot. You won't need a piping nozzle for this step.

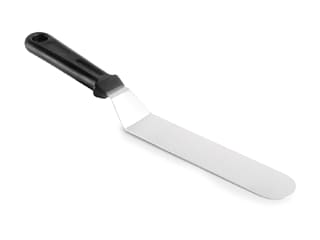
Fill the silicone mould cavities with caramel to the top. Smooth the surface using a offset metal spatula.

Cover the surface with cling film...

...and place in the freezer. Note that the caramel will not harden completely because it's primarily made of sugar.

Remove the hazelnut-peanut feuilletine from the fridge and peel off the top sheet of parchment paper.

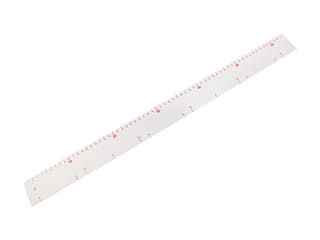
Using a knife and a graduated ruler...

...cut into 4.5 x 4.5cm squares to match the cavities of the gift silicone mould. If using a different mould, adjust the size accordingly. Keep refrigerated.

Once the caramel is frozen, unmould it by pressing from underneath. Greasing the mould beforehand will make this step much easier.

If the caramel spheres deform slightly during demoulding, reshape them by rolling gently between your palms.

Here are your banana and peanut caramel spheres. Keep them in the freezer.

Manjari chocolate mousse: Prepare all the ingredients.

Pour the whole milk, caster sugar, and glucose syrup into a saucepan. (Do not confuse glucose syrup with dehydrated glucose.)

Bring to a boil.

Meanwhile, partially melt the dark chocolate in the microwave, in 20 to 30-second intervals, stirring every time to avoid burning.

When the chocolate is about 50% melted, add the boiling sweetened milk...

...stirring with a spatula so the chocolate melts completely into the hot mixture.

You should obtain a smooth and even texture.

Finish by whisking the chocolate mixture while it's still hot to smooth it out.

You should have this result. Set aside.

Pour the whipping cream into the bowl of a stand mixer and whip until soft peaks form.

You should obtain a soft, airy whipped cream.

Add half of the whipped cream to the chocolate mixture...

...and whisk vigorously...

...until smooth and uniform.

Add the remaining whipped cream...

...and fold gently with a spatula...

...until the mousse is smooth and homogeneous...

...as shown in the photo.

Transfer the Manjari chocolate mousse into a piping bag. No nozzle is required.

Remove the hazelnut-peanut feuilletine from the fridge, invert it onto a baking tray, and peel off the parchment paper. Keep refrigerated.

Cut the tip of the piping bag with scissors to create an opening about 2cm wide.

Pipe the Manjari chocolate mousse into the cavities of the individual gift silicone moulds, filling them halfway.

Spread the mousse along the sides of each cavity using a mini offset spatula. Press the mousse firmly against the sides to eliminate air bubbles. You can tap the mould lightly on the work surface to help release them.

You should obtain this result.

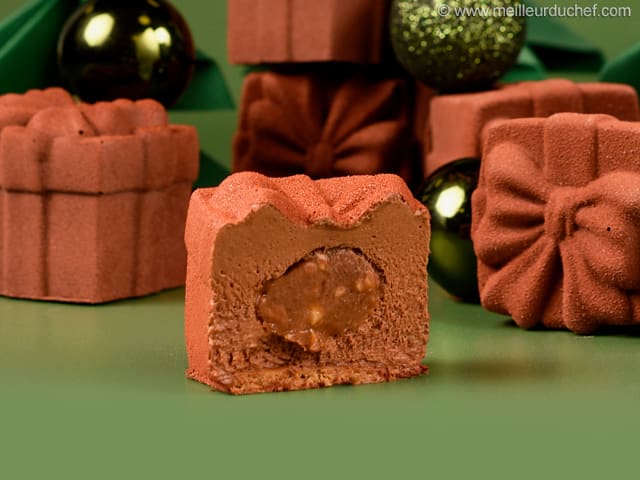
Remove the frozen banana and peanut caramel spheres from the freezer and place one in the centre of each cavity.

Cover the spheres with more Manjari chocolate mousse, filling the cavities to the top.

Smooth the surface with the mini offset spatula...

...pressing gently to ensure the mousse fills all spaces and air bubbles are removed. Leave a small gap to place the feuilletine base.

Take the firm, chilled hazelnut-peanut feuilletine bases from the fridge and place them on top of each cavity, directly in contact with the mousse.

Adjust the bases and remove any excess mousse that may have overflowed.

Cover with cling film and freeze. The desserts can be made up to this point several days or even weeks in advance.

Finish: On the day of serving, remove the mould from the freezer and take off the cling film.

Release the individual desserts by pressing from underneath, as shown in the photo. They must be fully frozen for optimal release.

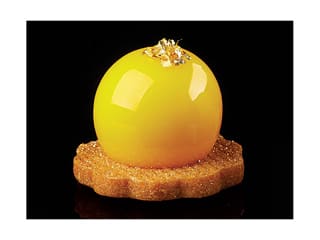
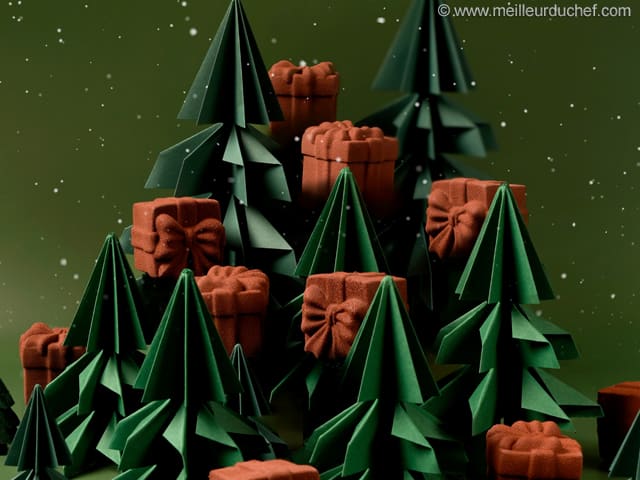
You should obtain individual gift-shaped desserts.

Make sure you release all the desserts immediately after removing them from the freezer, while still frozen for the velvet spray coating. Place them on a baking tray lined with cling film. Set the tray on a turning tray to make spraying easier.

Shake the caramel velvet spray can vigorously before use, until you hear the mixing ball inside (indicating it's well blended and ready to use).

Spray the coating onto the desserts from a distance of 30-40 cm...

...rotating the tray so that all sides are evenly coated.

Here are your chocolate desserts with banana-peanut carame, finished with a caramel velvet coating. You can plate them individually or leave them on the tray for service. Allow 2 to 3 hours of defrosting in the fridge before serving. Enjoy!
Please login to post a review