You can always send us your messages, comments or suggestions.
In one click, store and find all your favourite recipes.
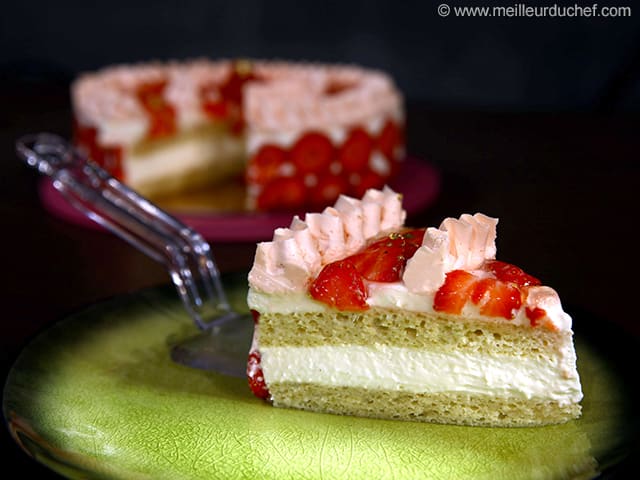
Add this recipe >Before starting this Strawberry and Fromage Blanc Delight recipe, organise the necessary ingredients for the Joconde biscuit.
In the stand mixer recipient, place the whole eggs and tant pour tant. If you don't have tant pour tant powder, combine 125 grams of almond powder and 125 grams of icing sugar.
Beat with the mixer...
... until foamy and doubled in volume.
Turn off the mixer and reserve.
Place the egg whites in a separate bowl...
... and whip with a pinch of salt...
... until firm peaks form.
Sift 35 grams of flour over the eggs and tant pour tant mixture.
Note: for a chocolate Joconde biscuit, you will need to replace the 35 grams of flour with 25 grams of flour combined with 15 grams of cocoa powder.
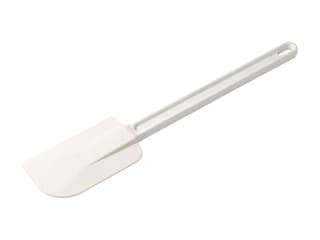
Fold gently a rubber spatula.
Add the clarified butter...
... and incorporate it gently.
Pour the preparation over the beaten egg whites. Fold gently with a rubber spatula, making sure the preparation doesn't collapse.
Place a Flexipan Entremets silicone mat 33.5 x 33.5 cm on top of a Silichef XL perforated baking sheet and pour the preparation.
Spread with a metallic cranked spatula to create an even layer.
Bake at 180°C (gas 4) for about 10 or 12 minutes. You can also use a round cake tin and cook the Joconde like a génoise sponge biscuit.
When cooked, remove from the oven...
... and leave to cool. Make sure the biscuit has cooled down completely before releasing it from the mould.
You can also make the biscuit in advance and store it in the freezer for a later use. Before freezing, wrap the biscuit in cling film so it doesn't absorb smells from other ingredients in the freezer.
For the Italian meringue: Organise all the necessary ingredients.
Pour the water in a saucepan...
... add the castor sugar and combine with a whisk.
Cook the sugar until the temperature reaches between 120°C. I recommend using a digital thermometer with probe.
Remove the pan from the heat when the sugar gets to 120°C.
Beat the egg whites until foamy, then add the cooked sugar slowly, pouring it against the inner side of the bowl.
Beat until cooled down completely.
The Italian meringue is now ready. Set aside.
Beat the cold whipping cream in the food mixer recipient. The whipped cream is a component of the fromage blanc mousse.
Beat until you obtain a whipped cream. Make sure it is not too firm.
For the fromage blanc mousse: Organise all the necessary ingredients.
Steep the gelatine sheets in cold water. Immerse the sheets one at a time so they don't form a gelatine mass.
Pour the water in a saucepan. Add the castor sugar...
... and cook until the temperature reaches 118°C.
Pour the egg yolks in the stand mixer recipient and beat at low speed. Add the cooked sugar, pouring it slowly against the inner side of the bowl. If you pour the sugar directly over the whisk while it's spinning, it will be thrown on the sides of the bowl and will set instantly.
Squeeze the gelatine to strain. Make sure you don't squash it.
Add the gelatine to the saucepan used to cook the sugar (it should still be warm).
Place the pan over low heat to melt the gelatine.
Add the melted gelatine to the egg and sugar mix. Beat until cooled down completely.
In a separate mixing bowl, place the fromage blanc.
Pour the preparation over the fromage blanc...
... and whisk until homogeneous. Make sure the preparation does not collapse!
Add the vanilla extract.
Add the whipped cream...
... and combine gently with a whisk, making sure the preparation doesn't collapse.
Add the cold Italian meringue...
... and combine with the rubber spatula.
If there are lumps of meringue or whipped cream, give the preparation a couple of whisk motions. The fromage blanc mousse is ready.
Assembling the cake: Gently remove the Joconde biscuit from the mould onto a sheet of greaseproof paper. The biscuit should be easy to release from the silicone mould. Make sure the biscuit is cold for this operation.
Flip the biscuit so the brown side is facing up. Using a vacherin ring (diameter 22cm), cut the biscuit into a disc.
Gently lift the biscuit disc...
... and place it on a baking sheet.
Arrange a bigger vacherin ring (diameter 24cm) around the biscuit.
Brush the surface of the biscuit with syrup. You can make this syrup in advance and store in an airtight container in the fridge for several weeks.
Line the inside of the mould with a strip of acetate sheet cut to the same width and height.
Slice the strawberries to a thickness of 3 or 4 mm. Arrange the strawberry slices vertically around the mould, in the gap between the biscuit and the acetate sheet.
Arrange a second row of strawberry slices on top. Two rows should be enough to get to the top of the ring.
Transfer the fromage blanc mousse into a piping bag and pipe a generous layer at the bottom to cover the biscuit.
With a small palette knife, create a volcano shape, so that the cream goes all the way up the rim. Repeat all around the cake.
Spread the mousse into an even layer.
Gather the Joconde biscuit scraps.
Using the mousse ring (diameter 22cm), cut another disc from the scraps.
Recompose the biscuit disc over the layer of fromage blanc mousse, starting with the first half...
... then the second half. Since this biscuit is buried in the middle of the cake, it doesn't matter if it is composed of several parts.
Brush the surface of the biscuit with syrup.
Make sure you steep the the biscuit with a generous amount of syrup.
Fill the rest of the mould with fromage blanc mousse...
... and even the surface with an Exoglass® cranked spatula.
The result should look like this.
Cover with cling film in direct contact with the surface of the cake and refrigerate. Ideally, make this cake the day before and store in the fridge overnight. The fromage blanc mousse has a smooth, creamy consistency and needs to spend a while in the fridge to set properly before releasing from the mould.
For the light butter cream:Organise all the necessary ingredients.
Pour the water in a saucepan...
... and add the castor sugar...
... and cook the sugar until the temperature reaches 118°C.
When the sugar approaches 110°C, start beating the egg whites.
When the egg whites are foamy (not too firm), add the cooked sugar, pouring it slowly against the inner side of the bowl.
Beat until cooled down completely.
Add the soft butter, cut into cubes...
... and beat until the crème au beurre is homogeneous.
At this stage, add a few drops of red fat-soluble colouring until you get the desired colour. A few drops of yellow colouring will help to reduce the brightness of the colour. We're aiming for a light pink colour here.
Add a few drops of strawberry flavouring (optional).
The butter cream is now ready. Set aside at room temperature.
Cut the remaining strawberries into slices, lengthwise. Use the best looking strawberries for the decoration.
Remove the cake from the fridge and remove the cling film.
Arrange the strawberry slices in a circular pattern, starting from the centre.
Using a piping bag fitted with a Saint-Honoré nozzle, pipe a thin collar around the strawberries. For an easier operation, place the cake on a rotating tray and create a zigzag pattern. While you're piping the cream with one hand, you can rotate the tray with the other.
Arrange a second row of strawberry slices around the butter cream collar.
Pipe a second collar of butter cream around the strawberries.
Melt the clear mirror glaze in the microwave and apply a coat over the strawberries. Prefer the use of a spoon instead of a brush to avoid damage on the cream collar.
Arrange a few edible flowers (such as pansies) carefully with decorating tongs.
Place a few gold flakes over the glaze carefully. Reserve in the fridge until ready to serve.
Just before serving: Gently remove the stainless steel ring by sliding it upwards, then detach the acetate sheet around it.
Return to the fridge and serve. Enjoy!
Please login to post a review