You can always send us your messages, comments or suggestions.
In one click, store and find all your favourite recipes.
Add this recipe >Before starting this Raspberry and Tahitian Vanilla Bûche de Noël recipe, organise the necessary ingredients for the raspberry insert.
For the raspberry insert: Pour the raspberry purée and 3/4 of the sugar in a saucepan. Place the saucepan over medium heat.
Combine the rest of the castor sugar with the pectin NH coating.
Whisk the raspberry purée while heating.
When the purée reaches 40°C, add the sugar and pectin while whisking. It is essential to combine the pectin with some sugar beforehand to avoid lumps. The preparation should not be too hot to incorporate the pectin (again, to avoid lumps).
Add half a punnet of raspberries to the saucepan...
... and bring to a boil. Continue cooking for another 2 minutes to activate the pectin. Set the raspberry confit aside to cool down at room temperature (at this stage it is too hot to be transferred into a mould). Stir regularly to make sure the surface doesn't jellify.
For the madeleine biscuit: Organise the necessary ingredients.
Pour the whole eggs in the stand mixer recipient.
Add the castor sugar...
... the zest of one and a half lemons...
... and blanch the preparation with the whisk attachment.
Add the melted butter (make sure it has cooled down first).
Add the milk...
... the lemon juice...
... and the olive oil while mixing at low speed.
Sift the flour on top of a sheet of greaseproof paper.
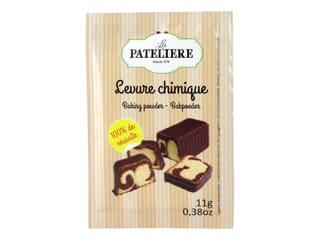
Sift the baking powder as well...
... as shown in the photo.
Add the sifted ingredients into the stand mixer recipient...
... and combine gently with a rubber spatula.
Transfer the madeleine preparation on a perforated baking sheet lined with a baking mat.
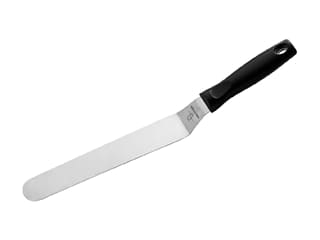
Spread to a thin, even layer with a metallic cranked spatula.
Bake in a fan-assisted oven preheated to 180°C (gas 4) between 15 and 18 minutes. Baking time might vary according to the type of oven.
In the meantime, the raspberry confit cooled down to room temperature. Pour half of the raspberry confit in the mini yule log insert mould...
... and bury the fresh raspberries in the raspberry confit.
Pour the rest of the confit on top. Set aside.
When cooked, remove the madeleine biscuit from the oven...
... and place the tray on your workbench.
Detach the edges of the biscuit with a spatula if needed.
Place a sheet of greaseproof paper over the biscuit...
... and flip upside down on your kitchen worktop.
Detach the silicone mat while the biscuit is still hot. Leave to cool at room temperature.
Using a knife and a graduated ruler, trim the biscuit on one edge (lengthwise).
Cut a strip to a width of 4cm...
... and a length of 24.5cm (the length of the mould is 25cm).
Place this biscuit strip on top of the raspberry insert, pressing down on it to make sure it sticks to the insert.
Cover the surface with cling film and place in the freezer.
For the Tahitian vanilla mousse: Organise the necessary ingredients.
Hydrate the gelatine powder with 33 grams of water.
Combine well and hydrate for at least 15 minutes at room temperature.
In the stand mixer bowl, beat 375 grams of whipping cream until you obtain a whipped cream. The texture should be soft.
In the meantime, split the vanilla pod lengthwise and scrape the seeds out with a knife.
Add the vanilla seeds to the whipping cream in the mixer.
Continue beating to incorporate the vanilla seeds...
... until you get a soft whipped cream.
Using scissors, cut the rest of the vanilla pod over a saucepan. Cut into chunks of 1cm.
Add 20 grams whipping cream...
.. milk...
... and bring to a boil.
In the meantime, place the egg yolks in a bowl.
Add the castor sugar...
... and blanch with a whisk.
Pour the boiling ingredients over the egg and sugar preparation while whisking.
Transfer the preparation into the saucepan used to boil the milk and cream...
... and cook 'à la nappe' (i.e. until the consistency is thick enough to coat the back of a spoon), like a custard. The temperature should not exceed 85°C, otherwise you will end up with scrambled eggs.
Dip the rubber spatula into the cream to check how cooked it is. When sliding your finger on the spatula, the finger mark should not disappear (see photo).
Pass the crème anglaise through a fine sieve.
Melt the hydrated gelatine in the microwave and add to the cream. Combine vigorously. Set aside.
Measure the width of your yule log mould. For this recipe, I used the Silikomart yule log mould. Make sure you don't follow the dimensions listed here if you're using a different mould.
The width of the mould is 9cm, so I need a strip of madeleine biscuit cut to a width of 8.5cm, slightly smaller than the mould.
Cut the biscuit using the graduated ruler.
Cut the strip to a length of 24.5cm (the length of the mould is 25cm).
When the raspberry insert is completely frozen, release it from the mould carefully.
Trim both ends to create a length of 24.cm.
The result should look like this.
When the vanilla cream has cooled down between 30 and 35°C (I recommend using a laser thermometer)...
... add 1/3 of the whipped cream to the custard...
... and combine with a whisk until smooth.
Add the rest of the whipped cream...
... and fold gently with a rubber spatula...
... until the vanilla mousse is homogeneous.
Transfer the mousse into a piping bag. The use of a nozzle is not necessary.
Pipe the vanilla mousse at the bottom of the silicone yule log, halfway up.
Using a small palette knife, create a volcano shape so that the mousse goes up the sides. Pipe another lace of vanilla mousse at the bottom.
Place the raspberry insert in the centre, with the rounded side facing down and the flat side facing up.
Bury the insert a little so that the mousse comes up on the sides.
Cover with the rest of the vanilla mousse...
... and even the surface with the cranked metallic spatula.
Place the madeleine biscuit strip over the vanilla cream, pressing on it gently.
Cover the surface with cling film and place in the freezer. Up to this stage, this recipe can be prepared several weeks in advance.
For the Inspiration Raspberry mirror icing (make the day before): Organise the necessary ingredients.
Hydrate the gelatine with 36 grams of water at room temperature...
... and set aside for at least 15 minutes.
Pour the water and glucose syrup into a saucepan.
Add the castor sugar...
... and bring to a boil. Continue cooking for a few seconds until the temperature reaches 103°C.
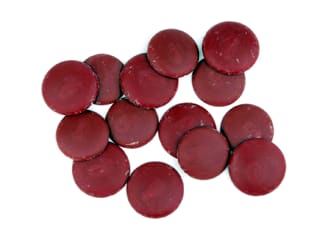
In a dispenser jug, pour the sweetened condensed milk and the Inspiration Raspberry chocolate.
Add the rehydrated gelatine...
... and the syrup at 103°C (there should no more bubbles).
Mix with a Bamix hand blender until smooth and homogeneous.
Make sure you get rid of as many air bubbles as possible.
Cover the surface of the raspberry icing with cling film...
... and refrigerate overnight. Note: This icing doesn't contain any artificial colouring, so you might notice it has lost some of its original colour after 24 hours in the fridge. This is completely normal.
For the chocolate decorations: Place 80 grams of Inspiration Raspberry chocolate in a bowl and melt in the microwave, stirring every 30 seconds. We're going to temper the chocolate using the seeding method.
Chop the rest of the chocolate with a knife.
Continue heating the chocolate until it has completely melted.
At this stage, the chocolate is melted and 45°C (make sure you don't exceed that temperature). We're going temper this chocolate like white chocolate.
Add the chopped chocolate so the temperature drops.
Combine carefully with the spatula until the chocolate chunks have melted.
The chocolate has already dropped by 10°C.
Continue mixing the chocolate and make it come up the sides of the bowl in a thin layer so it cools down faster.
The temperature should gradually drop.
Continue mixing...
... with the rubber spatula...
... until the chocolate is between 28 and 29°C.
Place a polyethylene sheet on your workbench. Pour the tempered chocolate over it...
... and spread into a thin layer using a cranked metallic spatula.
Leave to set. When the chocolate is partially crystallized, dry to the touch but still soft, score the surface with a knife...
... then score again crosswise...
... to create diamond shapes.
Wrap the polyethylene sheet around a cylinder (rolling pin or plastic tube) while the chocolate is still soft.
Seal with tape...
... and leave to crystallize in a cool room (between 18 and 19°C).
Remove the icing from the fridge. As mentioned in step #94, the icing has indeed lost some of its original colour. Remove the cling film.
Reheat the icing in the microwave, stirring every 20 or 30 seconds until melted completely. The colour should come back a little. The icing should be between 25 and 30°C when melted.
For the chocolate decorations (continued): When the chocolate has crystallized, remove the tape and unwrap the polyethylene sheet. The chocolate should come off easily.
It should break up into many pieces. Sort the diamond shapes...
... and keep the most aesthetic ones.
Take the log out of the freezer and remove the cling film.
Release the cake from the silicone and place on a cooling rack.
Place the rack on a deep tray to collect the excess icing. Two layers of icing are necessary for this recipe, so it is important to reuse the excess icing from the first layer.
When the icing is between 30 and 35°C (maximum), mix again and pour the icing in one stroke, from one end of the log to the other. Make sure the icing covers the whole surface.
The result should be as shown in the photo. Let the excess icing drip off. As the icing drips down the colour will get lighter.
Transfer the icing excess into a pouring jug and reheat in the microwave if needed until it is between 30 and 35°C. Mix again until homogeneous.
Pour the icing again from one end of the log to the other.
The icing is now thicker and the colour is darker. Let the excess icing drip off.
Using a cranked spatula, rotate the cake on the rack to get rid of any drops of icing.
Transfer the log onto a serving plate.
Arrange the chocolate decorations harmoniously over the log, making them overlap.
The result should look like this.
The chocolate decorations should be interlocked like this.
For the finish: Arrange raspberry crispy cubes around the base of the log. They will easily stick to the icing.
The result should be as shown in the photo.
Make a decorating bag with greaseproof paper. Fill the bag with a teaspoon of clear mirror glaze. Pipe a few drops of glaze over the chocolate decorations; they will serve as a glue for the gold leaf.
Using decorating tweezers, carefully arrange pieces of gold leaf over the drops of mirror glaze.
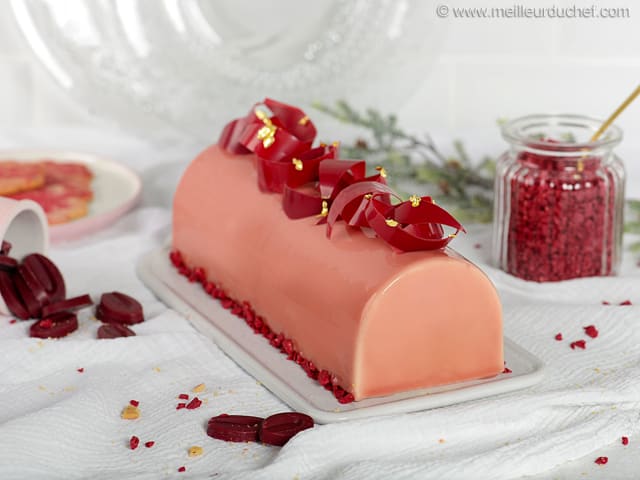
The raspberry and Tahitian vanilla Bûche de Noël is now finished.
Leave to defrost in the fridge for at least 3 or 4 hours. Reserve in the fridge until ready to serve. Enjoy this delicious Christmas dessert!
Please login to post a review