You can always send us your messages, comments or suggestions.
In one click, store and find all your favourite recipes.
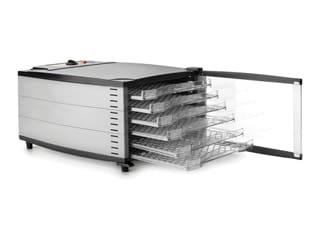
Add this recipe >For the dehydrated fruits: Before starting this Christmas Chocolate Blocks recipe, cut the orange and lemon into slices to a thickness of 3 or 4mm. Arrange the slices on two separate trays from the dehydrator.
Turn the dehydrator on and set it to the maximum temperature. Place the tray with the orange slices inside the dehydrator.
Place the tray with the lemon slices inside the dehydrator.
Close the dehydrator and dry the fruits for 3 or 4 hours. If you leave the fruits in the dehydrator overnight, reduce the temperature so the fruits don't brown.
For the rich shortcrust pastry biscuits: Place the almond rich shortcrust pastry on a sheet of greaseproof paper.
Place another sheet of greaseproof paper on top...
... and roll out to a thickness of 3mm using a rolling pin. Place two rulers on each side of the silicone mat to get an even thickness.
Check the thickness of the pastry, then freeze for 15 minutes until firm.
Remove the pastry from the freezer and cut small shapes (round, oval, flower and star) using various cutters (flower, star)... Arrange the biscuits over a perforated baking sheet lined with a sheet of greaseproof paper.
Create larger flower shapes using a flower fluted cookie cutter Ø 1.8cm.
The result should look like this.
Bake in a fan-assisted oven preheated at 170C (gas 3) for about 7 or 8 minutes.
The biscuits should be golden when cooked.
Remove the tray from the oven and leave to cool at room temperature.
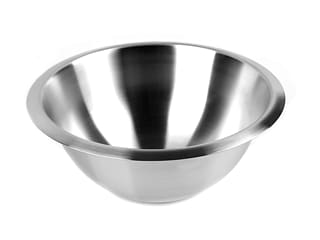
For the tempered milk chocolate: Place 2/3 of the milk chocolate (200g) in a bowl.
Melt the chocolate in the microwave and stir every 30 seconds to make sure the chocolate doesn't burn.
The chocolate will melt slowly...
... continue melting while stirring regularly until the chocolate is completely melted. At this stage, the chocolate has a temperature of 38°C (temperature should not exceed 45°C). The use of a laser thermometer is recommended for this operation.
The chocolate should be melted and homogeneous.
At this stage it has reached a temperature of 45°C.
Add the rest of the milk chocolate (100g). This tempering technique is called the seeding method: 2/3 chocolate melted in the microwave and 1/3 raw chocolate.
Combine with a rubber spatula to incorporate the hard chocolate quickly into the melted mass.
The temperature should reduce really quickly. Depending on the quantity of chocolate, you might need to reheat it a little. At this stage the chocolate is 32°C.
I used a heat gun on the surface of the chocolate to speed up the melting process. You can also reheat the chocolate from underneath the bowl.
Combine the chocolate again until all the pistoles have melted.
Reheat the chocolate again if needed.
Now we want the melted chocolate to cool down to 28°C (+ or - 1°C).
At this stage the chocolate is 32.6°C.
Two possibilities to cool down the chocolate: Dip the recipient into a bigger bowl filled with water at room temperature, or transfer the melted chocolate into a cooler recipient. Make sure the chocolate doesn't cool down too abruptly.
At this stage the chocolate is 30.3°C.
Repeat the operation and transfer the melted chocolate into a mixing bowl...
... and combine carefully while the temperature continues to cool down.
The temperature at this stage is 28°C, the perfect temperature for milk chocolate. The chocolate should be kept at this temperature during the whole recipe. Continue using a heat gun or place the bowl over a bain-marie at 28°C, or pour the chocolate in a tempering machine.
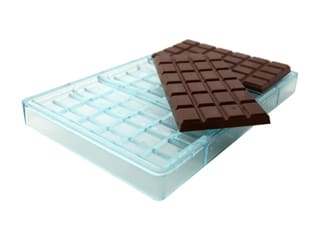
Place two chocolate block moulds on a baking sheet.
Transfer the piping bag into a piping bag and fill the cavities of the mould.
Tap the mould gently with a chocolate spatula to even the surface.
Repeat the operation with the second mould...
... and tap gently with the spatula to even the surface. Make sure the chocolate does not overflow from the cavity.
The result should be as shown in the photo.
For the fillings: Arrange the different ingredients carefully. Start with the small biscuits over the chocolate (which still hasn't crystallized) so they stick to the surface.
Arrange the orange slices...
... and dried lemon.
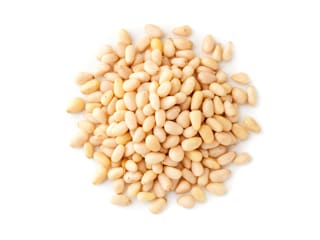
Continue with the fillings of your choice. I added caramelized pine nuts...
... and dried apricot cubes.
Finish the decoration with a few pieces of gold leaf. The whole surface of the chocolate should be covered with ingredients.
The result should be as shown in the photo. Leave to set.
For the tempered dark chocolate: The method is the same as the milk chocolate, except for the temperatures. Melt 2/3 of the dark chocolate in the microwave and stir every 30 seconds...
... until the preparation reaches 50°C.
Add the rest of the chocolate (150g) to the melted chocolate at 50°C.
Combine with the rubber spatula until all the pistoles have melted and the temperature has cooled down.
At this stage the chocolate has dropped to 35°C.
When the chocolate is completely melted, continue stirring until the chocolate goes down to 31°C. If this operation takes too long, you can transfer the melted chocolate into a separate mixing bowl. Make sure the temperature doesn't go below 31°C.
Combine again with the spatula.
The chocolate is now 31°C. The chocolate should be kept at this temperature during the whole recipe (using a heat gun, bain-marie or dipping machine).
Transfer the tempered dark chocolate into a piping bag.
Place three chocolate block moulds on a baking sheet. Fill the cavities with the tempered chocolate. The chocolate should be at 31°C.
The result should be as shown in the photo.
Tap the mould gently with the chocolate spatula to even the surface.
The result should be as shown in the photo.
For the fillings: Arrange the different ingredients before the chocolate crystallizes.
Dried orange and lemon slices, dried fruits, small almond biscuits...
... and finish with a few pieces of gold leaf, directly over the chocolate so it sticks easily.
The result should look like this.
We now have three dark chocolate tablets and two milk chocolate tablets. Leave the chocolate to crystallize overnight in a cool room, between 17°C and 18°C. If tempered successfully, the chocolate should have a glossy finish without any white marks.
The following day: Twist one of the moulds gently to release the chocolate block.
This is what the finished milk chocolate tablets should look like: one side with chocolate squares and the other side with fillings.
Repeat the operation with the second milk chocolate tablet. It should come off really easily.
The result should be as shown in the photo.
Repeat the operation with the dark chocolate blocks. Chocolate squares on one side, fillings on the other.
These chocolate tablets will make a great Christmas gifts for your guests. Enjoy!
Please login to post a review