


Cookies 🍪
By clicking "Accept", you authorize Meilleur du Chef to store cookies on your device to personalize site content, analyze our traffic, and provide social media functionality.
Favourites


In one click, store and find all your favourite recipes.
Add this recipe >
To make this strawberry tart recipe, start by preparing all the ingredients for the madeleine sponge.

Madeleine sponge: Melt the butter in a saucepan...

...until it becomes hazelnut brown. The butter will start to foam...

...and will slightly become darker, giving it the characteristic colour and aroma of hazelnuts.

Let the melted butter cool off the heat, at room temperature.

Pour the whole eggs and the caster sugar into a mixing bowl...

...and blanch these two ingredients together.

Add the flour...

...along with the baking powder...

...and mix vigorously to incorporate the dry ingredients.

Pour in the hazelnut butter...

...and mix thoroughly with a whisk until the batter is smooth and homogeneous.

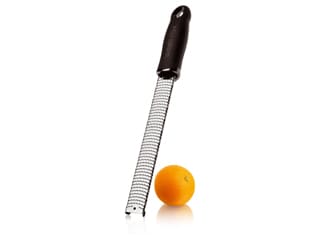
Zest a whole lemon using a Microplane Classic zester-grater, and add the zest to the batter for flavour.

Mix again to incorporate the zest.

Spread this madeleine batter onto a perforated baking tray lined with a silicone baking mat...

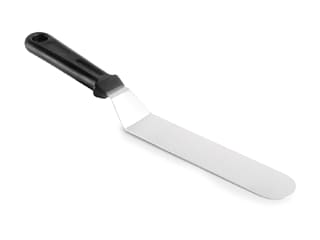
...and spread it evenly across the surface using an offset metal spatula.

Place the tray in a fan-assisted oven preheated to 180°C...

...and bake for 8 minutes. This baking time may vary depending on the oven.

Once baked, the madeleine sponge should be lightly golden and soft. Remove it from the oven.

If the edges of the sponge extend past the tray, trim them with a knife.

Slide the silicone mat and sponge onto a wire cooling rack...

...for optimal cooling. It's important to stop the baking process at this stage, hence the transfer to the rack. If left on the hot tray, it would continue to bake and dry out.

Chocolate shells: Prepare the ingredients.

Pour the Mycryo cocoa butter into a saucepan. You can also use cocoa butter pistoles, which will give the same result.

Melt the Mycryo cocoa butter over very low heat. I recommend doing this in a saucepan rather than in the microwave.

Meanwhile, melt the white chocolate in the microwave, in 20 to 30-second intervals, stirring every time to prevent it from burning.

While melting, take 4 red Power Flowers...

...add them to the semi-melted white chocolate...

...and continue melting while stirring regularly with a spatula...

...until the chocolate is fully melted and has a strawberry red colour. The use of Power Flowers is recommended but optional.

When the Mycryo cocoa butter is almost melted, remove the pan from the heat before it's completely melted to avoid overheating. The remaining pieces will melt gently.

Once the cocoa butter is fully melted, pour it into the coloured chocolate and mix with a spatula to combine. You might think this is a lot of cocoa butter, but we want to make the chocolate very fluid in order to create a thin shell.

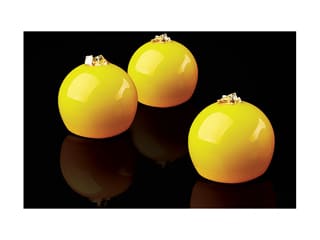
Place the Fragola silicone mould on a baking tray.

Transfer the coloured melted chocolate to a piping bag. No nozzle is needed here.

Tie the piping bag to close it.

Cut the tip of the bag to make a small opening, and fill the mould cavities with the chocolate.

Tap the tray on the work surface to release any air bubbles...

...and flip the mould over a deep tray fitted with a rack to empty the cavities.

Place the silicone mould on the rack and allow the excess chocolate to drain.

Let the chocolate set at room temperature in a cool room (18/19°C) for 10 to 15 minutes.

Carefully flip the mould and run a chocolate spatula across its surface...

...to clean up the edges of the cavities, which will help with unmoulding.

Strawberry compote: Prepare all the ingredients.

Heat the strawberry purée in a saucepan. Add 90% of the caster sugar.

Mix the pectin NH coating with the remaining sugar. When the purée reaches around 50°C, add the sugar-pectin mix, whisking constantly to avoid lumps.

Bring everything to a boil while whisking...

...and maintain the boil for at least 1 minute to activate the pectin.

Cut the strawberries into small cubes using a knife.

Once the compote is ready, add the diced strawberries...

...and mix thoroughly.

Transfer the strawberry compote to a food-grade container and cover it with cling film in direct contact. Chill for no more than 30 minutes.

Once the compote is gelled but still soft, remove it from the fridge and peel off the cling film. If it is too firm, microwave it for a few seconds. It should have a marmalade-like texture.

Pour the compote into a piping bag (without a nozzle). If it hasn't set too much, whisking won't be necessary.

Pipe the strawberry compote into the cavities of the Pavoflex sphere mould Ø 1.5cm...

...and tap the mould on the work surface to remove air bubbles.

Smooth the surface of the mould with the offset spatula to ensure the cavities are filled up to the top. Reserve the remaining compote for later.

Cover the mould with cling film and place it in the freezer.

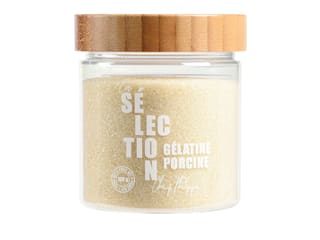
Strawberry mousse: Prepare all the ingredients. Mix the powdered gelatine with the hydration water (tap or mineral water) and let it bloom for 15 minutes.

Heat the strawberry purée and caster sugar in a saucepan.

When the mixture reaches around 50°C and the sugar is fully dissolved, take the bloomed gelatine...

...and melt it in the microwave for a few seconds before adding it to the hot strawberry purée. Whisk vigorously.

Pour this mixture into a food-grade container and let it cool at room temperature.

Whisk the whipping cream using an electric mixer.

The aim is to get soft whipped cream for perfect moulding results. Make sure there are no air bubbles. Set aside.

Take the cooled madeleine sponge...

...and cover it with a sheet of parchment paper.

Flip it onto the wire rack so that the silicone mat is on top.

Remove the silicone mat, which should peel off easily.

Take the cutter provided with the Fragola silicone mould (use the smallest cutter)...

...and cut out sponge bases.

Strawberry mousse (continued): Pour the cooled strawberry mixture (25-30°C) into a mixing bowl...

...and add 1/3 of the soft whipped cream.

Quickly whisk together.

Then add the remaining whipped cream...

...and gently fold it in with a maryse spatula...

... until smooth and homogeneous.

Transfer the mousse into a piping bag (without a nozzle).

Pipe the strawberry mousse into the mould cavities, halfway up, directly onto the chocolate shells.

Tap the tray on the work surface to let the mousse sink to the bottom of the cavities.

Remove the Pavoflex mould from the freezer and release the strawberry compote spheres. They must be well frozen.

Place a sphere of compote in each cavity of the Fragola mould, inserting it directly into the strawberry mousse.

Pipe the mousse to fill the cavities, leaving a slight gap on top to insert the madeleine sponge.

Place the madeleine sponge shapes into the cavities, pressing lightly with your fingertips so that they are flush with the rim. Don't hesitate to add more mousse before placing the sponge, as it's better for the mousse to overflow slightly.

Smooth the surface of the mould with an offset spatula...

...and cover in contact with a sheet of plastic wrap. Place in the freezer. This preparation can be done several days in advance and stored like this in the freezer.

Pistachio shortcrust pastry: Gather all the ingredients.

Pour the flour into the stand mixer bowl.

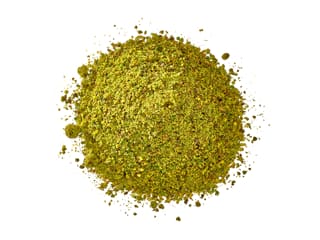
Add the pistachio powder...

...the icing sugar...

...and the cold butter cut into pieces...

...along with the fine salt.

Mix all the ingredients together with the paddle attachment.

Gradually, the mixture will get a crumble-like texture.

At this point, add the whole egg...

...while continuing to mix...

...until the dough comes together.

Transfer the pistachio shortcrust dough onto a sheet of parchment paper, flattening it slightly with your fingertips.

Cover with a second sheet of parchment paper...

...and roll out the dough with the rolling pin...

...to a thickness of 3mm. You can use rolling pin guides. Roll out the dough widthwise...

...and lengthwise to obtain an even layer. Place in the fridge for at least 1 hour (or in the freezer for 15 minutes).

Once the dough is thoroughly chilled and firm, remove the tray from the fridge (or freezer) and peel off the first sheet of parchment paper stuck to the dough.

Place a new sheet of parchment paper on top.

Then flip everything over onto the tray...

...and remove the second sheet of parchment to release the dough. It's important to peel it off before it sticks to the dough too much.

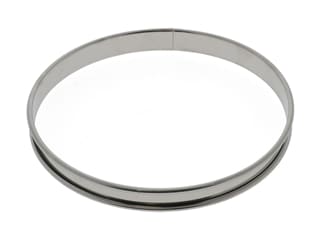
In a corner, place a tart ring Ø 20cm on the pistachio shortcrust dough.

Cut the dough by running a knife blade inside the ring.

Transfer the pistachio shortcrust dough disc onto a baking tray lined with parchment, and place the tart ring on top.

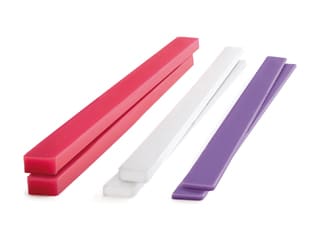
Using the leftover pistachio dough, cut strips about 2.5cm wide using a ruler and knife.

Line the tart ring with these strips. It's important to work quickly while the dough is still cold, firm, and easy to handle. If the room is too warm, the dough may soften quickly—in this case, place it back in the fridge or freezer until firm again.

Once the ring is lined, trim the excess dough with a knife, cutting from the inside out so the dough is flush with the rim.

The tart ring is now lined and ready to use. Chill for at least 1 hour (or 15 minutes in the freezer) before baking.

When the tart base is well chilled, bake in a fan-assisted oven preheated to 170°C...

...and bake for about 12 minutes, depending on your oven.

Remove the tart shell from the oven and let cool at room temperature. This is a blind bake—the pastry is not fully baked and should not be too golden.

Pistachio frangipane: Gather all the ingredients.

Place the butter and caster sugar in the stand mixer bowl.

Add the almond powder...

...the pistachio powder...

...and the fine salt.

Mix all these ingredients together...

...with the paddle attachment.

Then add the whole egg...

...and continue mixing.

Add the pistachio paste. This is optional but enhances the green colour and pistachio flavour.

Mix until the paste is fully incorporated.

You should have a smooth, uniform pistachio frangipane.

Transfer this preparation to a piping bag (no nozzle needed).

Pipe the pistachio frangipane into the pre-baked tart shell in a spiral motion from the centre outward.

Spread the frangipane with a mini offset spatula.

Place the tart base in a fan-assisted oven preheated to 175°C...

...and bake for about 15 minutes, depending on your oven.

Once baked, the pistachio frangipane will be lightly golden. Remove the tart from the oven and let cool at room temperature.

Vanilla whipped cream: Prepare the ingredients.

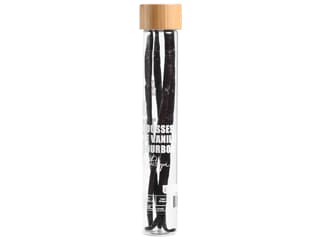
Split a quarter of the vanilla bean lengthwise and scrape out the seeds with the tip of a knife.

Pour the heavy cream into the stand mixer bowl and add the vanilla seeds.

Also add the caster sugar...

...and whip the cream until stiff peaks form.

You can also add Cremfix stabilizer halfway through whipping for optimal texture.

The vanilla whipped cream should now be thick and well set.

Take the tart shell with the cooled pistachio frangipane.

Transfer the whipped cream into a piping bag (no nozzle), and pipe it over the tart base...

...as shown in the photo.

Remove the tart ring and set aside.

Finishing: To coat the strawberries with pearl velvet spray, I recommend using a turntable. Place a parchment-lined baking tray on the turntable. Protect your workspace with more parchment or newspaper.

At the last minute, remove the silicone mould from the freezer and take off the plastic wrap.

Carefully release the Fragola strawberries and place them on the baking tray. This must be done while the mould is still frozen, as the strawberries must be frozen solid for optimal results.

This is what the strawberries should look like at this stage.

Shake the red velvet spray thoroughly until you hear the ball rattle inside (indicating the contents are well mixed). Spray a light coating over the frozen strawberries, rotating the turntable to cover all sides.

The goal is not a velvet effect but simply to give them a red colour, so a light coat is enough.

Assembly: You'll need the tart shell and the frozen "faux" strawberries.

Using two small offset spatulas, gently pick up the strawberries one by one...

...and place 8 or 9 onto the tart, directly onto the vanilla whipped cream. Make sure to place the strawberries upright, as they have a flat base. The strawberries may look slightly white and frosty because they're frozen—once defrosted, their red colour will return.

Continue decorating the tart by layering "faux" strawberries and fresh strawberries. All strawberries should remain whole.

Arrange the strawberries harmoniously so they nest together...

...balancing the entremets strawberries with the fresh ones. I chose the Charlotte variety because they have the same rounded, uniform shape as the "faux" strawberries.

Leave the stems on some of strawberries on top for a touch of green colour.

This is what the result should look like.

Fill any large gaps or empty spaces with the remaining strawberry compote...

...by piping small dots wherever white spots show, to make sure the layer of whipped cream is no longer visible.

Here is our finished strawberry tart. Let the "faux" strawberries fully defrost in the fridge for 2 to 3 hours before serving. Enjoy!
Please login to post a review