


Cookies 🍪
By clicking "Accept", you authorize Meilleur du Chef to store cookies on your device to personalize site content, analyze our traffic, and provide social media functionality.
Favourites


In one click, store and find all your favourite recipes.
Add this recipe >
To make these Crunchy Chocolate Nutcrackers, start by preparing the ingredients for the shiny cocoa butter layer.

Shiny cocoa butter layer: Pour the cocoa butter pistoles into a mixing bowl and melt them in the microwave in 20 to 30-second intervals...

...stirring every time. The pistoles will gradually melt.

Continue alternating between short bursts in the microwave and mixing with a maryse spatula. Although the pistoles would melt faster over very low heat in a small saucepan, it's important not to exceed 45°C. The microwave ensures a gradual melt.

Check the cocoa butter temperature with a laser thermometer, which here shows 31.1°C.

Continue melting the pistoles in the microwave...

...remembering to stir between each step and monitor the temperature throughout.

The cocoa butter pistoles are now almost completely melted, and the temperature reads 44.9°C.

The melting step is done; now begin the cooling stage...

...by continuously stirring the cocoa butter with the maryse spatula, spreading it up the sides of the bowl to help bring the temperature down.

The temperature gradually drops. It now reads 37.6°C.

Continue stirring until the cocoa butter reaches 35°C.

Once it reaches 35°C, sprinkle Mycryo cocoa butter over the surface. The amount corresponds to 1% of the total cocoa butter weight. Mix thoroughly.

Add the red and yellow Power Flowers colourings.

To achieve the desired colour, I used the Power Flowers app (available in stores) and selected red shade 5A, which requires 2 red Power Flowers and 1/4 yellow Power Flower, as indicated by the app. These quantities correspond to a total mass of 100 g (here, 100 g melted cocoa butter).

Mix to melt the Power Flowers into the cocoa butter at 35°C.

You can finish blending with a hand blender to fully incorporate the colouring...

...and break down the colour molecules. This ensures there are no undissolved pigment particles left. We now have colour 5A.

Continue stirring with the maryse spatula to lower the preparation's temperature, now at 34.6°C.

As the red cocoa butter cools, add the gold sparkling food colouring.

The amount of gold powder depends on how iridescent you want the finish to be.

Stir vigorously until fully incorporated and until the temperature drops to 29°C — the ideal working temperature for cocoa butter. I'll show you two ways to fill the mould cavities.

The first method doesn't require any special equipment. Simply fill the cavities of the Nutcracker soldier chocolate mould with the red shimmering cocoa butter.

Then flip the mould over the bowl to empty the cavities...

...and tap the side of the mould with the handle of a chocolate spatula so that the excess runs off — the cocoa butter layer should be very thin.

Scrape the surface of the mould with the chocolate spatula to level the edges.

This is the result you should get.

Once the cocoa butter has set (after a few minutes at room temperature), level the surface again to clean the mould and obtain sharp edges.

Do the same with all moulds if, like me, you're making several trays. The second method uses a chocolate spray gun: simply spray the red cocoa butter inside the mould, then clean the edges with a chocolate spatula. This technique produces a much finer finish.

Here is the back of the mould with the red shimmering cocoa butter layer, which will give a shiny, metallic finish.

Chocolate shell: Melt the white chocolate in the microwave in 20 to 30-second intervals, stirring every time to prevent burning.

The melted white chocolate should not exceed 45°C, just like the cocoa butter earlier.

Once this temperature is reached, add the red and yellow Power Flowers colourings to tint the chocolate mass. These colourings guarantee consistent colour results — ideal for pastry chefs and chocolatiers who want uniform entremets or chocolates throughout the year.

Mix thoroughly with the maryse spatula. The Power Flowers will begin melting, tinting the chocolate...

...which will also start cooling.

Continue mixing until the coloured chocolate reaches 35°C.

The preparation currently reads 38.8°C, so continue mixing...

...by scraping the chocolate up the sides of the bowl, then gathering it back down with the spatula.

When the coloured chocolate reaches 35°C...

...sprinkle Mycryo cocoa butter over it for quick, easy tempering.

Mix vigorously to fully incorporate the Mycryo cocoa butter. It will melt along with the Power Flowers.

The coloured chocolate continues to cool.

Keep stirring, scraping the mixture up the sides of the bowl, until it reaches 29°C.

Once the red chocolate is at 29°C, transfer it to a piping bag.

Seal the piping bag at the top with a knot, then snip a small opening at the tip with scissors to control the flow.

Pipe the red chocolate into the mould cavities. You'll notice the first cocoa butter layer has crystallised.

Once filled, tap the mould gently with the handle of the chocolate spatula to release any air bubbles.

Then invert the mould to empty the excess chocolate, tapping again with the spatula handle to drain it completely.

Scrape the surface with the chocolate spatula to clean the edges.

This is the result: the red chocolate layer should be thin. Flip the mould upside down onto a sheet of baking paper and let it crystallise in a cool room (around 18-19°C).

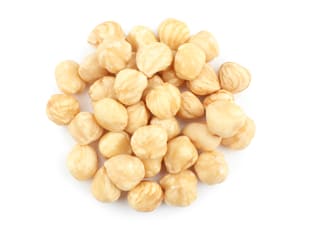
Caramelised hazelnuts: Gather all ingredients.

Spread the hazelnuts on a baking tray...

...and toast them in a preheated 160°C oven for 15 minutes.

Meanwhile, pour the water into a saucepan.

Add the caster sugar...

...and the vanilla powder...

...then stir with a spatula. Bring to a boil to make a syrup.

Once boiling...

...add the toasted hazelnuts.

Cook over medium heat, stirring constantly to coat all hazelnuts with the vanilla syrup.

Gradually, the sugar will crystallise and form a white coating around the hazelnuts.

Continue cooking over medium heat until the crystallised sugar melts again, forming a syrup that caramelises.

Caramelisation happens gradually. Do it slowly and gently to avoid burning the hazelnuts and developing bitterness.

When perfectly caramelised, add a knob of butter...

...and stir until fully incorporated.

Once the butter has melted and the hazelnuts are glossy and caramelised...

...strain them through a fine sieve over a bowl to remove excess butter.

Spread the caramelised hazelnuts on baking paper to cool, spacing them out to prevent sticking.

Hazelnut filling: Prepare all ingredients.

Place the dark chocolate in a mixing bowl and melt it in the microwave in 20 to 30-second intervals, stirring every time. The chocolate should melt without exceeding 50°C.

Finely chop the whole pistachios on a cutting board...

...making sure the pieces are very small, as the mould cavities are quite thin. Avoid large chunks of nuts.

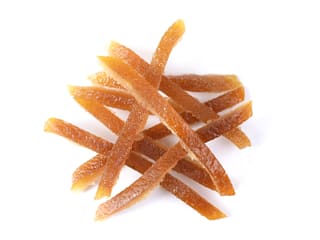
Do the same with the candied orange strips, cutting them into small cubes.

Finely chop the caramelised hazelnuts prepared earlier...

...again keeping the pieces small and even, or they will make the filling uneven later.

Continue melting the dark chocolate in short microwave intervals, stirring regularly.

When the chocolate is fully melted and reads 50°C...

...add the Mycryo cocoa butter. Since this isn't a tempering step, there's no need to wait for 35°C as before.

Stir vigorously until the Mycryo cocoa butter has fully melted into the chocolate.

Add the finely chopped pistachios.

Then add the puffed rice...

...followed by the chopped candied orange...

...and the finely chopped caramelised hazelnuts.

Mix thoroughly with the spatula until all the ingredients are evenly combined.

Finally, add the Piedmont hazelnut praliné...

...and mix again with the maryse spatula...

...until smooth and homogeneous. The hazelnut filling is ready; set aside.

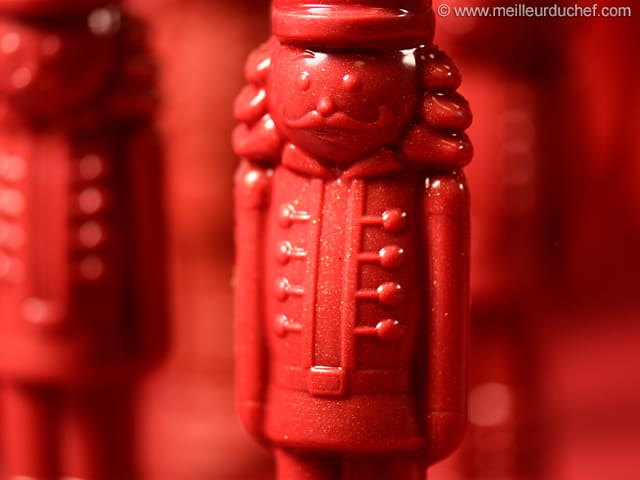
Take the fully crystallised chocolate shells — they should release easily from the mould with a slight twist. This means your tempering was successful. You'll notice a beautiful glossy, metallic finish thanks to the gold powder added to the cocoa butter. Unmould all shells before filling.

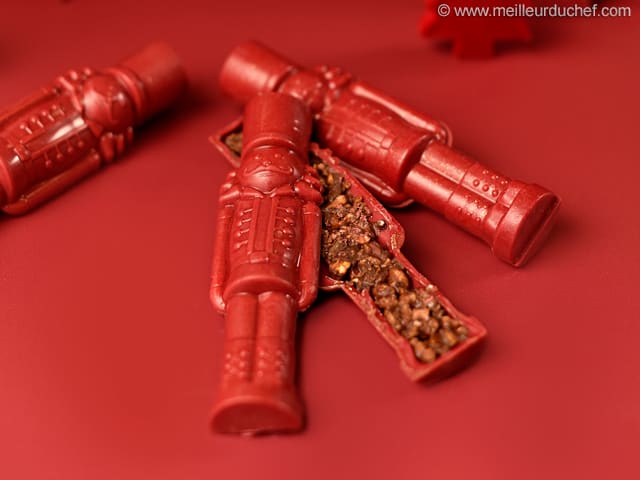
Filling and assembly: Place all chocolate shells back into the mould cavities and fill them with the hazelnut mixture while still pliable. If it has hardened, briefly warm it in the microwave to soften, but make sure it's at room temperature when piping — if warm, it will melt the shells.

Smooth the surface so it's level with the rim. Be careful not to overfill; the filling must stay within the shell's height...

...as shown in the photo.

Repeat for all cavities. Place the mould on a baking tray.

Once the filling has set, cover the mould with a sheet of baking paper...

...and a second baking tray.

Flip the whole thing over in one motion and remove the top tray, as shown.

Release the half-shells by gently twisting the mould.

Here are the front and back halves of the figures.

Now it's time to assemble the two halves.

To do this, place a front and back shell into the mould, in their respective positions.

Then place one remaining shell flat-side down on a baking tray preheated to 150°C for 10 minutes to slightly melt the surface. It's best to wear chocolate gloves to avoid leaving fingerprints.

Align this softened half with its matching half so that both parts meet and stick together.

Repeat with the second shell, placing it flat-side down on the warm tray...

...and aligning it with its other half.

This is the final result. Leave to crystallise.

Once the two halves have fully set and adhered, gently release the figurine and set it aside.

Repeat with all the soldiers.

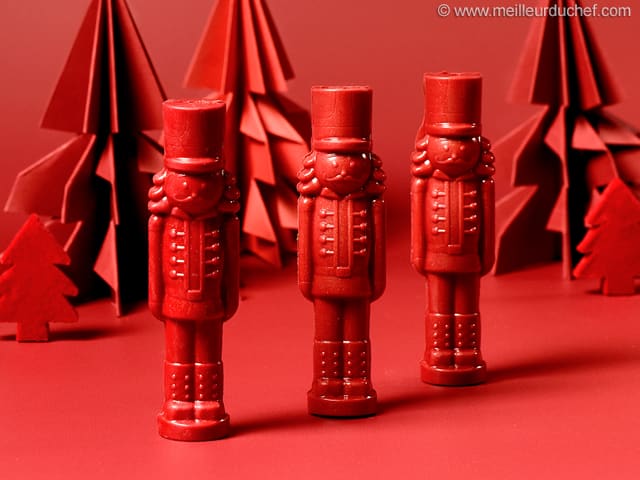
Here are your chocolate Nutcrackers, ready to enjoy!
Please login to post a review