You can always send us your messages, comments or suggestions.
In one click, store and find all your favourite recipes.
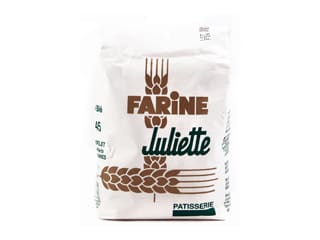
Add this recipe >Before starting this Opera Millefeuille recipe, organise all the necessary ingredients for the puff pastry. You may flour type 55 only for this recipe, but I recommend using half flour T45 and half flour T55 to give more strength to the puff pastry (flour T45 contains more gluten). This also ensures the pastry will keep well for longer in the fridge or in the freezer.
For the puff pastry: Pour the water at room temperature in the stand mixer bowl, fitted with the flat beater attachment.
Add the salt...
... and combine with a whisk until the salt has dissolved completely.
Add the flour T45...
... and flour T55, in whatever order.
Slightly melt 100 grams of butter in a microwave. Most of the butter should be soft but not melted.
Add the soft butter to the stand mixer bowl...
... and start mixing at low speed...
... until the dough has a homogeneous consistency. The point of this operation is not to knead but simply blend the ingredients. Kneading takes more time and is what gives strength to dough. The stronger and more elastic the dough is, the harder it will be to stretch it with a rolling pin. If you mix the ingredients for too long, the shape of the pastry might change during baking.
Stop the stand mixer and remove the flat beater.
Transfer the dough on your kitchen worktop...
... and shape into a square. Flour your workbench to handle the dough easily.
Wrap the dough with cling film to prevent it from drying.
Flatten the dough wrapped in cling film. Refrigerate for 3 to 4 hours.
We're going to start with the first two turns. Take the dough out of the fridge and remove the cling film.
Sprinkle a thin layer of flour over your worktop surface. Make sure you start with a small amount of flour only, and add more on your workbench if needed.
Roll out the pastry lengthwise with a rolling pin.
As you roll out the dough into a long rectangle, make sure it doesn't stick to the rolling pin or your workbench. Sprinkle more flour if needed.
During this rolling operation, perfect the rectangle shape with right angles
Ideally, the rectangle should have a length of 60cm and a width of 20cm. The length should be 3 times the width.
Set the dough rectangle aside. Sprinkle some more flour on your workbench. We're going to prepare the butter.
Place the extra-dry butter on a floured surface...
... and tap the surface with the rolling pin to give it a smooth consistency. We want the butter to have the same elasticity as the dough.
Roll out the butter into a square shape to dimensions 20 x 20cm.
If you find the shape too irregular, trim the sides with a knife...
... and use the scraps to fill any gaps in the butter.
Place the dough rectangle horizontally on your workbench. Place the butter square in the centre. The butter should cover 1/3 of the dough.
Fold one side of the dough over the centre...
... making sure to leave a gap at the fold, as shown in the photo.
The gap should be wide enough to stick a finger in (see arrow).
Fold the opposite side of the dough over the butter so both sides join right in the centre of the butter.
Make sure the sides join without overlapping.
Press with your hand where both sides join to seal.
There should be a gap at the fold on the opposite side.
The seal where the sides join should be vertical.
Roll out the dough lengthwise with the rolling pin. We want to make the dough square longer but not wider, so make sure you don't press too hard on the rolling pin.
Roll to a length of 60cm (3 times the width).
If the dough sticks a bit, sprinkle some more flour. You can flip the dough so the seal in underneath when you roll it out, but make sure you always stretch it lengthwise.
Give the dough a quarter-turn.
Fold one third of the dough over the centre...
... then fold the opposite side to complete the first turn. The dough is now folded in three parts.
The angles should be perfectly stacked and regular.
Position the dough like a book on your workbench, then roll out lengthwise. We're now starting the second turn.
Make sure the dough doesn't stick to the rolling pin or your workbench.
When the length reaches 3 times the width...
... give the dough a quarter turn.
Fold one third of the dough over the centre...
... then fold the opposite side. It doesn't matter whether you start by folding the right or left side, the point is simply to fold the dough into three parts.
Make a mark in the dough by sticking 2 fingers in. This means the dough has been folded 2 times. This is an important tip to help you remember how many times the dough was folded, in the event you want to continue the folding process later or if someone else does.
The second turn is now complete.
Wrap the dough with two sheets of cling film...
... to prevent it from drying at room temperature. (If left unwrapped, a dry skin will form on the surface, which is impossible to remove later.) Refrigerate for at least 2 hours before proceeding to the next 2 turns. This cooling time is essential for the success of this recipe (make sure you don't try to save time on this step).
Take the dough out of the fridge two hours later and place it on your workbench like a book.
Roll out the dough lengthwise until the length is 3 times the width.
Give the dough a quarter-turn.
Fold one side of the dough over the centre...
... then fold the opposite side. The sides and angles should be perfectly lined up.
Roll out the dough lengthwise. When the length is 3 times the width, give the dough a quarter turn. Fold one third of the dough over the centre...
... then fold the opposite side.
We have just completed four turns.
Make four finger marks in the dough. This recipe requires 5 turns in total. If you're making this pastry for a frangipane tart, you will need to complete six turns.
Wrap the dough with cling film. Refrigerate for at least 2 hours. I recommend allowing 2 days to prepare the puff pastry in advance. Make sure you follow the recommended cooling time.
Take the dough out of the fridge two hours later.
Position the dough like a book on your workbench, then roll out lengthwise.
When the length reaches 3 times the width...
... give the dough a quarter turn.
Fold one third of the dough over the centre...
... then fold the opposite side to complete the fifth turn.
Flatten the dough a little with the rolling pin to make sure the layers stick to each other. The five turns are complete, the puff pastry is done.
Make five finger marks in the dough as a reminder the turns are finished.
Wrap the dough with two sheets of cling film so an dry skin doesn't form on the surface. Refrigerate for at least 2 hours. If you wish to store your puff pastry in the freezer, make sure you refrigerate for 2 hours beforehand.
Take the dough out of the fridge and remove the cling film.
Place the dough on your floured workbench like a book.
Roll out with a rolling pin, stretching all sides of the dough.
Roll out to an even thickness. If the dough sticks to the worktop, sprinkle some more flour.
The thickness should be 3mm. When you get the desired shape and thickness...
... cover with a sheet of greaseproof paper (dimensions 60 x 40cm) and trim the sides of the pastry to the dimensions of the paper.
Wrap the puff pastry around the rolling pin, making sure to leave the greaseproof paper on...
... then unroll over a baking sheet with dimensions 60 x 40cm. This technique with the rolling pin ensures the pastry doesn't get damaged while handling it from the workbench to the baking sheet.
If you're using the puff pastry immediately after, set it aside for one hour at room temperature. For a later use, wrap with cling film and refrigerate for 12 hours. Make sure you don't leave the puff pastry in fridge for more than 48 hours. Small black pigments will appear on the surface of the pastry and will affect its taste.
Take the puff pastry out of the fridge.
Using a sheet of greaseproof paper as a guide, cut the puff pastry into two rectangles to dimensions 40 x 30cm. Only one rectangle is necessary to make one millefeuille. This recipe allows you to make two millefeuilles. You can store the leftover pastry in the freezer for a later use, making sure to lay it flat wrapped with cling film.
Transfer one puff pastry rectangle on a baking sheet lined with greaseproof paper.
Cover the dough with a second sheet of greaseproof paper.
Place an oven rack (upside down) over the puff pastry. Repeat the operation with the second pastry rectangle if you're making two millefeuilles.
Bake in a fan-assisted oven at 165°C (gas 3) for about 70 minutes. Halfway through baking, flip the tray for even cooking results. Baking time can vary according to the type of oven. Make sure you check the pastry after 60 minutes.
When cooked, take the pastry out of the oven and place it on your workbench.
Remove the rack and greaseproof paper. The puff pastry is perfectly cooked.
Place a baking sheet on top of the puff pastry...
... and flip the whole thing, using two tea towels to make sure you don't get burnt.
Sprinkle a thin layer of icing sugar over the whole surface of the puff pastry.
Sprinkle some castor sugar as well over the puff pastry. In the meantime, preheat the oven up to 220°C (gas 7), preferable with the grill function.
Return the puff pastry to the oven.
Check the caramelization to make sure the pastry doesn't burn.
When the whole surface of the pastry is caramelized, remove from the oven and place on your workbench. Leave to cool on a rack.
We cooked both pastry rectangles for this recipe, but we only need one to make one millefeuille.
For the vanilla crème pâtissière: Organise all the necessary ingredients.
Pour the whole milk in a saucepan.
Add half of the castor sugar and place the saucepan over medium heat.
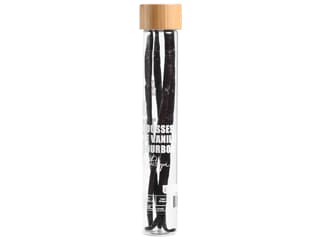
Split the vanilla pod lengthwise and scrape the seeds out with a knife.
Add the vanilla pod and seeds to the saucepan.
In a mixing bowl, tip the egg yolks...
... and the rest of the castor sugar...
... and blanch with a whisk. The preparation should become pale and sugar should slowly dissolve.
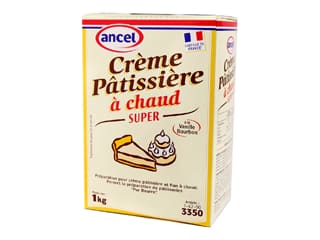
Add the crème pâtissière powder...
... and combine with the whisk.
When the milk starts boiling, pour half over the egg and sugar mix...
... and combine carefully with a whisk. Return the rest of the milk over the heat.
When the milk starts boiling, pour the preparation in a thin stream...
... while whisking. The cream should start to thicken. Continue cooking over medium heat for a few minutes. The cream will thicken first, then you will notice it will fluidify again. At this stage, the cream is cooked. You might find the cream runny, which is completely normal. It will thicken again while cooling down.
When the cream is cooked, add the butter cut into cubes...
... and whisk vigorously until the butter is completely incorporated.
Transfer the cream in to a large tray so it spreads to a thin layer. This will ensure the cream cools down fast.
Place cling film on the surface of the cream to prevent the formation of a crust. Leave aside to cool, then store in the fridge.
For the chocolate crémeux: Organise all the necessary ingredients.
Pour the whole milk in a saucepan...
... and add the whipping cream. Heat the ingredients.
In a mixing bowl, tip the egg yolks...
... and add half of the castor sugar.
Add the rest of the castor sugar to the milk and cream in the saucepan.
Blanch the egg yolks and sugar with a whisk...
... until the preparation is pale and fluffy. The sugar should dissolve completely.
When the milk starts boiling, pour half over the blanched preparation, while whisking. Return the rest of the milk back on the heat.
Pour the blanched preparation into the saucepan in one go.
Bring the cream to a boil while whisking constantly. This method is used for custard. Thanks the long blanching operation earlier, there is less risk to observe egg coagulation. The temperature normally shouldn't exceed 85°C for crème anglaise, but we can cook this cream until it starts boiling.
When the cream starts boiling, remove the pan from the heat. Continue whisking.
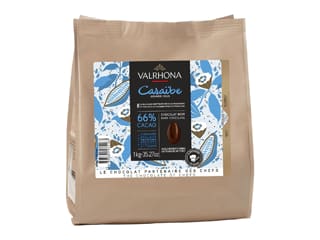
Pour the hot preparation over the Caraïbe dark chocolate chips (or any other dark chocolate couverture)...
... and whisk vigorously too melt and incorporate the chocolate...
... until smooth and homogeneous.
Transfer the cream into a food tray...
... and place cling film on the surface of the cream to prevent the formation of a crust. Reserve in the fridge.
For the coffee crème mousseline: Place 250 grams of vanilla crème pâtissière in the stand mixer bowl...
... and combine with the whisk attachment...
... until the preparation is smooth and homogeneous. In the meantime, melt the butter in the microwave.
Add the Trablit coffee extract to the crème pâtissière...
... and continue mixing. I don't recommend using a shot of espresso as it wouldn't incorporate well to the cream. Instead of liquid coffee extract, you can use coffee flavouring or coffee paste.
Add the melted butter (make sure it has cooled down first). If the crème pâtissière is really cold, you should use melted butter that has cooled down to room temperature. If the crème pâtissière is at room temperature, you should use soft butter. This tip is essential if you want to prevent curdling.
Combine carefully until the butter is totally incorporated.
The coffee crème mousseline should be perfectly smooth.
Place a rectangle of puff pastry on your kitchen worktop...
... and trim one side with a knife to create a neat finish.
Cut the puff pastry rectangle in half lengthwise...
... and trim the opposite side. Both strips should have the same width.
Trim the first strip on one end.
We can see the puff pastry is perfectly cooked. The colour is golden and homogeneous, which is essential for millefeuille.
Cut the pastry strip to a length of 20cm. These dimensions will make a millefeuille that serves 6 people.
Trim the second pastry strip on one end...
... then cut to a length of 20cm.
We will use the two puff pastry scraps to create a third tier. This won't be visible once the millefeuille is assembled. Line the two scraps together...
... and cut to the same dimensions as the pastry strips.
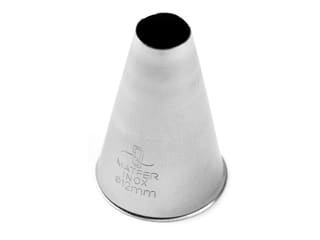
Transfer the coffee cream into a piping bag fitted with a plain nozzle (12mm diameter).
Place one pastry strip on a baking sheet lined with baking parchment.
Pipe the coffee crème mousseline into large drops on the puff pastry strip...
... along all four sides.
Gather the two pastry scraps on the baking sheet to create the second level.
Pipe the coffee crème mousseline into large drops along the sides of the second puff pastry strip.
Fill the gap in the centre with the coffee cream, this time not taking any particular precaution since it won't be visible once assembled.
Transfer the chocolate crémeux into a piping bag fitted with a plain nozzle (diameter 8mm). Pipe in the centre of each pastry strip...
...directly over the coffee crème mousseline. Make sure there is no chocolate crémeux over the coffee drops.
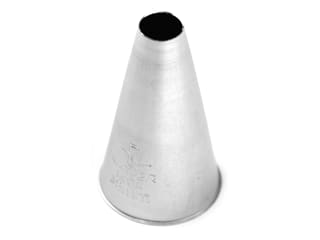
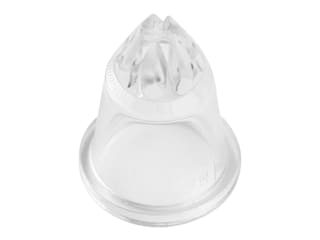
Place a fluted nozzle (diameter 12mm) at the end of the piping bag containing the coffee cream and hold it over the plain nozzle already in place.
Pipe a swirl of coffee crème mousseline in the centre of the third puff pastry strip. This will be the top tier of the millefeuille. This technique avoids the use of a piping bag that would be used for a swirl only.
At this stage, place the puff pastry strips topped with cream in the fridge or freezer for about 10 or 15 minutes until the cream is firm.
Take the two pastry strips out of the fridge (or freezer). The cream should now be firm enough to assemble the different levels.
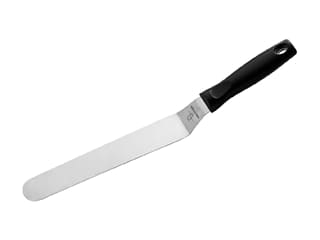
Using a metallic cranked spatula, assemble the bottom tiers. The pastry strip made of two parts should go at the bottom.
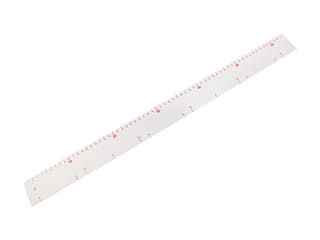
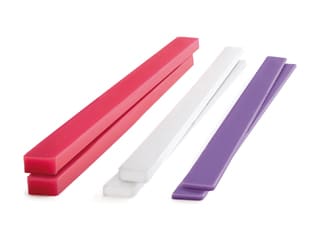
Place two rulers on either side of the top pastry strip (the one with the coffee cream swirl). Sprinkle both edges with Codineige decorating sugar.
Carefully remove the rulers...
...and arrange the third puff pastry strip on top.
Press gently with your fingers to make sure the top tier sticks to the cream.
The Opera millefeuille is now finished. Store in the fridge until ready to serve. Enjoy this beautiful, delicious dessert!
Please login to post a review