You can always send us your messages, comments or suggestions.
In one click, store and find all your favourite recipes.
Add this recipe >Before starting this Red Berry Chocolate Bars recipe, organise the necessary ingredients for the tempering operation (we're using the seeding method in this recipe). You can also follow the traditional method or the tempering technique using Mycryo cocoa butter.
For the dark chocolate shells (can be made the day before): Melt 2/3 of the dark chocolate in the microwave and stir every 20 or 30 seconds to make sure the chocolate doesn't burn.
In the meantime, chop the remaining chocolate with a knife, until you get small, regular chunks.
Stir the melted chocolate with a rubber spatula, then melt again in the microwave for 20 or 30 seconds.
The chocolate is slowly melting. Continue stirring and return to the microwave if necessary.
When melted, the chocolate should have a fluid consistency. Make sure the temperature doesn't exceed 50°C. The ideal temperature for use is between 45 and 50°C (I recommend using a laser thermometer). Stir the chocolate until homogeneous.
Add the chopped chocolate chunks in one go...
... and combine gently...
... until the chocolate chunks have completely melted.
A few seconds later, we can observe the temperature has gone down by almost 10°C.
Continue stirring until homogeneous. The temperature should go down to 31°C.
The temperature is slowly reducing. Continue stirring with the spatula. It is essential to be mixing the chocolate constantly.
Continue mixing the chocolate and make it come up the sides of the bowl in a thin layer so it cools down faster.
The temperature is slowly getting close to 31°C.
Continue stirring...
...until the chocolate has a temperature of 31°C. The chocolate is tempered and must be used immediately. Otherwise, maintain it at the right temperature during the whole recipe, using a bain-marie, a chocolate melting machine or a preheated oven.
Transfer the tempered chocolate into a piping bag.
We're using the dome chocolate bar mould for this recipe.
Cut the tip of the piping bag with scissors to obtain a small hole.
Fill the cavities with the tempered dark chocolate...
... making sure to fill up to the rim of the mould.
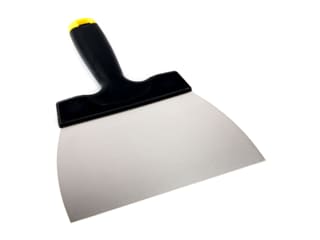
Tap the sides of the mould with a chocolate spatula to get rid of air bubbles.
You can observe the air bubbles on the surface of the chocolate.
Flip the mould over the bowl to get rid of the chocolate excess.
Tap the sides of the mould with the spatula so the chocolate excess drips off. The chocolate shell should be thin.
Scrape the surface of the mould with a chocolate spatula to create perfectly neat edges. All the chocolate excess will drip off.
Place the mould on your kitchen worktop and scrape the surface again.
Flip the mould onto a sheet of greaseproof paper and leave to crystallize, ideally in a cool room at 17 or 18°C (do not refrigerate).
For the red berry confit: Organise all the necessary ingredients.
Place the red berry purée and fresh (or frozen) berry mix in a saucepan. I used frozen berries for this recipe.
Add 3/4 of the castor sugar and the citric acid powder.
Combine the rest of the castor sugar with the pectin NH coating. It is essential to combine the pectin and castor sugar together beforehand to avoid lumps. If lumps form, it will be impossible to dissolve them later.
Combine the ingredients gently with a whisk while heating.
When smoke starts to come out of the purée, add the pectin and sugar mix.
Cook for 1 or 2 minutes to activate the properties of the pectin. Make sure you cook the preparation over medium heat so it doesn't burn.
Transfer the hot purée into a food tray so it spreads to a thin layer. This will ensure a faster cooling process.
Cover the surface of the purée with cling film to prevent the formation of a crust.
Leave to cool at room temperature. Up to this stage, this recipe can be made 1 or 2 hours in advance.
When the confit has cooled down, remove the cling film. It should come off easily.
The preparation is now at a temperature of 26°C, which is the ideal temperature for use.
Transfer the red berry confit into a mixing bowl...
... and combine with a whisk until smooth and homogeneous.
Transfer the red berry confit into a piping bag...
... and close the top of the bag with a knot.
Take the mould with the crystallized dark chocolate. I recommend leaving the dark chocolate to crystallize overnight.
The chocolate colour should be homogeneous and glossy. Poorly tempered chocolate often comes with white marks on the surface and is almost impossible to release from the mould.
Cut the tip of the piping bag to obtain a diameter of about 1cm...
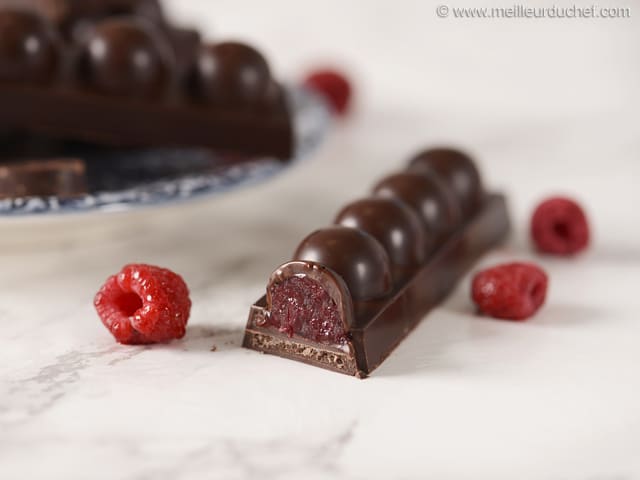
...and fill the cavities with the red berry confit. Leave a small gap on top for the dark chocolate shell.
Even the surface with the spatula. Make sure the filling isn't overflowing from the top of the mould. Set aside at room temperature for 1 to 2 hours so a thin crust forms on the surface of the red berry confit.
Sealing the chocolate shells: There are two possibilities for this operation. You will need to temper a small batch of dark chocolate (this should take 10 or 15 minutes), unless you have kept the tempered dark chocolate excess at the required temperature the whole time using a bain-marie, melting machine or an oven. Obviously this will depend if you choose to make this recipe over several days or do it all in one day. I made this recipe in two days. Temper dark chocolate using the seeding method.
Melt 2/3 of the dark chocolate in the microwave and stir every 30 seconds until the temperature reaches 45/50°C. Chop the rest of the chocolate.
Add the chopped chocolate chunks, then stir constantly until the chocolate has completely melted and the temperature goes down to 31°C.
Transfer the tempered dark chocolate into a piping bag.
Cut the tip of the piping bag to obtain a very small hole...
... and pipe the tempered dark chocolate over the red berry filling to seal the shells.
Tap the sides of the mould with the spatula to get rid of air bubbles and to fill any gaps inside the cavities.
Even the surface of the chocolate with the spatula and place the mould on your workbench. Leave to crystallize.
When the chocolate has crystallized completely, scrape the surface of the mould again to ensure perfectly neat edges.
Flip the mould over your workbench, then give it a sharp tap.
If the tempering was done correctly, the chocolate bars should come off easily.
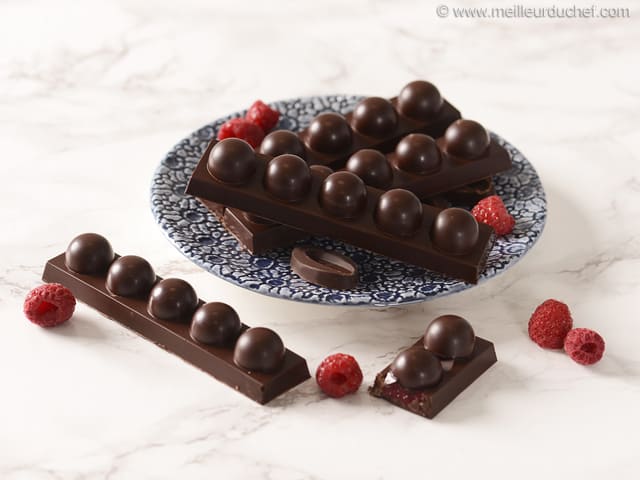
These delicious chocolate bars are now ready to serve! Enjoy this delicious treat!
The tempered chocolate excess can be reused later for another recipe, or incorporated in a chocolate cake preparation.
Please login to post a review