You can always send us your messages, comments or suggestions.
In one click, store and find all your favourite recipes.
Add this recipe >Before starting this Caramel & Lemon Chocolates recipe, make sure you have organised all the necessary ingredients for the green shells. First, combine the pear liqueur (or kirsch) with the colouring powder (gold or silver). Transfer the mixture into the spray gun.
Test the spray gun on a piece of greaseproof paper and check whether the result is regular. Use the switch on the spray gun to adjust the output.
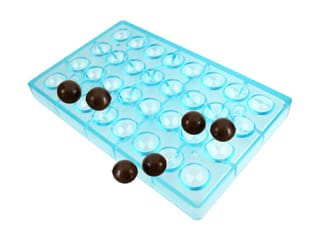
Spray a very thin layer of the coloured mixture on the cavities of the polycarbonate mould. Spray at a distance of about 40 or 50 cm.
On the surface, you should see tiny alcohol marks that will evaporate within a few minutes. Only the silver (or gold) colour will remain.
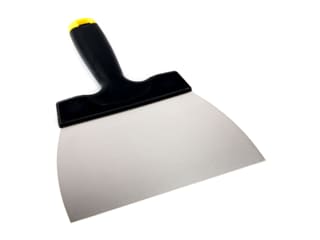
Once the alcohol has completely evaporated, scrape the surface of the mould with a chocolate spatula to remove any residue.
Set aside.
Tempering the green cocoa butter: Heat the cocoa butter up to 45°C, then let the temperature go down to 34°C. At this stage, add the Mycryo cocoa butter (2 grams for 200 grams of chocolate) and combine, then let cool down to 29°C.
Fill the spray gun recipient with the tempered green cocoa butter.
Do a test spray on greaseproof paper to adjust the output texture...
... and when it is very fine, spray a thin layer on the cavities of the polycarbonate mould.
Leave to crystallize until the cocoa butter has set.
Scrape the surface of the mould again to remove cocoa butter excess.
Spray the mould with white cocoa butter. Note that this cocoa butter has been tempered beforehand, following the same operation as for the green cocoa butter.
This white cocoa butter is used to create an opaque effect on the surface. We recommend spraying 2 layers for better results.
Leave the cocoa butter to set again.
When set, scrape the surface of the mould again to remove cocoa butter excess. If necessary, scrape the surface a few times so that the surface is perfectly neat.
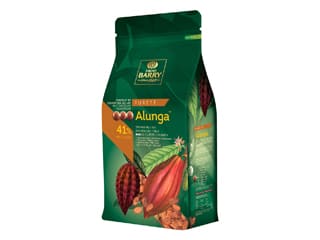
Tempering the Alunga milk chocolate: In a bain-marie, melt the milk chocolate couverture and bring to a temperature of 45°C. Then let cool down to 34-35°C...
... and add the Mycryo cocoa butter, pouring it into a thin stream.
Combine with an Exoglass® spatula.
Wait for the temperature to go down to 29°C, combining regularly. Monitor the temperature using a probe thermomete or laser thermometer.
For the moulding: Pour a thin layer of milk chocolate into the mould cavities.
Using the chocolate spatula, even the surface.
Gently tap the sides of the mould with the spatula handle to knock out any air bubbles.
Flip the mould onto a sheet of greaseproof paper...
... and gently tap the mould again to get rid of the chocolate excess.
Scrape the surface with the spatula, going from bottom to top...
... to remove the chocolate excess. Note: The excess chocolate should be kept at 29°C if you wish to use it again later. If the chocolate sets, you will need to repeat the tempering process with Mycryo cocoa butter.
Leave in a cool place (cellar for instance), but do not place in the fridge.
For the caramel and lemon ganache: Organise all the necessary ingredients.
Pour the sugar in a saucepan to make a caramel, without adding water.
In a separate saucepan, pour the lemon purée and the butter. Cook over medium heat. In the meantime, caramelize the sugar.
In a separate recipient, place the Alunga milk chocolate and Ocoa dark chocolate. Set aside.
When the sugar starts caramelizing, stir with the Exoglass spoon to obtain a homogeneous consistency and colour.
When you obtain a golden caramel...
... add the lemon and butter preparation. Combine with a whisk. Take extra precautions to avoid getting burnt by splashes of hot caramel. Add the lemon and butter preparation in separate gos.
Still on the heat, gently tip the saucepan back and forth to melt the caramel thoroughly.
Let the preparation go down to 80°C.
Pour the preparation over the chocolate pistoles, without stirring.
The chocolate chips should start melting slowly...
... then combine with a whisk until all the chocolate solids have melted.
The ganache is ready; it will be used as a filling later. Let the ganache preparation go down to 28°C first.
Filling the chocolates: For a quicker cooling down process, pour the ganache preparation into a piping bag fitted with a plain nozzle (5mm diameter)...
... and leave the bag as shown, flat on your workbench.
Fill up the cavities with the ganache preparation, and stop just a little below the rim.
Once all the cavities have been filled, tap the mould on the workbench to create an even surface. Store in a cool room for 12 hours (at a temperature of 17°C) to ensure a better crystallization.
For the base layer: Pour some crystallized chocolate over one half of the mould...
... and spread over the whole surface with the chocolate spatula.
All cavities are now covered with the base layer.
Tap the mould on the workbench again, then place it in a cool room (17°C) for the chocolate base to set.
Release from the mould: Slightly twist the mould to facilitate the release.
Turn the mould upside down onto a chopping board...
... and tap the surface of the mould with the spatula handle. This technique prevents breakage or damage.
Gently lift up the mould.
Most chocolates should come off easily.
If some chocolates are still stuck to the mould, give the mould a sharp rap on the workbench to loosen the chocolates.
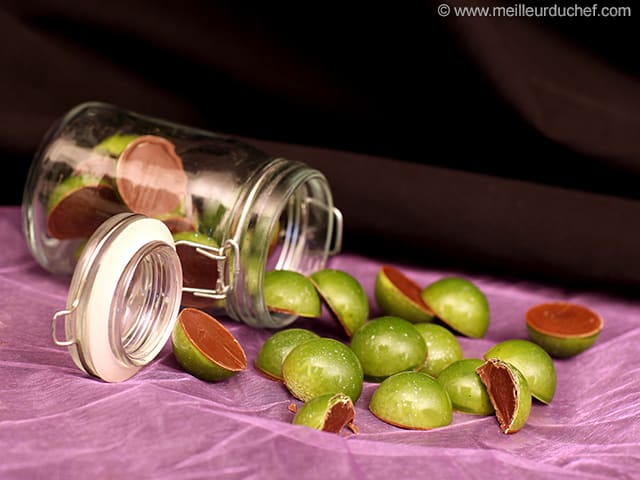
The chocolates should have a glossy finish. You should be able to notice the colour effects distinctly: silver, green and white.
Please login to post a review