


Cookies 🍪
By clicking "Accept", you authorize Meilleur du Chef to store cookies on your device to personalize site content, analyze our traffic, and provide social media functionality.
Favourites


In one click, store and find all your favourite recipes.
Add this recipe >
Raspberry marbled cocoa soft sponge: To make this Easter basket with chocolate eggs & red berries, start by making the raspberry marbled cocoa soft sponge. Prepare the ingredients for the raspberry confit.

Pour the raspberry purée into a saucepan and bring to the heat.

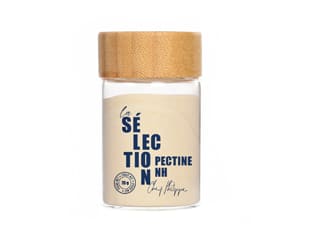
Meanwhile, mix the small quantity of caster sugar and the NH coating pectin together. The latter must always be mixed with caster sugar before being incorporated into a preparation to prevent it from forming lumps.
Please note, NH coating pectin cannot be replaced by another pectin or gelling agent.

When the raspberry purée begins to heat and reaches approximately 50°C, add the sugar and pectin mixture while whisking the preparation to prevent lumps from forming.

Continue cooking, whisking continuously, until it reaches a boil.

Maintain this boil for 1 minute to activate the properties of the pectin; otherwise, your confit will not set sufficiently and may remain liquid.
This cooking process must be done while whisking the preparation constantly.

Then transfer this raspberry mixture into a food container and cover the surface with cling film. Leave to cool at room temperature before placing it in the fridge to set.

Once the raspberry confit has set, remove the container from the fridge and remove the cling film.

Pour this confit into a bowl and whisk vigorously until smooth. Place the confit into a piping bag and pipe it onto a sheet of baking parchment in a zigzag pattern, as shown here in the photo, over a square of approximately 20 x 20 cm.

Cross the zigzags to obtain a raspberry confit grid...

...as shown in the photo. Place in the freezer.

Now prepare all the ingredients for the cocoa soft sponge. This sponge will be made once the raspberry confit grid is completely frozen.

Pour the whole eggs and the large quantity of caster sugar into a pastry bowl...

...and blanch this preparation with a hand whisk for 1 minute. We are just looking to create a homogeneous mixture, without whisking it excessively.

Add the ground almonds...

...as well as the flour...

...and the cocoa powder.

Mix everything with the whisk...

...until you obtain a smooth and homogeneous preparation.

Finally, add the butter previously melted in the microwave.

Remove the raspberry confit grid from the freezer and cut it using a mousse ring Ø 14cm, which we will use here as a cutter to obtain a confit disc.

Press down firmly with both hands to cut the raspberry confit.

Then flip the whole thing onto a second sheet of baking parchment and gently peel off the bottom sheet without damaging the confit.
This operation must be carried out quickly before the confit has time to defrost.

We achieve this result. The raspberry confit grid disc is in the centre, and the confit scraps around it will also be used.

Take a baking tray and cover it with a sheet of baking parchment, which should be lightly greased with oil spray.

Place a mousse ring Ø 16cm in the centre and pour half of the cocoa soft sponge batter into the bottom of the ring.
It is not necessary to grease the inside of the stainless steel ring.

Spread the cocoa batter using a mini cranked spatula to an even thickness.

Then place the still-frozen raspberry confit grid in the centre of the stainless steel ring, directly in contact with the chocolate preparation.

Use the confit scraps to fill any empty spaces, as shown here in the photo.

Cover the raspberry confit with the remaining cocoa soft sponge batter...

...and smooth the surface with the mini cranked spatula so that the raspberry confit is completely covered.

This is what the result should look like.

Place the tray in a fan oven, preheated to 170°C, and bake for 10 to 12 minutes (this baking time may vary from one oven to another).

Once baked, remove the sponge from the oven. It is possible that it may have leaked slightly from under the ring, as seen in the photo; this is not a problem as very little material escapes.

Place this raspberry marbled cocoa soft sponge on the work surface and leave to cool at room temperature.

Raspberry rose insert with seeds: Prepare all the ingredients.

Pour the raspberry purée and the whole raspberries (fresh or frozen) into a saucepan. Heat over medium heat.

Mix the NH coating pectin with the caster sugar to prevent lumps from forming.
This pectin cannot be substituted by another gelling agent.

When the preparation reaches approximately 50°C, add the pectin mixed with sugar while whisking these elements together.

Continue cooking and whisking until the raspberries break apart, release their juice, and turn into a purée themselves.

Bring the preparation to a boil...

...and maintain this boil for 1 minute, again to activate the properties of the pectin. You must continue to whisk the preparation to prevent lumps from forming.

Once cooked, remove the saucepan from the heat and add the lemon juice...

...as well as the rose water and mix thoroughly. Rose water is optional and quantity depends on the flavour intensity you wish to achieve. Don't hesitate to taste the preparation!

We obtain our raspberry rose confit with seeds, which will be used in the composition of the dessert insert.

Transfer this confit into a food container and cover the surface with cling film.

Leave to cool at room temperature before placing the confit in the fridge.

Raspberry marbled cocoa soft sponge (continued): Once the raspberry marbled cocoa soft sponge has cooled, detach it from the mousse ring by passing a knife blade between the sponge and the stainless steel ring.

Then gently remove the ring to release our chocolate sponge.

Here is the raspberry marbled cocoa soft sponge, which will serve as the base for our dessert. The marbling is visible from the underside, as we will see later.

Dark chocolate crémeux: Prepare all the ingredients. Do not rely on the quantities in the photos; I made a larger batch that day.

Pour the milk into a saucepan...

...as well as the whipping cream and bring to a boil.

Pour the egg yolk and caster sugar into a pastry bowl...

...and blanch them until pale.

Once the milk and cream are boiling, pour them over the whisked mixture while whisking until homogeneous.

Then transfer everything back into the saucepan used to cook the milk and cream.

Cook 'à la nappe' (until the consistency is thick enough to coat the back of a spoon) like a custard, forming 8-shaped motions with the spatula at the bottom of the saucepan, without exceeding 82°C.
The use of an electronic probe thermometer is recommended here.

Filter this cream by pouring it through a fine sieve placed over a bowl in which the dark chocolate pistoles have been placed. This dark chocolate can be previously melted in the microwave in 20 to 30-second intervals, stirring every time to prevent burning.

Mix the boiling cream with the dark chocolate.

Add the fine salt and finish mixing using a hand blender to obtain a smooth and homogeneous preparation.

Assembling the insert: Take the mousse ring Ø 14cm and place it on a baking tray covered with a sheet of cling film.

Insert an acetate strip cut to the correct length inside the stainless steel ring.

After smoothing the raspberry rose confit with a whisk, pour it into a piping bag.
Pipe the preparation into the bottom of the ring to a thickness of approximately 1cm.

Smooth the surface of the confit using the mini cranked spatula...

...as shown in the photo.

Then pour the dark chocolate crémeux into the mousse ring, directly in contact with the raspberry rose confit, also to a thickness of approximately 1cm.

This is what the result should look like.

Cover the stainless steel ring with cling film and place in the freezer.

Crunchy cocoa praline: Prepare all the ingredients.

Melt the milk chocolate in the microwave in 20 to 30-second intervals, stirring every time.

When it is melted, add the hazelnut praline...

...and mix quickly with a spatula.

Add the pailleté feuilletine flakes...

...as well as the fleur de sel...

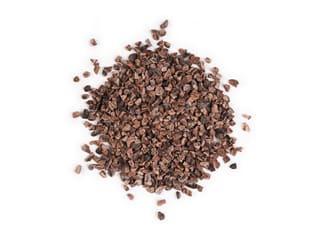
...and the cocoa nibs.

Mix all these elements together carefully until a homogeneous preparation is obtained.

Here is our finished crunchy cocoa praline.

Transfer this crunchy filling onto the raspberry marbled cocoa soft sponge, around which we have placed a mousse ring of the same diameter and an acetate strip to facilitate removal.

Spread the crunchy filling over the entire surface of the sponge to a thin, even thickness using the mini cranked spatula.

Place in the freezer.

Jivara milk chocolate mousse: Prepare all the ingredients.
Mix the powdered gelatine with the hydration water (tap water or mineral water) and leave to hydrate for 15 minutes.

Start by whisking the whipping cream into a soft whipped cream.

Boil the milk in a saucepan, then pour it over the milk chocolate pistoles to begin melting them. You can also melt the chocolate beforehand to make incorporation easier.

Mix vigorously with a spatula to thoroughly dissolve all the chocolate in the boiling milk and form an emulsion.

Once the cream is whisked, we obtain a soft whipped cream, as shown here in the photo.

Add 1/3 of this soft whipped cream to the chocolate preparation...

...and mix quickly with a whisk.

Add the remaining soft whipped cream...

...and fold in gently with a spatula until a smooth and homogeneous preparation is obtained.

If necessary, finish by giving two or three quick whisks to eliminate any remaining lumps of whipped cream.

Here is our Jivara milk chocolate mousse; its texture should be very soft.

Assembly: Place the silicone basket mould on a baking tray.

Pour the milk chocolate mousse into the mould, filling it to 1/3 of its height.

Remove the raspberry rose and dark chocolate crémeux insert from the freezer. Release this insert...

...and remove the acetate strip.

Place the insert into the mould, positioning the dark chocolate crémeux directly in contact with the milk chocolate mousse, so the raspberry part is facing upwards.

Gently press the insert into the mousse with your fingertips.

Add a little more Jivara milk chocolate mousse over the insert if necessary.

Release the raspberry marbled cocoa soft sponge...

...and remove the acetate strip.

Place the sponge in the mould, with the crunchy cocoa praline side directly in contact with the milk chocolate mousse, so the marbled cocoa sponge side is on top.

Gently press the sponge down until the excess mousse rises up the sides of the mould.

Remove the excess mousse using the mini cranked spatula.

Finish by cleaning the edges of the mould with paper towels.

Cover the surface with cling film and place in the freezer. This dessert can be made up to this stage several days or even several weeks in advance, kept protected in the freezer.

Dark chocolate Easter eggs: We will temper the dark chocolate using the seeding method. To do this, finely chop the smaller quantity of dark chocolate with a knife.

The larger quantity of dark chocolate will be melted in the microwave in 20 to 30-second intervals, stirring every time, without exceeding 45/50°C.

Once the dark chocolate is entirely melted and reaches a maximum of 50°C, add the freshly chopped chocolate all at once...

...and mix to incorporate the chopped chocolate into the melted chocolate.

The chocolate mass will cool quickly, and it is possible that once the temperature reaches 31/32°C (ideal working temperature), some unmelted lumps may remain. If so, use a hair dryer or heat gun to melt them.
Note: only reheat the surface of the chocolate mass very slightly by 1 to 2°C maximum.

When the dark chocolate is completely melted and reaches 31/32°C, it is tempered and ready to use.

Immediately pour the 31/32°C dark chocolate into a piping bag (without a nozzle). Snip the tip to create a small opening to control the flow...

...and pipe it into the cavities of the crackled half-egg chocolate mould...

...as shown in the photo.

Tap the mould on the work surface to smooth the surface of the dark chocolate.

This is what the result should look like.

Place the mould over a sheet of baking parchment to catch the excess and run a chocolate spatula over the mould to level the surface.

Leave the dark chocolate to crystallise at room temperature, preferably in a cool room (18/19°C).

White chocolate Easter eggs: For the white chocolate, we will use the tempering method by seeding. Finely chop the smaller quantity of white chocolate with a knife.

The larger quantity of white chocolate will be melted in the microwave in 20 to 30-second intervals, stirring every time, without exceeding 45°C.

Once the white chocolate is entirely melted and reaches a maximum of 45°C...

...add the chopped chocolate all at once...

...and mix to incorporate it into the melted chocolate.

Mix the chocolate until it reaches 28/29°C (ideal working temperature for white chocolate). Use a hair dryer or heat gun if necessary.

When the white chocolate is completely melted and reaches 28/29°C, pour it into a piping bag (without a nozzle). Snip a small hole to control the flow.

Fill the crackled half-egg chocolate mould with this tempered white chocolate...

...filling all the cavities.

Tap the mould on the work surface to smooth the surface and release any air bubbles.

Place the mould over parchment paper and level with the chocolate spatula. Leave to crystallise at room temperature in a cool room.

Milk chocolate Easter eggs: Proceed in the same way with the milk chocolate, without exceeding 45°C and sticking to the working temperature of 29/30°C. Fill the cavities...

...and tap gently on the work surface to release air bubbles and smooth the surface.

Run the chocolate spatula over the mould to level it.

This is what the result should look like. Leave to crystallise at room temperature in a cool room.

Once all the chocolates have crystallised, take the mould with the dark chocolate...

...and flip it over a sheet of baking parchment. Apply a slight twist to the mould...

...so that the dark chocolate half-eggs release. They will come off easily if the tempering was done correctly. If your chocolate has white marks, marbling, or won't release, it probably means the tempering was unsuccessful.

Reposition half of the dark chocolate half-eggs back into the mould to prepare for assembly.

Repeat the operation with the white chocolate mould...

...flipping it and twisting it slightly.

Our white chocolate half-eggs are now released from the mould.

Replace half of them back into the cavities.

To stick the half-eggs together, heat a saucepan on the hob until the bottom is warm. Wearing chocolate gloves to avoid fingerprints, place the flat side of a half-egg on the warm saucepan bottom. The rim will melt...

...allowing you to press it against a half-egg still sitting in the mould.

Repeat for all white chocolate half-eggs and leave to crystallise in a cool room.

Proceed the same way with the dark chocolate half-eggs...

...to achieve this result.

Release the milk chocolate half-eggs...

...turning the mould over and twisting the plate slightly.

Our milk chocolate half-eggs are now released.

Reposition half of them back into the cavities.

Melt the flat side of the remaining milk chocolate half-eggs on the warm saucepan...

...and assemble them with the halves in the cavities.

Our milk chocolate eggs are now done; leave them to crystallise at room temperature in a cool room.

Raspberry confit: Prepare the ingredients.

Pour the raspberry purée and half of the caster sugar into a saucepan and heat.

Add the other half of the sugar to the NH coating pectin...

...and mix them together.

When the purée reaches about 50°C, add the pectin-sugar mixture while whisking.

Bring to a boil and maintain for 1 minute, whisking constantly to prevent lumps and activate the pectin.

Transfer this raspberry confit into a food container...

...and cover with cling film. Leave to cool at room temperature before refrigerating.

Coating with velvet spray: On the day, remove the silicone mould from the freezer at the last moment and remove the film.

Release the dessert by peeling the mould away from the sides...

...then flip it over and peel the mould back to extract the cake. This must be done quickly to prevent the dessert from softening.

Place the dessert on a tray covered with cling film. Place this tray on an electric turntable to make the coating operation easier.

Shake the caramel velvet effect spray well until the ball inside rattles. Spray from a distance of about 30cm away, rotating the tray to cover all sides evenly.

Our Easter dessert is now fully coated.

Transfer the dessert onto a serving platter using two cranked spatulas. Place in the fridge to defrost completely for 4 to 5 hours. Decoration should only be done once it is fully thawed.
If you prefer to plan ahead, you can unmould and spray the day before and finish the decoration on the day.

Finish: Remove the raspberry confit from the fridge and remove the film.

Pour the confit into a bowl and whisk vigorously...

...until smooth.

Transfer the smooth confit to a piping bag (no nozzle needed)...

...and pipe it directly into the hollow part of the dessert. Keep the excess in the bag for final decoration.

Spread the confit with a mini cranked spatula to an even thickness of 2 to 3mm; it must be perfectly flat and smooth.

We achieve this result.

Prepare all the decorating elements: raspberries, redcurrants, blueberries, chocolate eggs, and chopped pistachios. Here, the decoration also includes a chocolate chick (optional).

Begin arranging the fruit in the hollow part, directly on the confit. Place the chocolate chick as well.
Note: Be careful not to damage the braided border. The confit helps hold the decoration in place so it doesn't collapse when sliced.

Interspace the chocolate eggs between the fruit, alternating between dark, milk, and white chocolate.

Gradually add more fruit...

...and more eggs to mimic a basket of fresh fruit. Place some raspberries with the opening facing upwards.

Fill the upward-facing raspberries with the remaining raspberry confit or purée.

Finally, sprinkle the dessert with chopped pistachios.

Our Easter Basket entremets is now finished. Keep refrigerated until ready to serve. Enjoy!
Please login to post a review
