






Cookies 🍪
By clicking "Accept", you authorize Meilleur du Chef to store cookies on your device to personalize site content, analyze our traffic, and provide social media functionality.


Favourites



In one click, store and find all your favourite recipes.
Add this recipe >
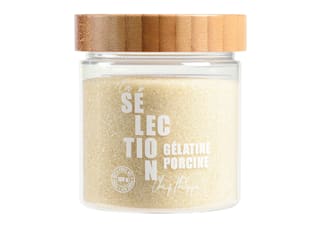
Peanut & miso caramel insert: To make this peanut trompe l'œil recipe, start by preparing all the ingredients for the peanut miso caramel insert. Mix the powdered gelatine with the hydration water (tap water or mineral water), and leave to hydrate for at least 15 minutes.

Pour the whipping cream into a saucepan and bring to a boil.

Once boiling, remove the saucepan from the heat and set aside. Pour the caster sugar into a second saucepan...

...and heat it until it turns into a syrup, then a caramel.

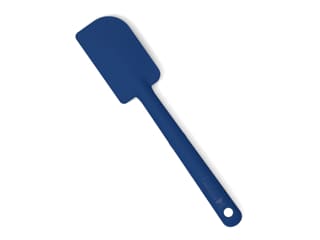
You can stir the sugar during cooking using a spatula. The lumps of sugar formed in the caramel will gradually melt.

Push the cooking of the caramel until it starts to foam slightly on the surface, as shown here in the photo. Be careful not to exceed this cooking stage, as caramel that is too dark will turn bitter.

Deglaze the caramel with the previously heated boiling cream...

...and mix vigorously to dissolve it into the hot cream.

When the mixture is smooth, add the butter all at once, and mix with the spatula.

Also add the peanut praline...

...and mix again with the spatula.

Add the white miso paste...

...as well as the hydrated gelatine and mix vigorously.

Transfer everything into a measuring jug (or another tall, narrow container)...

...and blend using a hand blender until a smooth and homogeneous mixture is obtained.

Add the roasted peanuts, previously chopped with a knife, and mix thoroughly.

Pour this resulting peanut miso caramel into the cavities of the mini yule log silicone mould.

Scatter a few whole roasted peanuts over the surface of the caramel...

...and smooth with an offset spatula to incorporate the peanuts into the caramel.

Cover directly with cling film and place in the freezer.

Crisp almond-lime shortbread: Prepare all the ingredients.
Do not rely on the quantities visible in the photos; on that day, I was making several desserts, so the quantities shown in the photos are much larger than those listed in the recipe ingredients.

In the stand mixer bowl, pour the butter at room temperature and the icing sugar.

Start mixing with the paddle attachment at moderate speed.

When the butter and icing sugar mixture is smooth (this is called "crémer")...

...add the almond powder, which is toasted here, although the recipe could also be made with blanched almond powder...

...as well as the lime, freshly zested directly over the bowl.

Add the previously weighed whole egg.

Then mix until fully incorporated.

Add the flour and the fleur de sel.

Mix again until a smooth dough is obtained.

The mixing should be done without overworking the dough. As soon as all dry ingredients are incorporated, the dough is ready.

Place this crisp almond-lime shortbread dough onto a sheet of parchment paper.

Cover with a second sheet of parchment paper and flatten slightly with your hand.

Roll out the dough with a rolling pin to an even thickness of 3mm. Roll out lengthwise...

...as well as widthwise.

This is what the result should look like.

To ensure an even layer, I used 3mm thick levelling strips. All you need to do is slide the rolling pin over them.

Transfer the dough onto a baking sheet and refrigerate for at least 30 minutes (or 10 minutes in the freezer).

When the dough has chilled thoroughly, remove it from the fridge and peel off the top sheet. Reposition the sheet onto the dough, flip the whole thing over, and remove the second sheet of parchment paper to release the dough.

Take the cutter provided with the peanut silicone mould and cut out the dough using the smaller side of the cutter to obtain peanut-shaped dough bases. Any remaining dough can be frozen for later use.

Here are our dough bases, which will serve as the base for the individual desserts, placed on a baking sheet lined with parchment paper. Feel free to make a few extra shortbreads in case of breakage.

This is what the result should look like.

Bake in a preheated fan-assisted oven at 170°C for 10 to 12 minutes. This cooking time may vary from one oven to another.

When cooked, remove the sheet from the oven...

...and leave the shortbreads to cool at room temperature.

Milk chocolate-peanut shell: Prepare the ingredients.

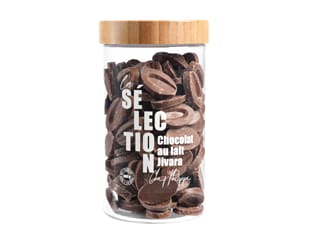
Melt the milk chocolate in the microwave in 20 to 30 second intervals, stirring every time so it does not burn. The chocolate must be completely melted without exceeding 45°C.

Add the peanut praline...

...and mix these two elements together until smooth.

Transfer this milk chocolate peanut mixture into a piping bag. A nozzle is not needed.

Pipe the milk chocolate peanut mixture into the silicone mould, distributing it across the 6 peanut-shaped cavities.

Spread the mixture up the sides of the cavities using a mini offset spatula, ensuring no bare spots remain.

When the 6 cavities are well coated, flip the mould over onto a wire rack set over a baking sheet lined with parchment paper. Shake the mould gently with your hands to drain the excess milk chocolate peanut mixture, creating a very thin chocolate shell.

Turn the silicone mould right side up and verify that each cavity is evenly coated with chocolate.

Smooth the surface of the mould with the mini offset spatula to trim the edges for a clean finish.

Leave the peanut chocolate to set in the fridge.

Peanut crunchy layer: Prepare all the ingredients.

Melt the milk chocolate in the microwave in 20 to 30 second intervals, stirring every time, without exceeding 45°C.

Add the peanut praline...

...and mix with a spatula.

Add the pailleté feuilletine flakes...

...and mix until homogeneous.

Finally, add the fleur de sel...

...and mix again.

Take the cooled shortbreads and turn them over.
It is important to remember to turn them over so they face the correct direction for the assembly process later. If these biscuits are not turned over, you will run into an issue at step 100.

Spread the peanut crunch onto the top side of the shortbread...

...applying a thin layer 2 to 3mm thick. Proceed carefully with the mini spatula as these bases are small. Place in the fridge so the crunch sets.

Light peanut coffee mousse: Prepare all the ingredients. Hydrate the powdered gelatine in the hydration water for at least 15 minutes.

Bring the milk to a boil, then remove from heat before adding the whole coffee beans.

Stretch a sheet of cling film over the top of the saucepan and leave to infuse for 1 hour.

After 1 hour, remove the cling film...

...and strain the milk through a fine sieve into another saucepan to remove the coffee beans. Reheat the milk.

Meanwhile, pour the egg yolks and caster sugar into a mixing bowl...

...and blanch with a whisk until you no longer hear the crunching sound of sugar grains rubbing against the bottom of the container.

Then pour the boiling coffee-infused milk over this blanched mixture while whisking.

Pour everything back into the milk saucepan...

...and cook 'à la nappe' without exceeding 82°C, stirring constantly in 8-shaped motions with the spatula at the bottom of the saucepan. Cooking must be slow and gradual. Using a probe thermometer is recommended for best results. The crème anglaise is done when the foam on its surface disappears.

When the coffee-flavoured crème anglaise is cooked, add the peanut praline...

...and mix carefully with the spatula.

Finally, add the hydrated gelatine...

...and incorporate by mixing vigorously. It will melt into the warm preparation.

Blend everything with the immersion blender until smooth and homogeneous.

Transfer this peanut and coffee flavoured cream into a food container to cool at room temperature. Do not place in the fridge here, to prevent the mixture from setting.

When the mixture has cooled down but remains lukewarm, pour it into a mixing bowl.

Beat the whipping cream into soft whipped cream using an electric mixer. Add half of this soft whipped cream to the peanut and coffee mixture.

Whisk quickly without taking special precautions.

Then add the remaining whipped cream...

...and fold in gently with a spatula...

...until our light peanut coffee mousse is smooth and homogeneous...

...as shown here in the photo.

Transfer this mousse into a piping bag (without a nozzle).

Assembly: Remove the inserts from the freezer, and the chocolate shells and bases from the fridge.

Pipe the light peanut coffee mousse into the chocolate shells up to half height.

Release the peanut miso caramel inserts, which must be frozen to the core for optimal results (take them out of the freezer at the last minute). Cut 3 inserts in half to match the length of the individual desserts.

Assemble 1 whole insert + 1 half insert to reach the ideal length.

Place the reassembled inserts (1 whole + 1 half) into the peanut silicone mould, rounded side touching the light peanut coffee mousse and flat side facing up.

This is what the result should look like.

Fill the mould cavities with the remaining light peanut coffee mousse.

Smooth the surface with the mini offset spatula, taking care not to leave any air pockets inside.

Close the cavities with the bases, peanut crunch side touching the mousse and shortbread side facing up.
If the shortbreads were not turned over after baking at step 65, they will not fit the shape of the mould properly.

Press the bases down gently with your fingertips to expel any excess mousse around the sides of the mould. Remove the excess mousse with the mini offset spatula.

Cover directly with cling film...

...and place in the freezer. This recipe can be prepared up to this step several days, or even several weeks in advance, before finishing.

Coating: Prepare the ingredients.

Melt the Dulcey blond chocolate in the microwave in 20 to 30 second intervals, stirring every time.

When the chocolate is partially melted, add the Mycryo cocoa butter (or cocoa butter chips), previously melted in a saucepan over very low heat...

...while mixing with a hand blender, until smooth and homogeneous. The ideal working temperature for this coating is 32°C.

Remove the silicone mould from the freezer and peel off the cling film. Gently release the peanut desserts by first pinching the edge of the cavity to loosen it slightly, then unmoulding the peanuts by pressing underneath the mould...

...and peeling it back as shown here in the photo. The desserts must be frozen to the core for optimal results.

We get our 6 peanut-shaped desserts, placed on a baking sheet.

Insert the tip of a knife underneath a peanut to secure it firmly on the blade.

Dip one peanut into the Dulcey blond chocolate coating...

...up to its base. Avoid coating the peanut entirely. It must still be frozen to the core to proceed with the dipping.

Lift the dessert out of the mixture and allow it to drain. You can tap the knife on the edge of the container to let the excess coating run off.

Then place the coated peanut onto the baking sheet. Repeat for all the peanuts.

Our trompe-l'œil peanuts are now done. Defrost in the fridge for 2 to 3 hours before serving.
Enjoy!

Please login to post a review