


Cookies 🍪
By clicking "Accept", you authorize Meilleur du Chef to store cookies on your device to personalize site content, analyze our traffic, and provide social media functionality.
Favourites

You can always send us your messages, comments or suggestions.


In one click, store and find all your favourite recipes.
Add this recipe >
Hazelnut dacquoise biscuit: To make this Caramel Sensation Yule Log recipe, start by preparing the hazelnut dacquoise biscuit. To do this, pour the egg whites into the stand mixer bowl.

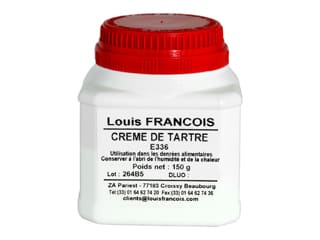
Add the cream of tartar, which is optional, although recommended to obtain perfectly smooth whites that will not become grainy.

Add the caster sugar...

...and start beating the egg whites with the whisk attachment at medium speed to dissolve the sugar into the whites...

...then increase the mixer speed to 3/4 of its power.

In the meantime, sift the icing sugar into a fine sieve, over a sheet of parchment paper.

Pour the hazelnut powder (without sifting it) into a pastry bowl and add the sifted icing sugar.

Mix these two powders together with a whisk until you obtain a homogeneous blend which will form a hazelnut "tant pour tant" (traditionally made with equal portions of almond powder and icing sugar).

Transfer this hazelnut "tant pour tant" onto the parchment paper sheet.

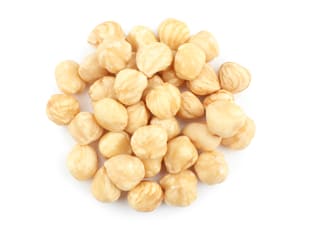
Place the whole hazelnuts in a piping bag and bash them with a rolling pin...

...until you obtain coarsely crushed hazelnuts...

...as shown here in the photo. Transfer them to a container. Set aside.

Continue whipping the egg whites at maximum speed until stiff.

You should obtain a meringue with a texture similar to "shaving foam." This meringue must be perfectly smooth and form stiff peaks.

Add the hazelnut "tant pour tant" to this meringue. Ideally, it is best to have someone with you so that one mixes while the other pours in the dry ingredients.

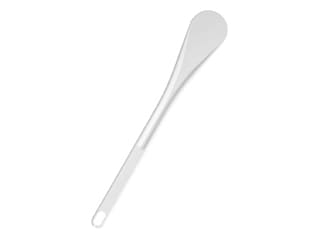
Mix everything quickly with a maryse spatula, taking care not to deflate the preparation...

...until you obtain a smooth and homogeneous hazelnut dacquoise biscuit batter.

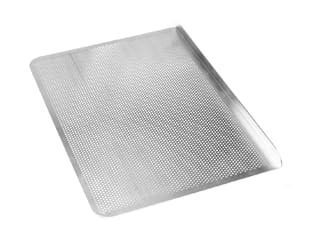
Place the smooth silicone mat on a perforated baking sheet. You may lightly grease this mat with an oil spray. Transfer the dacquoise batter onto the silicone mat...

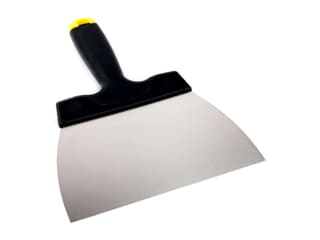
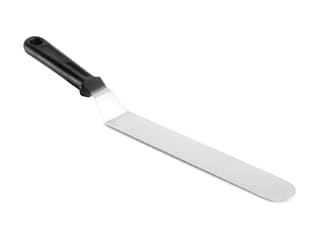
...and spread it using an offset metal spatula to an even thickness over the entire mat surface up to the corners, using the edges to help smooth it properly...

...as shown in the photo. The quantities of this recipe produce a thick biscuit which will be higher than the edge of the silicone mat. The batter must be spread generously and evenly.

Sprinkle the crushed hazelnuts over the dacquoise biscuit batter...

...distributing them evenly over the entire surface.

Then dust a light veil of icing sugar over the batter, without adding too much.

Place the tray into a fan-assisted oven, preheated to 180°C, and bake for about 25 minutes, keeping in mind that this cooking time may vary depending on the oven. Start by baking the biscuit for 20 minutes and extend the baking time if necessary.

When the baking is complete, remove the tray from the oven. The hazelnut dacquoise biscuit should be golden and perfectly cooked.

To check the baking, lightly press the biscuit with your fingertips. Finger marks should not remain; the biscuit must spring back to its original shape. If the marks remain indented, it means the biscuit isn't fully baked and must be returned to the oven for a few more minutes.

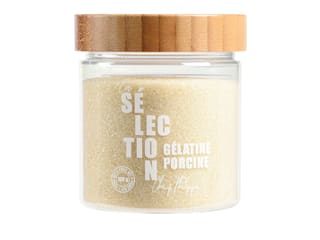
Caramel crème brûlée (make the day before): Start by mixing the gelatine powder with the hydration water (tap water or mineral water), and allow it to hydrate for at least 15 minutes. Then pour the milk and the whipping cream into a saucepan...

...and bring to a boil.

Add the fleur de sel.

When the mixture reaches boiling point, remove the saucepan from the heat and mix with a whisk to incorporate the fleur de sel.

Pour the egg yolks into a mixing bowl.

Add the small amount of caster sugar...

...and blanch this mixture until you can no longer hear the grains of sugar scraping at the bottom of the bowl. Set aside.

Pour the large quantity of caster sugar into a large saucepan and cook it dry (without adding water) over moderate heat.

The sugar will gradually turn into syrup and then into caramel.

Ideally, the sugar should become syrup first, before it starts to brown. If this is not the case, do not hesitate to stir with the spatula so that the sugar melts as quickly as possible. Make sure the heat isn't too strong to avoid the caramel forming too prematurely.

Little by little, the caramel forms; the sugar must be fully melted. If lumps of sugar remain, they will dissolve gradually.

Continue cooking the sugar to obtain a strong caramel flavour. Note that a caramel that is too blond will taste too mild, while a caramel that is too dark will taste bitter. When the caramel is ready, it will foam slightly on the surface. At this point, it is right at the threshold where bitterness begins.

As soon as this foam appears on the surface of the caramel, add the hot cream and milk all at once while mixing with a spatula (beware of splashes and burns).
Do not hesitate to scrape the bottom of the saucepan to collect any salt that may have remained at the bottom.

Continue cooking while mixing with the spatula to obtain a liquid caramel preparation. The caramel must dissolve fully into the cream to form our crème brûlée (all pieces of caramel must melt).

Once the caramel is perfectly smooth, pour half of it onto the whisked egg yolks and sugar...

...and whisk vigorously.

Pour this mixture back into the saucepan containing the remaining caramel...

...and cook 'à la nappe' over moderate heat, mixing constantly with the whisk, without exceeding 85°C. If you do not use a kitchen thermometer, the best method is to bring the mixture to a boil and, as soon as the first bubble appears, remove the saucepan from the heat. You must mix continuously during the whole process and even after removing it from the heat to prevent the egg yolks from coagulating prematurely.

When the preparation is cooked and the boil has stopped, add the hydrated gelatin...

...and whisk vigorously to incorporate it into the hot mixture.

Pour the caramel crème brûlée into the silicone insert mould.

It is normal for the preparation not to reach the top edge of the mould; there should be a gap of about 1cm. Place in the freezer. This preparation must be made at least the day before, or even several days ahead, so that the insert freezes completely through.

Salted caramel: Hydrate the gelatin powder with the hydration water for 15 minutes. Then pour the whipping cream into a saucepan and heat.

Add the fleur de sel...

...and bring the cream to a boil. Once boiling, remove from the heat.

Weigh the glucose syrup directly into a second saucepan.

Add the caster sugar and heat...

...mixing these two ingredients with the spatula.

Gradually, the sugar melts to form a syrup, which will then turn into caramel. The heat must remain moderate to avoid the caramel forming too quickly.

Continue mixing the caramel during cooking to help the sugar melt and to obtain even cooking.

The caramel should form gradually, and the colour should darken.

Continue cooking the caramel...

...until a foam appears on the surface.

As soon as this foam appears, pour the boiling cream over the caramel, remembering to scrape the bottom of the saucepan to recover all the salt, as done previously. Mix vigorously with the whisk.

Then add the butter in 3 batches to the boiling caramel...

...and whisk again until fully incorporated. If you add the butter in one go, it may separate and the preparation will be difficult to fix.

Once the butter is incorporated, add the hydrated gelatin and mix vigorously.

Transfer this salted caramel into a food container in a thin layer. Cover the surface directly with plastic film and allow to cool at room temperature (do not refrigerate unless keeping from one day to the next).

Smooth caramel cream: Hydrate the gelatin powder with the hydration water for 15 minutes. Heat the milk and whipping cream in a saucepan. Then pour the sugar into another large saucepan.

Heat so the sugar turns into syrup...

...and gradually into caramel. It is possible to mix during the process. The caramel may become grainy like here in the photo...

...then it will melt and dissolve to form a smooth liquid caramel. The colour will deepen gradually.

Cook the caramel until a foam forms on the surface.

When the caramel is ready, deglaze it with the boiling cream and milk, mixing carefully with the spatula.

Then whisk to dissolve any pieces of caramel that may have formed.

Scrape the bottom and sides of the saucepan well to dissolve all solid residues.

Pour this boiling mixture over the egg yolks previously placed in a bowl...

...whisking constantly to avoid premature coagulation of the yolks.

Transfer the mixture back into the caramel saucepan and cook 'à la nappe' without exceeding 85°C, as done previously; as soon as the first bubble appears, remove the saucepan from the heat.

Continue mixing away from the heat for 1 or 2 minutes, still to avoid premature coagulation of the egg yolks.

Finally add the hydrated gelatine and whisk vigorously to incorporate it well.

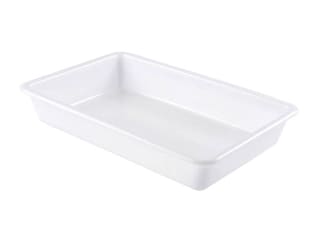
Strain this caramel Bavarian cream through the fine sieve, over a food tray...

...as shown in the photo. It is normal for some egg yolk or caramel residue to remain in the sieve.

Cover the preparation with cling film applied in direct contact and leave to cool at room temperature. Do not place this preparation in the fridge to avoid gelling.

Chocolate decorations: While the caramel cream is cooling, we will prepare the decorations for the Yule log with tempered milk chocolate and tempered dark chocolate. You can follow my methods for tempering dark chocolate or milk chocolate with Mycryo cocoa butter. For this recipe, we used the seeding method for tempering chocolate. Pipe the tempered milk chocolate into the cavities of a mini tablet mould.

Once the cavities are filled with milk chocolate, smooth their surface with the offset metal spatula or a large chocolate spatula. Then leave to crystallise at room temperature, preferably in a cool room (18/19°C).

Do the same with the checkerboard yule log tip mould, which has been placed beforehand on a baking sheet.

Tap underneath the baking sheet to smooth the surface of the chocolate. Leave to crystallise at room temperature, still in a cool room.

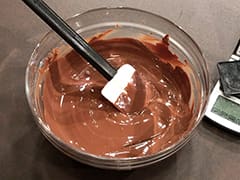
Now pipe the tempered dark chocolate into the 24 half-sphere mould Ø 3.2cm...

...and flip it over the bowl to empty the cavities.

Scrape the surface of the mould with a chocolate spatula.

Turn the mould over onto a sheet of parchment paper and leave to crystallise at room temperature in a cool room.

We finish our chocolate decorations by piping the tempered dark chocolate into the thermoformed Christmas shapes mould (which contains stars, Christmas baubles and trees). Once the cavities are filled, gently tap the mould on the work surface to release any air bubbles.

Then scrape the surface of the mould with the chocolate spatula.

Leave to crystallise at room temperature, in a cool room.

Once the hazelnut dacquoise biscuit has cooled, turn it over onto a sheet of parchment paper and lift the four corners of the silicone mat before removing it, in order to avoid breaking them. Then remove the mat.

We obtain our unmoulded hazelnut dacquoise biscuit. The unmoulding operation must be done when the biscuit is cold.

Start by cutting a length of 25cm...

...corresponding to the size of our yule log mould. Adjust the biscuit dimensions if you are using a different mould.

Trim the biscuit by cutting a small 0.5 cm strip along the width so as to obtain a clean and straight edge.

From the 25cm long rectangle, measure a width of 7.5cm (slightly smaller than the yule log mould) to cut a first strip...

...and a second strip of biscuit of the same width. We need 2 dacquoise strips for 1 yule log.

Flip these two dacquoise biscuit strips over so that the crushed hazelnuts are visible on the surface.

Mix the cooled salted caramel. The texture should be silky smooth. Place it in a piping bag (without a nozzle).
If it has been kept in the fridge and is too thick, let it come back to room temperature for 30 minutes before using.

Pipe the caramel onto one of the two biscuits, forming laces of about 1cm in diameter, parallel and touching each other, as shown in the photo.

Place the second biscuit strip on top, with the hazelnut side directly in contact with the caramel.

This is what the result should look like. Please note that we made two caramel yule logs that day — at home you will only get one biscuit/caramel/biscuit layer insert. Place in the freezer to firm up.

Chocolate decorations (continued): Turn the checkerboard mould over to release the chocolate yule log tips...

...as shown in the photo. Set aside.

Flip the chocolate tablet mould over...

...to release the mini chocolate tablets. Set aside.

Repeat the operation with the thermoformed Christmas shapes mould...

...to obtain our chocolate decorations. Set aside.

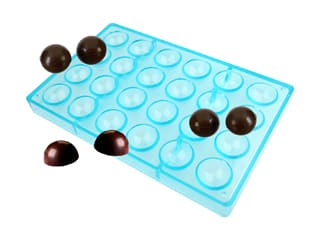
Flip the half-sphere mould...

...to release the chocolate half-spheres.

Heat an empty saucepan on the stove so that the bottom becomes hot. Then place two chocolate half-spheres for a few seconds on the hot bottom of the saucepan...

...and assemble them, making sure the edges are perfectly lined up. Leave to crystallise at room temperature.

Caramel cream (continued): Beat the whipping cream into whipped cream with an electric mixer.

The cream will emulsify and become creamy like a Chantilly.

Pour half of this whipped cream into the previously cooled caramel Bavarian cream, which has been transferred to a mixing bowl.

Mix quickly with the whisk to obtain a homogeneous preparation.

Add the remaining whipped cream...

...and finish mixing with a maryse spatula.

Assembly: Pour this caramel cream into the silicone yule log mould, filling it halfway...

...as shown in the photo. (Don't forget the quantities shown here were for two yule logs.)

Remove the silicone mould from the freezer and release the caramel crème brûlée insert, which must be completely frozen for successful unmoulding.

Take the insert and press it into the mould, flat side up and domed side directly in contact with the caramel cream. Press with your fingertips to make the cream rise up the sides. Make sure the insert is placed perfectly straight.

This is what the result should look like.

Take out the hazelnut dacquoise biscuit filled with salted caramel...

...and place it on the surface of the mould, burying it gently into the caramel cream...

...while pressing so that the cream rises up the sides.

Smooth the surface with the offset metal spatula. The biscuit should reach the rim of the mould, or be 1 to 2mm below, because we still have the praline crunch to add.

Press well with the spatula to push the biscuit down if necessary. If cream overflows, it is not a problem — simply remove it with the spatula. Place in the freezer.

Praliné crunch: Place the milk chocolate in a mixing bowl and melt it in the microwave in 20 to 30-second intervals, stirring every time to prevent burning. When it reaches a maximum of 45°C, add the almond/hazelnut praline...

...as well as the pailleté feuilletine flakes...

...and mix everything together with the maryse spatula. The fat content of the chocolate and praline will waterproof the feuilletine flakes.

Add the grapeseed oil and mix thoroughly.

Assembly (continued): Remove the yule log mould from the freezer so the top part of the log is firm. Place the praline crunch directly into the yule log mould, over the cream.

Spread the praline crunch with the offset spatula to form a crust a few millimetres thick.

Bring the praline crunch to the edges, level with the yule log, using the spatula.

Then smooth the surface again for a neat finish. Place in the freezer. This Yule log can be prepared up to this stage several days or even several weeks in advance.

Velvet spray: On the day, remove the yule log from the freezer, release it and place it on a tray lined with parchment paper. It must be frozen solid for optimal unmoulding. Take the caramel velvet spray and shake it until the ball inside rattles (indicating the spray is homogeneous and ready to use). Spray the surface of the yule log from a distance of 30 to 40cm, making sure to apply an even layer.

Take the velvet yule log with a large offset metal spatula and transfer it onto a serving platter.

Finishing touches: Take the small chocolate decorations and add a small drop of salted caramel on top, which will act as glue.

Place these chocolate decorations harmoniously on the surface of the yule log.

Repeat the operation with the yule log tips, and pipe one or two knobs of caramel on the back of each chocolate yule log tips before pressing them onto both ends of the log.

This is what the result should look like.

Dust the surface of the yule log with a little bit of Codineige decorating sugar using a small fine sieve to imitate snow.

Using a decorating cone, pipe a few small drops of salted caramel on the surface of the yule log.

Our Caramel Sensation Christmas Yule log is now finished. Defrost in the fridge for 4 to 5 hours. For a faster defrosting time, you may leave it at room temperature (20 to 22°C maximum) for 2 hours, then store in the fridge until serving time.
Enjoy!
Please login to post a review