


Cookies 🍪
By clicking "Accept", you authorize Meilleur du Chef to store cookies on your device to personalize site content, analyze our traffic, and provide social media functionality.
Favourites


In one click, store and find all your favourite recipes.
Add this recipe >
To make this Coffee Bean Entremets recipe, start by preparing the ingredients for the coffee fondant insert. Mix the powdered gelatine with the hydration water (tap water or mineral water), and leave to hydrate for 15 minutes.

Coffee fondant insert: Pour the whipping cream into a saucepan and bring to the heat.

Meanwhile, place the Coffola and the white chocolate in a pastry bowl...

...and melt them in the microwave in 20 to 30-second intervals, stirring every time so they do not burn. Take care not to exceed 45°C. These two elements can be fully or partially melted (at least 75% melted).

Add the hydrated gelatine, previously melted in the microwave. Then mix vigorously with a spatula until fully incorporated.

Once the cream has reached boiling point...

...pour it slowly over the white chocolate and Coffola while stirring with a spatula to form an emulsion.

When the cream is fully incorporated, we obtain a perfectly smooth and homogeneous mixture.

You may blend the mixture using a hand blender to homogenise the mass if necessary.

Place the 16-cavity oval silicone mould on a baking tray.

Fill the mould cavities with the chocolate and coffee-flavoured preparation...

...up to halfway, as shown here in the photo.

Cover the mould with a layer of cling film...

...and place in the freezer.

Soft dark chocolate sponge: Prepare all the ingredients.

Heat the whipping cream in a saucepan.

Pour the whole eggs and caster sugar into a pastry bowl...

...and whisk this preparation until the sugar is entirely dissolved and the mixture is pale, as we did previously.

When the cream reaches boiling point...

...pour it over the dark chocolate pistoles. The latter can be previously melted in the microwave in 20 to 30-second intervals, stirring every time, to facilitate incorporating the chocolate into the cream.

Let the chocolate pistoles sit in the boiling cream so they begin to melt from the heat. Then mix vigorously with a spatula until a homogeneous chocolate preparation is obtained.

Pour this chocolate preparation over the whisked eggs and sugar...

...and mix with a whisk to homogenise the whole mixture.

Add the flour, sifted through a fine sieve...

...along with the baking powder...

...and the fleur de sel.

Mix all these elements together with a spatula...

...until you obtain a smooth and homogeneous soft dark chocolate sponge batter.

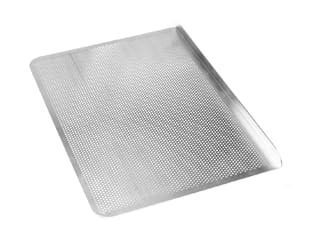
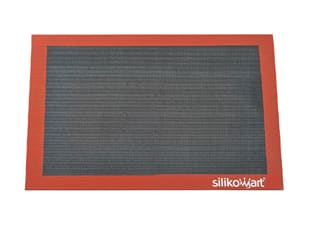
Using an oil spray, grease a silicone baking mat previously placed on a perforated baking tray.

Wipe away any excess grease with a paper towel.

Pour the chocolate batter onto the silicone mat...

...and spread it with a cranked spatula to an even thickness...

...across the entire surface of the tray.

This is what the result should look like.

Place in a fan oven, preheated to 170°C, and bake for 10 to 12 minutes (baking time may vary from one oven to another).

Once baked, remove the tray from the oven...

...and place it on the work surface.

Cover the sponge with a sheet of baking parchment while it is still hot...

...and flip it over in one quick motion to avoid breaking the sponge, so that the silicone mat is on top and the baking parchment is underneath.

Remove the silicone mat, which should peel off easily since it was greased beforehand. Then slide the baking parchment and the sponge onto a cooling rack.

Here is our soft dark chocolate sponge. Leave to cool at room temperature on the rack for optimal cooling.

Take a rounded oval cutter 5.8 x 3.7cm (cutter side)...

...and cut out the chocolate sponge...

...to obtain 12 bases. We will need 9 chocolate ovals, but I am making a few extra in case of any breakage.

Remove these soft dark chocolate sponge ovals and arrange them on a sheet of baking parchment.

Crunchy coffee praline: Take the crunchy coffee praline paste...

...and prepare all the ingredients.

Melt the Coffola in the microwave in 20 to 30-second intervals, stirring every time.

When the Coffola is completely melted, add the crunchy coffee praline...

...as well as the pailleté feuilletine flakes...

...and mix carefully with a spatula until a homogeneous preparation is obtained.

Take a little coffee praline paste on the tip of a mini cranked spatula and spread it over each of the sponge bases...

...to an even thickness of 3 to 4 mm.

Slide the bases onto a baking tray and place in the freezer to set.

Coffola mousse: Prepare all the ingredients. Hydrate the powdered gelatine with the hydration water for 15 minutes.

Pour the whole milk into a saucepan and bring to the heat.

In the meantime, melt the Coffola in the microwave in 20 to 30-second intervals, stirring every time. If it is not entirely melted it doesn't matter, it needs to be at least 75% melted.

When the milk reaches boiling point, pour it over the melted or partially melted Coffola...

...and begin to mix gently with a spatula to dissolve all the Coffola beans into the boiling milk.

Then mix with a hand blender to obtain a homogeneous mixture.

Add the hydrated gelatine, previously melted in the microwave. Blend again to perfectly incorporate the gelatine into the Coffola preparation.

Pour the whipping cream into the stand mixer bowl and whisk into a whipped cream using the whisk attachment. The liquid cream must have 30 to 35% fat content and be very cold.

This whipped cream must be whisked enough to have a certain firmness. Usually, I recommend not over-whipping it, but it is different here with Coffola, as its texture is not the same as chocolate. It is therefore preferable to have a whipped cream that holds its shape.

Pour half of the whipped cream into the Coffola preparation...

...and mix quickly with a whisk.

Add the remaining whipped cream...

...and fold in gently until smooth and homogeneous.

Transfer this Coffola mousse into a piping bag. The use of a nozzle will not be necessary here.

Assembly: Remove the coffee fondant inserts from the freezer and remove the cling film.

Gently flip the inserts and place them on a sheet of baking parchment.

Pipe the Coffola mousse into the cavities of the coffee bean silicone mould, filling them halfway.

Place the inserts into the mould cavities, pressing with your fingertips so they are buried in the mousse.

Finish the assembly with the chocolate sponge, with the coffee praline side directly in contact with the Coffola mousse, and therefore the soft dark chocolate sponge side on top. If necessary, add a little more mousse. Ideally, when inserting the sponge, the excess mousse should overflow slightly from the cavity.

Remove the excess mousse using a mini cranked spatula.

Then cover the mould with a sheet of baking parchment...

...and a baking tray. Here I am using a blue steel tray that is heavy enough to apply pressure.

Place everything in the freezer until completely frozen. This recipe can be made up to this stage several days, or even several weeks, in advance.

Crunchy chocolate shortcrust (can be made the day before): Prepare all the ingredients.

Pour the flour into the mixer bowl.

Add the icing sugar...

...the baking powder...

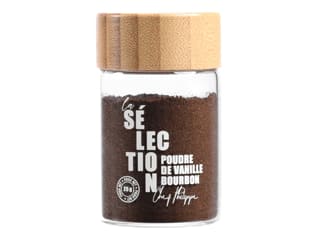
...the vanilla powder...

...the fine salt...

...as well as the ground almonds...

...and the cocoa powder. All the dry ingredients into the bowl.

Then add the egg, previously beaten and weighed...

...and butter at room temperature.

Mix all these ingredients together using the paddle attachment.

Initially, the texture should be sandy...

...then it will gradually turn into a dough.

Gather this crunchy chocolate shortcrust dough into a single ball using the palm of your hand...

...and transfer it onto a sheet of baking parchment.

Cover this dough with a second sheet of baking parchment...

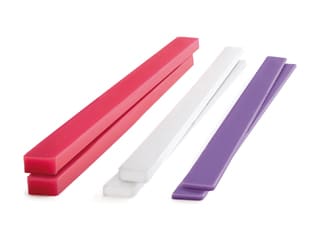
...and roll it out with a rolling pin. You can use levelling strips to obtain an even thickness of 3 mm.

Roll the dough in one direction and then the other...

...until it is entirely rolled out, as shown here in the photo. Slide everything onto a baking tray and let this chocolate shortcrust dough rest in the fridge for several hours. Ideally, it is best to make it the day before.

Finish: On the day, remove the silicone mould from the freezer and take off the top sheet of baking parchment.

Gently flip the mould to extract them. They must be frozen to the core for optimal removal.

Using a knife, trim the base of the individual entremets if needed for a clean finish. This operation must be carried out very quickly so as not to warm up the desserts, which must remain completely frozen for the coating.

Cover a baking tray with cling film...

...and place the entremets on it, spacing them out as shown here in the photo.

Place the baking tray on a turntable for an easier operation.

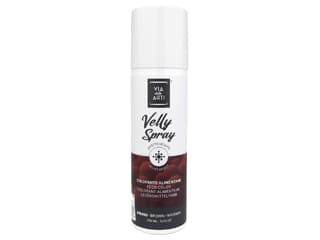
Take the brown velvet spray and shake it before use until the ball rattles inside the bottle (a sign that the colouring is homogeneous and ready to use). Spray each entremets from about 30 cm away with the velvet spray.

Ensure the entire surface of the cakes is coloured by rotating the tray on the turntable for a perfect result. Place the cakes in the fridge to defrost for 2 to 3 hours.

Remove the cocoa shortcrust dough from the fridge and remove the top sheet of baking parchment.

Place this sheet back onto the chocolate dough and flip everything onto a second tray.

Now remove the second sheet of baking parchment so that neither sheet sticks to the dough, which will now be released.

Here I used a rounded plain oval cutter 7.1 x 4.7cm.

Cut out ovals of cocoa shortcrust dough with the cutter...

...and place them on a perforated baking tray covered with a silicone bread baking mat. Do not hesitate to make more than necessary in case of breakage.

Cover everything with a second perforated baking mat, directly in contact with the chocolate dough...

...place in a fan oven, preheated to 170°C, and bake for about 12 minutes. Baking time may vary from one oven to another.

Once baked, remove the tray from the oven...

...and leave to cool on the work surface at room temperature. You must not remove the top silicone mat while the biscuits are still hot, as you risk damaging them.

Once the biscuits have completely cooled, remove the top silicone mat...

...and turn them over, as it is the lower part (the underside) that will be the visible part of the dessert because it is flatter and nicer with its embossed appearance.

Arrange the biscuits in a staggered pattern on the serving dish.

Pipe a hazelnut-sized amount of melted dark chocolate into the centre of each biscuit...

...and place the entremets on top using two mini cranked spatulas. The melted dark chocolate acts as glue.

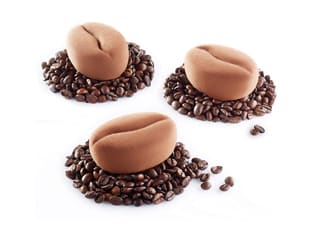
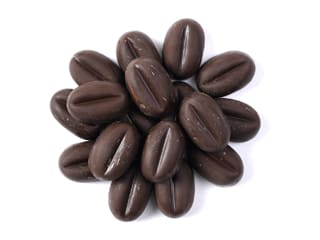
Our coffee bean individual entremets are now done. They should be well centred on the cocoa shortcrust biscuits. Enjoy!
Please login to post a review