


Cookies 🍪
By clicking "Accept", you authorize Meilleur du Chef to store cookies on your device to personalize site content, analyze our traffic, and provide social media functionality.
Favourites


In one click, store and find all your favourite recipes.
Add this recipe >
Melting raspberry centre: To make this raspberry trompe l'oeil recipe, start by preparing all the ingredients for the melting raspberry centre.

Pour the raspberry purée as well as the fresh (or frozen) raspberries into the saucepan.

Heat everything on the hob.

Add 3/4 of the sugar to the saucepan.

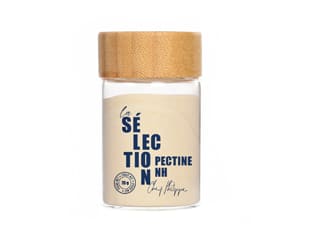
Mix the remaining sugar with the NH coating pectin.

Heat over medium heat.

When the mixture reaches 50°C...

...add the sugar and pectin mixture while whisking to prevent lumps from forming.

Bring the whole preparation to a boil and maintain it for at least 1 minute.
This cooking time is essential to activate the properties of the pectin.

Transfer the raspberry melting core into a container.

Cover with cling film directly on the surface.

Let cool to room temperature, then place in the fridge.

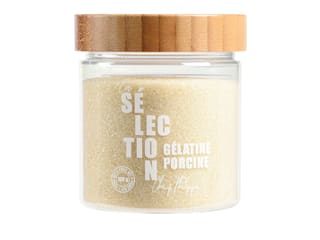
Vanilla diplomat cream: Prepare all the ingredients. Mix the powdered gelatine with the hydration water (tap or mineral water) and let it hydrate for 15 minutes.

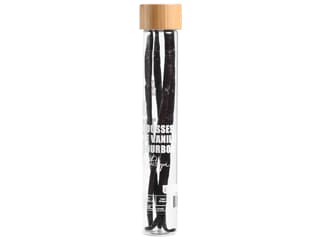
Pour the milk into a saucepan and add the Tadoka vanilla bean. If you do not have Tadoka vanilla, you can use a vanilla pod. Heat and bring to a boil.

Meanwhile, pour the egg yolks into a container and add the caster sugar.

Blanch the mixture until you can no longer hear the crunch of the sugar against the bottom of the mixing bowl.

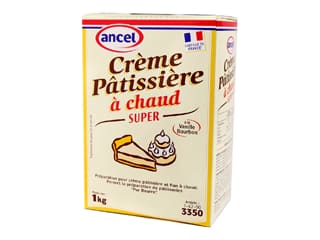
Add the pastry cream powder or the corn starch.

Mix well with the whisk to prevent any lumps.

Pour the boiling milk over the preparation while whisking constantly.

Transfer the whole mixture back into the saucepan used to heat the milk.

Cook the pastry cream over moderate heat, whisking continuously...

...until the cream thickens, then continue cooking for 1 to 2 minutes until the cream loosens up slightly, which indicates it is properly cooked.

Add the butter and mix thoroughly.

Add the hydrated gelatine mass...

...and mix vigorously with the whisk.

Transfer the resulting pastry cream into a food container...

...and cover it with cling film directly on the surface. Let cool before placing in the fridge.

Melting raspberry centre (continued and final step): Take the jellied raspberry melting core out of the fridge and transfer it to a container.

Mix quickly with a whisk to achieve a smooth texture.

Add the rose water. This ingredient is optional.

Mix thoroughly to incorporate it well.

Pour the preparation into a piping bag. The use of a nozzle is not necessary.

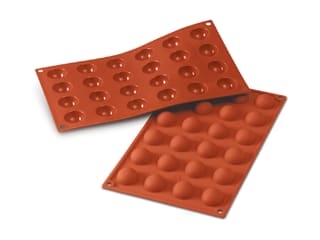
Take the half-sphere silicone mould.

Fill the cavities with the raspberry preparation.

Smooth the surface with a cranked spatula.

Cover with cling film directly on the surface and place in the freezer.

Soft almond sponge: Prepare all the ingredients.

In the stand mixer bowl, pour the whole eggs and the icing sugar.

Add the almond powder.

Beat the mixture with the whisk attachment for 3 or 4 minutes...

...until it gains volume and lightens in colour.

In a second bowl, pour the egg whites. Add a pinch of fine salt.

Whip the whites, and when they begin to look very frothy, add the caster sugar.

Whip the egg whites until stiff peaks form.

Pour the first preparation into a pastry bowl...

...and add the flour.

Mix using a maryse spatula.

Add the melted and cooled butter.

Mix gently with the maryse spatula.

Add the whipped egg whites...

...and mix gently once more with the maryse spatula until a smooth and homogeneous preparation is obtained.

Our soft almond sponge batter is ready.

Spread the resulting batter onto a sheet of greaseproof paper placed on a baking tray.

Spread the batter to an even thickness using a cranked spatula...

...to ensure even baking. For this, I also use a levelling guide that I slide along the edges of the tray to get a very even thickness across the entire surface of the batter.

Bake in a fan-assisted oven, preheated to 170°C, for 12 minutes. This cooking time may vary from one oven to another.

After baking, remove the tray from the oven...

...and let the soft almond sponge cool to room temperature.

Chocolate shells: This technique is optional but recommended for extra stability and easier unmoulding.
Pour the white chocolate into a container and add the red Power Flowers colour.

Melt the cocoa butter in a small saucepan over very low heat. Here, I am using a mix of Mycryo cocoa butter and cocoa butter pistoles. You can use either one, or a combination of both.

Melt the white chocolate with the red colouring in the microwave in 20 to 30-second intervals, mixing every time.
Repeat the operation until the chocolate is completely melted, ensuring it does not exceed a temperature of 45°C.

Add the previously melted cocoa butter.

Blend everything with a hand blender to obtain a perfectly smooth and homogeneous mixture.

Pour the red chocolate into a piping bag (no nozzle).

Fill the cavities of the raspberry silicone mould up to 3/4 with this preparation.

Bring the chocolate up the sides of the cavities using a mini cranked spatula to ensure the inside of each cavity is perfectly coated.

Gently flip the mould upside down over a large food container to empty the shells...

...and place everything on a wire rack, which is set over a deep tray for draining.

When the chocolate is semi-crystallised, about 15 to 20 minutes later, remove the tray from under the rack.

Scrape off the excess chocolate to ensure the edges of the cavities are neat and clean.

Place in the fridge...

...for complete crystallisation of the chocolate.

Take the raspberry half-spheres out of the freezer and remove the cling film.

Partially warm up half of the half-spheres using a heat gun or a hair dryer.

Release the other half-spheres and press them together to assemble them into full spheres.

Cover with cling film directly on the surface...

...and return them to the freezer.

Vanilla diplomat cream (continued and final step): Pour the very cold whipping cream into the stand mixer bowl and whisk. Make sure to whip it to a soft texture.

In a second bowl, pour the cold pastry cream...

...and whip it to make the mixture perfectly smooth.

Add half of the whipped cream.

Mix quickly with a whisk, without needing to be particularly gentle.

Then add the remaining whipped cream...

...and fold it in gently with the maryse spatula...

...until our vanilla diplomat cream is smooth and homogeneous.

Pour the cream into a piping bag (no nozzle).

Set aside at room temperature (outside of the fridge).

Assembly: Using a Ø 4cm plain round cutter...

... cut out discs of soft almond sponge.

Take the silicone mould with the crystallised chocolate and fill the cavities with the vanilla diplomat cream. The cream must have a soft texture.

Insert a frozen raspberry sphere directly into the centre of the cream.

Fill any remaining empty spaces on top of the spheres with more cream.

Smooth the surface with a mini cranked spatula.

Trim the almond sponge discs with scissors to adapt them to the shape of the mould cavities.

Place these sponge discs into the cavities of the mould, directly in contact with the vanilla diplomat cream.

Smooth the edges...

...and cover everything with cling film directly on the surface.

Place in the freezer for several hours (minimum 1 night).

Release: Take the raspberry silicone mould out of the freezer and remove the cling film.

Without waiting, unmould the raspberry entremets carefully so as not to damage them.

The presence of the chocolate shell will make the release process easier. However, be careful: if the shells were poorly filled—meaning if you left air bubbles—the chocolate shell might break.

This is what the result should look like. Place the raspberry on a baking tray covered with cling film. This tray will be set on a turntable to facilitate the coating process.

Finish: Take the red velvet effect spray.

Shake the velvet spray well until you hear the ball rattle inside, indicating the mixture is homogeneous. Then spray from a distance of 20 to 30 cm from the raspberry.

Use the turntable to reach all sides and colour the entire surface of the raspberry.

Proceed in the same way with the other raspberries.
After coating, leave the entremets to thaw in the fridge. It will take a minimum of 3 hours for a complete defrost before you can serve them to your guests. Enjoy!

Please login to post a review