


Cookies 🍪
By clicking "Accept", you authorize Meilleur du Chef to store cookies on your device to personalize site content, analyze our traffic, and provide social media functionality.
Favourites


In one click, store and find all your favourite recipes.
Add this recipe >
To make this Chocolate & Raspberry Heart Entremets, start by preparing all the ingredients for the raspberry insert.

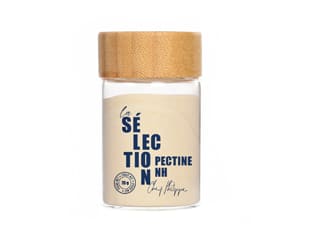
Raspberry insert: Heat the raspberry purée in a saucepan. Meanwhile, pour the caster sugar onto the NH coating pectin and combine these two powders together.

When the mixture reaches 50°C, add the pectin and sugar in a fine stream while mixing with a whisk.
Pectin should always be mixed with sugar beforehand to prevent lumps from forming when it is incorporated.

Bring this preparation to the boil while continuing to whisk. Once boiling, maintain the boil for at least 1 minute to activate the pectin.

Then add the lemon juice and mix carefully so it is fully incorporated.

Transfer this raspberry confit into a food container for fast and optimal cooling...

...and cover directly on the surface with plastic wrap to prevent a skin from forming. Leave to cool at room temperature before placing in the fridge.

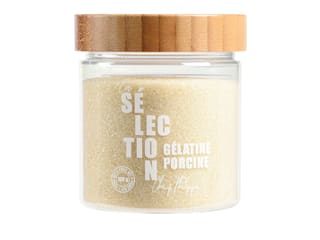
Vanilla crémeux: Prepare all the ingredients. Mix the powdered gelatine with the hydration water (tap or mineral water) and leave to hydrate for 15 minutes.

Split the vanilla pod in half...

...and scrape the inside with the tip of a knife to extract the seeds.

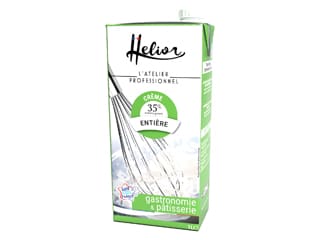
Pour the whipping cream into a saucepan and add the split vanilla pod and the seeds.

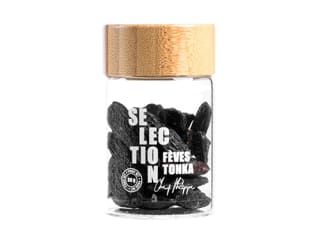
Take the Tonka bean...

...and grate it with a Microplane zester-grater over the saucepan. I used the equivalent of half a bean.

Bring the cream to the boil.

Once boiling, stop the heat...

...and cover the saucepan tightly with plastic wrap stretched over the edges.

Leave to infuse for at least 30 minutes so the vanilla and Tonka bean release all their flavour.

Raspberry insert (continued): When the raspberry confit is completely cold and set, remove it from the fridge and take off the plastic wrap.

Pour the confit into a mixing bowl...

...and whisk vigorously until smooth.

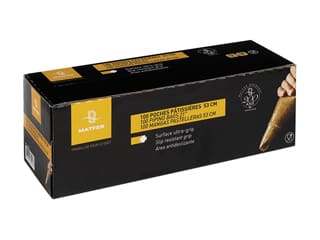
Transfer this preparation into a piping bag. No piping tip is needed.

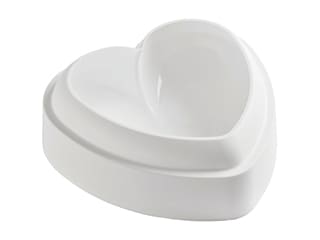
Take the heart-shaped cutter supplied with the Amore heart silicone mould...

...and place it on a baking tray lined with parchment paper, with the narrowest side of the cutter facing down, directly in contact with the paper.

Pipe the raspberry confit into the heart cutter...

...filling it halfway up the narrowest part.

Level the raspberry preparation with a mini offset spatula to obtain a perfectly flat surface.

Cut the fresh raspberries in half lengthwise...

...and press them into the raspberry confit as shown in the photo. Place this raspberry insert in the freezer.

Vanilla crémeux (continued): Once the vanilla and Tonka have infused, remove the plastic wrap and reheat to the boil.

Place the egg yolks in a mixing bowl...

...add the caster sugar and whisk until pale and smooth, until you no longer hear the grains of sugar scraping on the bottom of the bowl.

Pour the boiling cream over the whisked yolks and sugar while whisking.

Return everything to the saucepan...

...and cook 'à la nappe' (until the consistency is thick enough to coat the back of a spoon) while stirring constantly with a flexible spatula, making 8-shaped motions across the bottom of the pan, without exceeding 82°C. Using a probe thermometer is recommended.

Once cooked, pour the cream through a fine sieve into a container.

Press the mixture through the sieve with the spatula to recover the vanilla seeds while removing any lumps.

Add the hydrated gelatine (gelatine mass)...

...and mix quickly until fully dissolved.

Add the butter and mix with a hand blender until perfectly smooth and homogeneous.

Remove the raspberry insert from the freezer...

...and pour the vanilla crémeux into the cutter, directly on top of the raspberry confit, filling to the top edge while staying within the narrow part of the cutter.

Cover the heart cutter with plastic wrap and place in the freezer.

Soft dark chocolate sponge: Prepare all the ingredients.

Heat the whipping cream in a saucepan.

Place the whole eggs and caster sugar in a mixing bowl...

...and whisk until pale and the sugar is completely dissolved, as done previously.

When the cream comes to the boil...

...pour it over the dark chocolate pistoles. These can be pre-melted in the microwave in 20 to 30 second intervals, stirring every time, to make incorporation easier.

Let the chocolate sit briefly in the hot cream so it starts to melt, then mix vigorously with a spatula until smooth and glossy.

Pour this chocolate mixture over the whisked eggs and sugar...

...and whisk to combine evenly.

Sift the flour through a fine sieve...

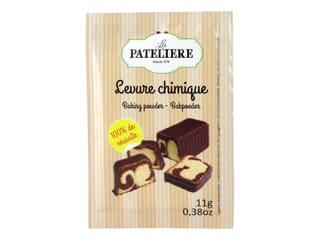
...add the baking powder...

...and the fleur de sel.

Mix everything together with the flexible spatula...

...until you obtain a smooth, homogeneous chocolate sponge batter.

Place a mousse ring Ø 16cm on a perforated baking tray lined with a silicone baking mat. No need to grease the ring.

Pour the chocolate sponge batter into the ring...

...and smooth the surface with the spatula to obtain an even thickness.

Bake in a fan-assisted oven preheated to 170°C for 10 to 12 minutes (time may vary depending on the oven).

When baked, remove the tray from the oven...

...and leave the sponge to cool at room temperature.

Once completely cooled, unmould by sliding a knife blade between the ring and the sponge.

You should obtain your unmoulded soft dark chocolate sponge.

Using a génoise slicing knife, cut the sponge horizontally into two layers. Keep the top layer for another use.

The bottom layer is used for this recipe.

Cut the sponge using the narrow side of the heart cutter. You can unmould the frozen insert briefly to use the cutter, then return the insert to the freezer.

Press firmly on the cutter with both hands to cut out the heart-shaped sponge.

You should obtain your dark chocolate sponge heart.

Dark chocolate hazelnut crunchy layer: Take the ready-made crunchy filling. If unavailable, make your own by mixing 60 grams of melted dark chocolate with 20 grams of hazelnut praliné, 30 grams feuilletine flakes, 15 grams of roasted cocoa nibs and a pinch of fleur de sel.

Soften the crunchy filling slightly in the microwave for a few seconds and spread about 80 grams directly onto the chocolate sponge.

Spread and level it over the whole surface with the mini offset spatula, right up to the edges, in an even layer. Refrigerate.

Dark chocolate mousse: Prepare all the ingredients.

Heat the whole milk in a saucepan.

Place the egg yolk in a mixing bowl and whisk it quickly. Here no sugar is added, unlike a classic crème anglaise.

When the milk boils...

...pour it over the yolk while whisking.

Return the mixture to the saucepan...

...and cook 'à la nappe' (until the consistency is thick enough to coat the back of a spoon) without exceeding 82°C, stirring constantly.

Melt the dark chocolate pistoles in the microwave in short intervals, place a sieve over them...

...and strain the hot custard over the chocolate.

Stir until the chocolate is fully melted.

The mixture may look slightly grainy; it will smooth out later.

Whip the whipping cream in the stand mixer bowl...

...to a soft whipped consistency.

Add one third of the whipped cream to the chocolate mixture...

...and whisk vigorously to smooth.

Add the remaining whipped cream...

...and gently fold with a rubber spatula...

...until smooth and homogeneous.

Use this soft chocolate mousse immediately.

Transfer it into a piping bag (no nozzle).

Assembly: Place the Amore silicone heart mould on a baking tray.

Unmould the frozen insert.

This is what the raspberry/vanilla heart insert should look like.

Pipe chocolate mousse into the mould, filling it halfway.

Spread the mousse up the sides to remove air bubbles.

Place the insert inside, raspberry side down, vanilla side up.

Press gently so mousse rises around the sides.

Add a thin layer of mousse on top...

...and smooth, leaving space for the sponge.

Place the sponge (crunchy side down) onto the mousse.

Press until level with the mould edge.

Brush a thin layer of melted dark chocolate over the sponge using a pastry brush to seal it.

Cover in contact with plastic wrap and freeze completely (can be stored frozen several days; allow 3-4 hours to thaw later).

Velvet spray coating: On the day, unmould the fully frozen entremets.

Gently peel the mould away from the edges.

Flip onto a tray and remove the mould completely.

Place the frozen cake on a turntable protected with plastic wrap using a turntable.

Shake the brown velvet spray until the mixing ball rattles clearly.

Spray from 25-30 cm away while rotating the turntable...

...to coat the entire surface evenly.

Lift the cake with an offset spatula...

...and place it onto the serving dish.

A frosty layer will appear; this is normal and will disappear after 3-4 hours of thawing in the fridge.

Dark chocolate heart petals: Prepare the ingredients and temper the chocolate using Mycryo cocoa butter.

Melt the dark chocolate in the microwave in short intervals without exceeding 50°C (ideally 45-50°C).

Stir to cool it down, checking the temperature closely with a laser thermometer.

When it reaches 35°C...

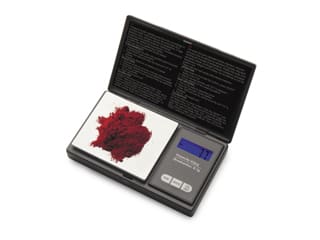
...add 1% Mycryo using a precision scale.

Stir to fully incorporate.

Continue stirring until the chocolate reaches 31-32°C, at which point it is tempered.

Pour onto a polyethylene sheet.

Cover with a second sheet...

...and spread thinly (about 2mm) with a rolling pin.

When partially set, mark heart shapes using the heart cutter.

Press firmly to create clear shapes.

Mark the entire slab of chocolate (you can create different sizes if you wish).

Before full crystallisation, roll the sheets around the rolling pin to create a curved shape.

Leave to crystallise at cool room temperature (18-19°C).

Red heart petals: Prepare the ingredients (minimum 50 grams white chocolate).

Melt the white chocolate with the red Power Flower colouring in short microwave intervals without exceeding 45°C.

Cool to 35°C while stirring, and add Mycryo as explained earlier.

Mix thoroughly...

...and cool to 29°C (tempered).

Pour onto a polyethylene sheet.

Cover with a second sheet...

...and spread to a 2mm thickness.

When partially set, mark heart shapes.

Roll the plastic sheet around the rolling pin.

Leave to crystallise at 18-19°C.

Finish: Once set, peel apart the sheets to release the dark chocolate hearts.

Select the best-looking curved petals.

Repeat the operation with the red hearts.

You now have black and red chocolate heart petals.

Place the dark petals on the surface of the defrosted entremets using a little melted dark chocolate as glue.

Overlap them slightly...

...arranging them harmoniously without hiding the heart shape.

Finish by placing one red heart in the centre.

Your Valentine's Day chocolate and raspberry heart entremets is ready. Leave to defrost completely for 3 to 4 hours in the fridge before serving.
Enjoy!
Please login to post a review