


Cookies 🍪
By clicking "Accept", you authorize Meilleur du Chef to store cookies on your device to personalize site content, analyze our traffic, and provide social media functionality.
Favourites


In one click, store and find all your favourite recipes.
Add this recipe >
For the dough: To make this light lemon mille-feuille recipe, start by preparing all the ingredients for the puff pastry.

Pour the fine salt into the cold water...

...and mix thoroughly to dissolve it completely.

Melt the butter in the microwave at medium power to prevent it from splashing while melting.

Place the flour in the stand mixer bowl and mix it with the dough hook attachment while adding the cold salted water.

Then immediately add the melted butter, which must be at room temperature.

Knead these elements with the dough hook at medium speed.

During kneading, do not hesitate to scrape down the sides of the bowl using a dough scraper to gather the dough in the centre of the container.

Continue mixing until a homogeneous dough is obtained. Be careful not to overmix.

Transfer this resulting dough onto the worktop.

Take a 40 x 30 cm sheet of greaseproof paper and place it on the worktop.

Place the dough in the centre of the parchment, flattening it slightly with your fingers to give it a rectangular shape.

Cover the dough with a second sheet of greaseproof paper of the same dimensions.

Fold the top section of the 2 sheets down by a few centimetres to form a crease, as shown here in the photo.

Measure a length of 30 cm with a ruler...

...to make a second fold 30 cm away from the first. Mark the fold well with your fingers.

Make a third fold on one of the sides, also marking it with your fingers.

Measure a width of 20 cm to make the final fold.

Mark this fourth fold with your fingers as well.

We should obtain a greaseproof paper rectangle approximately 30 cm long by 20 cm wide.

Flip the whole thing over on the worktop...

...and roll out the dough with a rolling pin inside the two sheets of greaseproof paper to form a perfect rectangle of dough.

The thickness of the dough must be identical across the entire surface right into the corners.

Check the measurements to obtain a dough sheet 20 cm wide...

...by 30 cm long, bearing in mind that we don't need to be accurate to the millimetre. Place this dough in the fridge for at least 30 minutes to firm up.

Take the cold extra butter and place it on a silicone baking mat.

Soften the butter and give it elasticity by folding the silicone mat over it and tapping it with the rolling pin...

...until the butter becomes pliable while remaining relatively cold.

This is what the result should look like.

Place the butter in the centre of a sheet of greaseproof paper...

...and cover it with a second sheet of greaseproof paper.

As we did for the dough, make a first fold and mark it with your fingers to shape the butter to the desired dimensions.

Then measure a width of 15 cm with the ruler...

...to form the second fold. Mark this fold with your fingers.

Make a third fold on one of the sides and mark it with your fingers.

Finally, measure 20cm in length...

...to make the fourth fold.

Flip the whole thing over on the worktop.

This is what the result should look like.

The sheets of greaseproof paper should be folded to give a length of 20 cm...

...by a width of 15 cm.

Roll out the extra dry butter with the rolling pin to spread it...

...over the entire surface of the greaseproof paper to a uniform thickness...

...right into the corners. Since the butter is a bit firm, you will need to press down sufficiently with your hands on the rolling pin, without tearing the greaseproof paper. Place the shaped butter in the fridge. You can, of course, leave this dough and butter in the fridge and proceed with the laminating the next day if you wish to make your pastry over 2 days.

For the turns: Take the dough out of the fridge...

...and remove the first sheet of greaseproof paper.

Flip the dough over onto the worktop...

...to remove the second sheet of greaseproof paper.

Roll out the dough on a lightly floured worktop to gain an extra 3 to 4 cm in length...

...applying pressure across the entire surface to maintain a regular thickness.

We obtain our dough rectangle, which measures roughly 33/34 x 20cm.

Take the butter out of the fridge and remove the first sheet of greaseproof paper.

Then flip the whole thing onto the dough like this. Make sure that the 20 cm length of the butter square aligns with the 20 cm width of the dough. The two layers must be flush along the edges.

Press down firmly with your hand to make the butter adhere to the dough and remove the top sheet of greaseproof paper.

Fold the bottom section of the dough over the butter...

...and fold the top section of the dough down to wrap the butter entirely.

The two sections of the dough can join up or overlap very slightly in the centre, as shown here in the photo.

Take the dough sheeter and lightly flour the board. The roller should be set to its widest opening.

Start by turning the handle to slide the dough between the board and the roller. If the gap is too large, lower it by one notch.

You must proceed progressively for the first pass so as not to damage anything.

Once the first pass is made, return to the initial position by turning the handle in the opposite direction.

Lower the gap by one notch. It is important to progress notch by notch and not to drop by two or three settings at once.

Roll out the dough by turning the handle so that the board slides to the left side...

...and returns to the right. Lower the gap by one more notch using the two adjustment wheels on the sides. Remember to check regularly that your dough isn't sticking to the board or the cylinder of the roller.

Turn the handle to slide the board to the left side and bring it back to the right.

Lower the gap by one more notch with the adjustment wheels.

Turn the handle to slide the board to the left side and return to the right...

...before lowering the gap by one more notch. To clearly explain the laminating process, I am doing a back-and-forth motion here before lowering the thickness by a notch, but once you are used to using it, you can lower it by a notch after a single pass.

Remove the board from the roller and dust off the excess flour using a flour brush.

First single turn: Fold the right side of the dough over the central section to create a single turn...

...and line up the corners well so that the dough edges are perfectly flush.

Then dust off the excess flour if necessary.

Fold the left side of the dough over the centre...

...bringing the corners squarely against the corners and the edges against the edges.

Reposition the pastry on the board, which must be slid back into the roller after opening the gap to the maximum. Remember to lightly flour your dough and your roller. The dough must not stick; it should slide easily thanks to the flour. The dough should be positioned with the open seam facing right.

Start by turning the handle to slide the board to the left and return to the right.

Reduce the gap by one notch using the two adjustment wheels on the sides.

Turn the handle so that the board slides to the left, then bring it back to the right. If your roller has trouble gripping the worktop due to its material, you can use this black handle to hold it steady with your left hand.

Reduce the roller gap by one notch again...

...and turn the handle to slide the board to the left, holding the roller with the black handle if necessary.

After bringing the board back to the right, reduce the gap by one notch...

...and turn the handle to slide the board to the left. Then bring the board back to the right. The dough is progressively becoming thinner.

Do not hesitate to dust the dough with a little flour if it sticks to the board or the cylinder. Flour should always be added in small amounts.

Also dust the top of the dough with flour.

After reducing the gap by one more notch, turn the handle so that the board slides to the left, and bring it back to the right. We will stop one notch away from the narrowest (thinnest) setting.

Remove the excess flour with the flour brush.

Second single turn: Then perform another single turn by folding the right side of the pastry toward the centre...

...and the left side toward the centre. Do not forget to dust off the excess flour if needed and to line up the sides flush against each other. Feel free to pull gently on the corners of the dough if necessary (without tearing it).

Pull the cling film to wrap your dough. To do this, place it in the centre of the sheet of cling film...

...and wrap the pastry tightly in the cling film.

Here, I am making 2 light marks on the dough with two fingertips to remind myself that I have just completed 2 turns.

Leave the dough to rest in the fridge for at least 30 minutes before continuing. It is possible to leave the pastry in the fridge for longer before proceeding.

To begin the third turn, take the dough out of the fridge and remove the cling film.

Dust the board with a little flour.

Arrange the dough on the board with the open seam facing right, as shown here in the photo.

Place the board on the roller, which has been set to the widest gap. Start laminating so that the board slides to the left.

Decrease by one notch to reduce the thickness of the dough and laminate toward the right.

Add a little flour if necessary to prevent the pastry from sticking to the board or the cylinder.

Turn the handle to slide the board toward the left...

...then return toward the right, and so on.

Once the pastry is sufficiently rolled out, remove the excess flour with the brush.

Third single turn: Perform a single turn by folding the right side toward the centre...

...and the left side toward the centre as well. We have just finished our third turn.

Place the pastry back on the floured board (with the open seam facing right). Set the roller to its widest gap.

Roll out the pastry by sliding the board to the left.

Lower the roller gap by one notch...

...and slide the board to the right to roll out the pastry progressively. As you can see, here I am doing a single pass before reducing by a notch; it is no longer necessary to do the back-and-forth motion.

Reduce the gap again by lowering it by one notch.

Then slide the board to the left, holding the black handle if necessary.

Continue this process until you obtain a regular and thin dough sheet about 4 to 5 mm thick.

Remove the board from the roller.

Fourth single turn: Fold the right side of the pastry toward the centre...

...and do the same with the left side, joining the edges together neatly like this.

Wrap the pastry tightly in cling film and place it in the fridge for at least 30 minutes.

Here, I have made 4 light marks on the dough with my fingertips to remind myself that I have completed 4 turns.

Once the pastry is thoroughly firmed up, take it out of the fridge and remove the cling film.

Lightly flour the board...

...and place the pastry on it, with the open seam facing right.

Laminate the pastry by sliding it from right to left, progressively reducing the roller gap...

...until the pastry is fully rolled out.

Remove the board from the roller and dust off the excess flour using the brush.

Fifth single turn: Perform a single turn by folding the right side toward the centre and the left side toward the centre as well.

Position the dough once more (open seam facing right) on the lightly floured board.

Set the roller to its widest gap.

Then roll out the pastry in successive stages, progressively reducing the roller gap, until you obtain a regular sheet about 4 to 5 mm thick.

Sixth and final single turn: Remove the board from the roller and dust off the excess flour with the brush. Fold the right side of the pastry toward the centre...

...as well as the left side, also toward the centre.

We obtain our puff pastry made with the roller, on which I make 6 marks to show that my pastry has been given 6 single turns.

Wrap this pastry tightly in cling film to protect it from the cold and from drying out...

...and place it in the fridge for at least 30 minutes before use. This pastry can be kept in the fridge for 48 hours and freezes very well for later use.

When the puff pastry has cooled, take it out of the fridge and remove the cling film.

Place the pastry on the roller board and roll it out progressively, moving from the widest notch to the thinnest notch, holding the roller firmly by the black handle.

Gradually, the pastry spreads out. You can give it a quarter turn to roll it out slightly in width, without exceeding the maximum width handled by the roller.

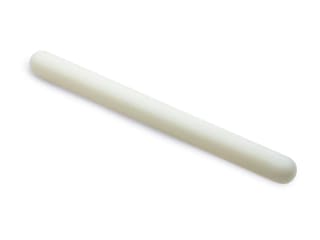
When you reach the thinnest setting on the roller, finish with the rolling pin to thin the pastry even further until it reaches a regular thickness of 2 mm. Rest in the fridge before baking to firm up.

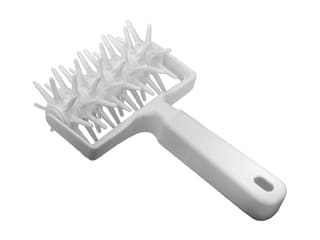
Prick this sheet of puff pastry with a roller docker (or with a fork).

Place in the fridge, well-wrapped, to prevent the surface of the pastry from drying out.

Lemon cream: Prepare all the ingredients. Do not rely on the quantities shown in the photo; on that day, I doubled the proportions.
Mix the powdered gelatine with the hydration water (tap or mineral water) and let it hydrate for at least 15 minutes.

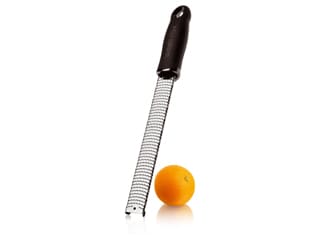
Pour the lemon juice into a saucepan and add the zest of 2 lemons, removed using a Microplane Classic zester-grater.

Also add the caster sugar...

...as well as the whole eggs...

...and the egg yolks.

Start heating the mixture on a hob over medium heat.

Cook while stirring continuously until it reaches a maximum of 82°C. The temperature must rise progressively to avoid ending up with scrambled eggs.

Once the preparation reaches 82°C, remove the saucepan from the heat. The cream will have thickened slightly.

Add the hydrated gelatine...

...and mix vigorously with a whisk to dissolve it into the hot cream.

Mix everything using a hand blender to thoroughly incorporate the gelatine.

Add the butter and blend again...

...until a smooth and homogeneous preparation is obtained.

This is what the result should look like. Allow to cool until it reaches 30°C.

Lemon/yuzu jelly: Prepare the ingredients.

Heat the lemon juice and yuzu juice in a saucepan, adding 3/4 of the caster sugar.

Mix the agar-agar into the remaining 1/4 of caster sugar.

Add this agar-agar and sugar mixture into the heating lemon and yuzu juices...

...and bring to a boil while mixing with a whisk.

Once boiling is achieved, maintain it for a few seconds and transfer this preparation onto a deep tray. Allow to set at room temperature.

Take the wavy aluminum trays for puff pastry and grease them on one side only using an oil spray.

Take the puff pastry sheet out of the fridge and place it on the first greased sheet.

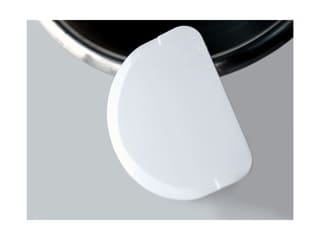
Then press the pastry to fit the shape of the wavy sheet. For this, I use a small strip to ensure the pastry fits well into the hollows.

You should be meticulous during this step so that this shape holds during baking. The puff pastry must be pressed into each indentation. I start from the centre and fit the pastry to the shape, working from the centre outward.

Cover the pastry with the second wavy sheet, greased side facing down.

Bake everything in a fan-assisted oven, preheated to 180°C...

...and bake for 40 minutes. This baking time can vary from one oven to another. I placed a heavy blue steel baking tray on top of the wavy sheets to apply pressure and prevent the puff pastry from rising too much.

Crunchy lemon insert: Prepare all the ingredients.

Crush the pailleté feuilletine flakes with the rolling pin to obtain finer chunks.

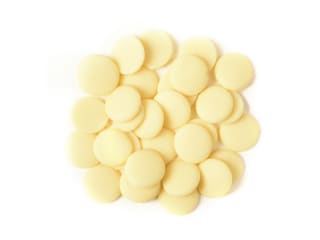
Melt the white chocolate in the microwave in 20 to 30-second intervals, mixing every time to prevent burning.

Add the yuzu praline to the melted white chocolate...

...and mix these two ingredients together.

Add the zest of a lemon, or half a lemon if it is large...

...and mix with the maryse spatula.

Add the crushed pailleté feuilletine flakes...

...and mix again until homogeneous.

Puff pastry finish: After baking the puff pastry, remove the heavy blue steel sheet and the top wavy sheet.

The puff pastry should be golden and wavy.

Take the sheet out of the oven and transfer the puff pastry onto a baking tray lined with a sheet of greaseproof paper.

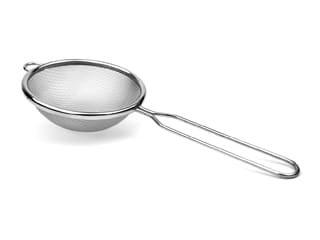
Using a fine sieve, dust a light layer of icing sugar across the entire surface of the puff pastry...

...as shown in the photo.

Bake this puff pastry covered with icing sugar in a fan-assisted oven, preheated to 200°C...

...until the icing sugar melts and forms a transparent, shiny film of sugar.

After baking, remove the puff pastry from the oven and transfer it to a chopping board. Slice rectangles of puff pastry while it is still hot; it will cut better and crumble less. Cut strips of puff pastry 5 cm wide...

...by 12 cm long.

This is what the result should look like. Set aside at room temperature.

Lemon curd (continued): Take the cooled lemon cream, which should be around 30°C, and mix it thoroughly with a whisk.

Add the mascarpone...

...and mix vigorously with a whisk.

Then mix with the hand blender until our lemon cream is smooth and homogeneous. Transfer this preparation into a container and wrap it tightly in cling film. If you are making the recipe in 2 stages, you can keep your lemon cream in the fridge to use later or the next day.

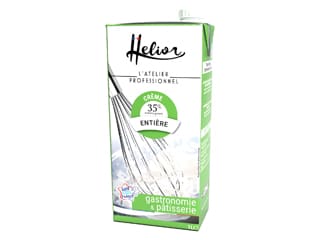
Pour the whipping cream into the stand mixer bowl and mix with the whisk attachment...

...into a very firm whipped cream, as shown here in the photo. Be careful not to overwhip it into butter. Set it aside.

Transfer the lemon cream into the stand mixer bowl. This step is only necessary if the lemon cream has set in the fridge. If your cream is still soft at room temperature, it won't be necessary to smooth it with the whisk.

Mix the cream quickly with the whisk attachment to smooth it. It is better to use the electric mixer to achieve a perfect smoothness rather than a hand whisk, which might leave small lumps.

Pour the whipped cream over the lemon cream all at once...

...and mix thoroughly with a whisk until smooth and homogeneous. Do not overmix to preserve a light texture.

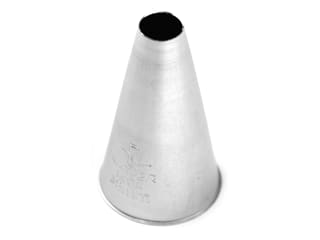
Transfer this resulting lemon cream into a piping bag fitted with a plain nozzle Ø 8mm. Place the piping bag in the fridge so that the cream firms up a little.

Lemon/yuzu jelly (continued): Take the set lemon and yuzu juice, pour it into a pastry bowl...

...and whisk it vigorously to smooth it.

Transfer this lemon/yuzu jelly into a piping bag. Here, it will not be necessary to use a nozzle.

Tie a knot in this piping bag and set it aside in the fridge.

Assembly: You can use the ready-to-use Unipatis lemon yuzu crunchy filling, or make it yourself with the ingredients listed above.

If you are using the ready-to-use lemon yuzu filling, soften it slightly in the microwave for a few seconds and pour it into a piping bag (without a nozzle). We will need between 150 and 200 g of the preparation.

Close the piping bag...

...and set it aside. Note that if the crunch is heated too much, it will be liquid; place it in the fridge so that it becomes creamy at the time of piping. The same applies if you are using a homemade filling.

Take the puff pastry strips. You will need to place 12 rectangles of puff pastry on one side, and 6 others will be kept separate as the top covers (caramelized side up). The other layers will have the caramelized side facing down.

The lemon yuzu filling should be at 24°C when it is piped (the ideal temperature for using this preparation, which must not be too runny).

Pipe a dollop of crunchy filling into the centre of each hollow, avoiding letting it run down the sides. Make sure to check its texture.

Pipe the lemon cream into 3 parallel laces, pressed against one another, along the entire length of the puff pastry strips.

Pipe a few drops of lemon/yuzu jelly directly onto the lemon cream, as shown here in the photo.

Then stack two layers of puff pastry on top of each other to build the mille-feuilles.

This is what the 6 lemon mille-feuilles should look like.

Finish: Take the 6 top covers, caramelized side up. Place a piece of cardboard or a sheet of paper diagonally over one of the covers and dust icing sugar over the surface...

...to achieve this result.

Do the same with all the puff pastry tops.

Gently place these covers on top of the mille-feuilles.

Here are our decorated lemon mille-feuilles. Keep in the fridge until ready to serve. Enjoy!

If you prefer not to make the puff pastry yourself, buy it fresh from your local pastry shop for the best quality. Alternatively, purchase a block of puff pastry from the supermarket and roll it out yourself; avoid pre-rolled sheets. If using shop-bought pastry, skip ahead to step 132.
Pastry preparation:
Please login to post a review
