


Cookies 🍪
By clicking "Accept", you authorize Meilleur du Chef to store cookies on your device to personalize site content, analyze our traffic, and provide social media functionality.
Favourites


In one click, store and find all your favourite recipes.
Add this recipe >
To make this blueberry, chocolate & vanilla entremets, start by preparing all the ingredients for the blueberry confit.

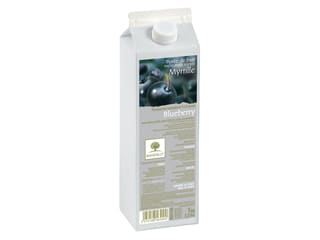
Blueberry confit: Pour the blueberry purée into a saucepan and heat it up.

Take 10% of the caster sugar and mix it with the pectin NH coating — this prevents lumps from forming.

Add the remaining sugar to the blueberry purée and whisk to combine.

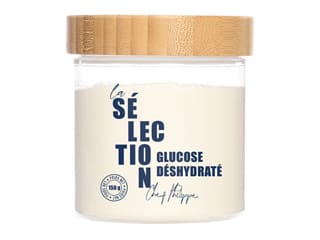
Add the glucose syrup, previously warmed in the microwave to make it more fluid and easier to handle.

When the mixture reaches 40°C, add the sugar-pectin mix in a thin stream while whisking continuously.

Bring the mixture to a boil and maintain the boil for at least 1 minute to activate the pectin. Keep whisking during the entire cooking process to prevent lumps.

Once cooked, remove the saucepan from the heat and add the lemon juice.

Whisk to incorporate it well.

Spread the blueberry confit in a food container in a thin layer for optimal cooling...

...then cover it directly with a sheet of cling film to prevent a crust from forming on the surface.

Once cooled, refrigerate until ready to use.

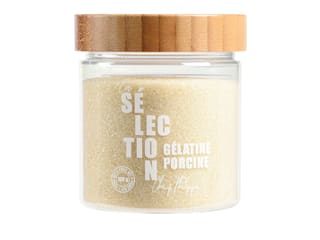
Intense vanilla crémeux (make the day before): Prepare all ingredients. Combine the powdered gelatin with the hydration water (tap or mineral water) and let it bloom for 15 minutes.

Pour the milk into a saucepan, add the dehydrated glucose, and the Tadoka vanilla bean. If unavailable, use a Tahitian vanilla pod.

Heat while whisking to help the vanilla bean dissolve and infuse the milk.

Place the white chocolate in a mixing bowl.

Melt the chocolate in the microwave, in 20 to 30-second intervals...

...stirring every time to prevent burning. The chocolate should be fully melted without exceeding 45°C.

Pour the hot vanilla-infused milk over the melted white chocolate in two or three additions, mixing with a spatula to create an emulsion.

The milk will gradually incorporate into the chocolate.

Finish adding the milk and continue mixing.

Add the hydrated gelatin, previously melted in the microwave, and whisk to combine.

Finally, add the cold whipping cream...

...and blend using a Bamix hand blender...

...until smooth and homogeneous.

Transfer the intense vanilla crémeux into a food container...

...and cover it directly with cling film.

Refrigerate. It's best to prepare it the day before to allow proper cooling.

Soft chocolate sponge: Prepare all ingredients.

Add 1 to 2 tablespoons of water to the cornstarch...

...and mix thoroughly to fully dissolve it.

Pour the remaining water into a saucepan...

...and bring it to a boil.

Once boiling, pour this hot water over the cornstarch mixture and stir with a spoon.

Transfer everything back into the saucepan...

...and bring to a boil until thickened...

...whisking constantly. The mixture will thicken slightly, similar to a béchamel sauce.

Once thickened, pour it over the dark chocolate pistoles placed in a mixing bowl. Let it sit for a minute to allow the chocolate to melt slightly from the heat.

Whisk vigorously until the chocolate is fully melted and smooth.

Once the chocolate mixture is smooth and fully incorporated, add the egg yolks...

...and mix with a spatula.

Then add the flour...

...and mix again with the spatula.

Pour the egg whites into the bowl of the stand mixer.

Add the caster sugar at the start of whipping.

Whip the egg whites at high speed and stabilize them to form a firm meringue.

You should obtain a stiff meringue.

Add half of the meringue to the chocolate mixture...

...and whisk briskly.

The mixture should be homogeneous.

Add the remaining meringue...

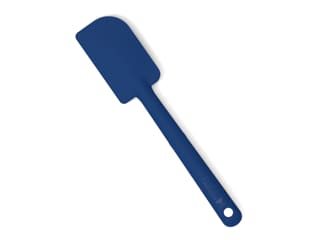
...and gently fold it in using a spatula...

...until you obtain a smooth, even batter for the soft chocolate sponge...

...as shown in the photo.

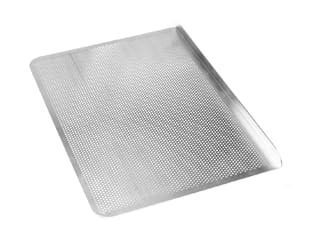
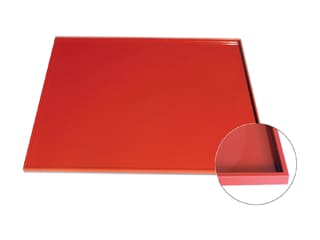
Place a smooth silicone mat with edges on a perforated baking tray and grease it with oil spray.

Spread the chocolate sponge batter over the silicone mat...

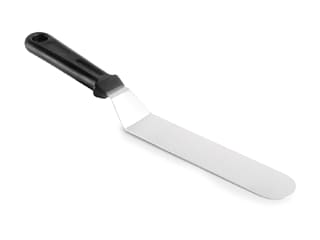
...and smooth it with an offset spatula, using the edges to level it evenly. The given quantities fit a 32.5 x 32.5 x 1cm tray.

Bake in a fan-assisted oven preheated to 165°C for 15 to 18 minutes (baking time may vary depending on your oven).

Once baked, remove the sponge from the oven...

...and let it cool to room temperature.

As it cools, the sponge will slightly shrink and detach from the silicone mat.

When lukewarm or cool, place a sheet of parchment paper on top...

...and flip the whole thing over in one swift motion onto the baking tray.

Gently peel off the silicone mat — it should come away easily.

Set aside. You'll have more sponge than needed for this entremets, but it's difficult to reduce the quantities without altering the texture. The extra sponge freezes well; just be sure to wrap it tightly in cling film.

Intense vanilla crémeux (continued): On the day of assembly, remove the crémeux from the fridge. Transfer it to the mixer bowl and whip it to aerate...

...until it reaches a whipped ganache or whipped cream consistency. Set aside.

Blueberry confit (continued): Remove the confit from the fridge and place it in the mixer bowl (it should be fully gelled).

Whip the mixture to smooth it out. You can also do this manually with a whisk and vigorous mixing.

You should get this smooth texture. Set aside.

Crispy blackcurrant layer: Prepare all ingredients.

Melt the dark chocolate in the microwave, in 20 to 30-second intervals, stirring every time, without exceeding 50°C.

Add the crushed cornflakes...

...the pailleté feuilletine...

...and the crispy blackcurrant chunks...

...and mix thoroughly with a maryse spatula...

...until the mixture is evenly combined. Set aside.

Take the soft chocolate sponge and cut out a disk using a 16cm mousse ring. Use the ring as a cutter.

Place the sponge disk on a baking tray lined with parchment paper, position the ring around it, and spread the crispy blackcurrant mixture on top.

Spread the crispy layer evenly with a small offset spatula...

...pressing to make it adhere and form an even block with the sponge.

Freeze until needed.

Take a 14cm entremets ring and place it on a baking tray lined with parchment paper.

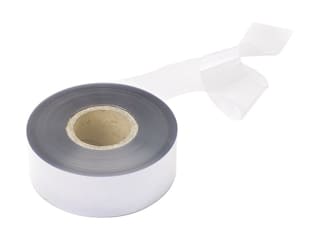
Line the inside of the ring with an acetate roll 3.5cm wide, which will make the release process easier.

Take the blueberry confit and the intense vanilla crémeux. Divide the confit in two, placing 200g in a mixing bowl. Set aside the rest.

Add 380g of intense vanilla crémeux to the confit...

...and gently fold with a maryse until smooth and homogeneous.

You should now have three mixtures: blueberry confit, intense vanilla crémeux, and vanilla-blueberry crémeux.

Transfer the vanilla-blueberry crémeux into a piping bag. No nozzle is required for this step.

Seal the piping bag by tying a knot at the end and set aside.

Pour the intense vanilla crémeux into a second piping bag...

...bring the preparation down to the tip using a scraper...

...and close the bag by tying a knot. Set aside.

Cut the tip of a third piping bag to make a large opening...

...and place it into a piping bag holder.

Cut the tip of the piping bag containing the blueberry confit...

...as well as the one containing the intense vanilla crémeux.

Position both bags side by side inside the third bag...

...like this.

Take this piping bag to get the same result as shown in the photo.

Pipe both textures into the entremets ring. I used this method to achieve a perfect marbling effect between the two preparations.

Fill up to 3/4 of the stainless-steel ring, as shown in the photo. You should leave about 1cm of space at the top of the ring.

Smooth the surface of the preparation with the back of a spoon. It doesn't matter if the colours mix slightly. Do not mix in depth — just smooth the surface.

Pour the remaining pure blueberry confit into the entremets ring, directly over the just-piped preparations, and smooth the surface using an offset spatula.

You should get this result.

Cover the entire surface with a sheet of plastic wrap, making sure it touches the surface...

...and place in the freezer.

Custard (crème anglaise): Prepare the ingredients. This step should be done when the insert is fully frozen.

Pour the milk and glucose syrup into a saucepan...

...and bring to a boil.

Pour the egg yolks into a mixing bowl and whisk quickly while pouring in the boiling sweetened milk.

Transfer everything back into the milk saucepan and cook 'à la nappe' while making 8-shaped motions at the bottom of the pan with a spatula, without exceeding 82°C. Using an electronic probe thermometer is recommended for this step.

When the custard is cooked, transfer it into a clean container to stop the cooking process.

Dark chocolate mousse: Place the dark chocolate in a mixing bowl.

Pour the hot, freshly prepared and weighed custard over the chocolate.

Shake the bowl slightly so the chocolate is fully submerged and starts melting from the heat of the custard. Then mix everything with a spatula until smooth...

...like this. The chocolate must be completely melted and blended into the custard.

Pour the cold whipping cream into the stand mixer bowl and whip it into soft peaks.

You should obtain a soft whipped cream. The fact that it's soft will not make the mousse less stable in the end.

Pour half of this whipped cream into the chocolate mixture, which should be at 35°C (maximum 40°C)...

...and mix quickly with a whisk. This pre-mix helps loosen the chocolate mixture and equalize its temperature.

Add the remaining whipped cream...

...and gently fold it in with a spatula...

...until you get a smooth and homogeneous mixture.

Transfer this dark chocolate mousse into a piping bag (no nozzle).

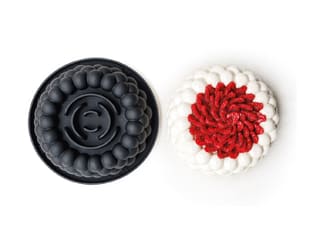
Take the Cloud silicone mould and place it on a baking tray.

Pipe the dark chocolate mousse into the silicone mould, making sure it fills every cavity completely. The softer the mousse, the smoother the result will be.

The mould should be filled up to 3/4.

Tap the mould on the work surface to compact the mousse in the bottom.

Spread the mousse up the sides of the mould with a small offset spatula, pressing it into the cavities to release any air bubbles.

Take the insert out of the freezer and remove the plastic wrap.

Remove the stainless-steel ring. This will be easy to do thanks to the acetate strip.

Peel off the acetate strip — do not forget this step or you'll encounter problems when slicing the entremets.

Here is the unmoulded insert.

Place this insert into the silicone mould...

...pressing it gently with your fingertips so it sits horizontally and centred, with the pure blueberry confit side in direct contact with the mousse.

The excess dark chocolate mousse should rise up the sides. The insert should be pushed down so there's about 0.5cm of space between the top of the insert and the top of the mould.

Smooth the excess mousse with an offset spatula, removing any surplus if necessary.

Take the soft chocolate sponge and its blackcurrant crispy layer out of the fridge and remove the stainless steel ring.

You should get this result.

Flip the sponge so the crispy side is on the bottom...

...and place it into the silicone mould...

...pressing it gently with your fingertips so the blackcurrant crispy layer is directly in contact with the mousse.

Remove the excess mousse and smooth the edges with an offset spatula. The sponge may slightly exceed the mould by a few millimetres.

Our entremets is now assembled.

Cover the entire surface with a sheet of plastic wrap, making sure it touches the surface...

...and place in the freezer. The entremets can be made up to this stage several days or even weeks in advance.

Decorations: Start by hydrating the powdered gelatin with the hydration water for at least 15 minutes. Then pour the blackcurrant syrup and water into a saucepan...

...and heat gently without bringing it to a boil. A temperature between 60 and 85°C is sufficient.

When this temperature is reached, stop heating and add the hydrated gelatin.

Mix the preparation thoroughly until the gelatin is completely dissolved. Let cool to room temperature.

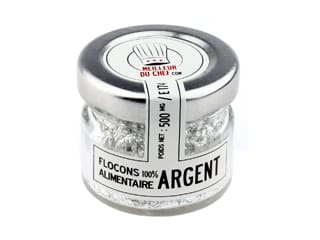
Once the syrup has cooled, add the silver flakes...

...and stir with a spatula so they remain evenly suspended in the syrup and not just on the surface.

Pour this shimmering syrup into a piston funnel...

...and fill the cavities of the Pavoflex sphere mould Ø 2cm with this preparation. If the syrup has slightly gelled (thickened), the flakes will stay suspended more easily than if it's hot and liquid. Stir the syrup occasionally to redistribute the silver flakes evenly.

You can also use the Pavoflex sphere mould Ø 3cm if you prefer. This option is optional, as are the Ø 2cm gelatin spheres (I'll suggest two finishing options for this entremets).
Place in the freezer. Freezing is essential for unmoulding. Keep the remaining blackcurrant jelly aside.

Velvet coating: On the day, take the silicone mould out of the freezer...

...and remove the plastic wrap.

Loosen the edges of the mould.

Turn the mould over and peel it back to release the entremets. It must be completely frozen for an optimal result.

Place the entremets on a tray lined with plastic wrap. Set the tray on a turning tray for an even coating.

Take the white velvet-effect spray and shake it until the ball inside rattles — a sign it's ready for use.

Spray the velvet coating over the entremets from a distance of 30-40 cm...

...while turning the tray to evenly coat all surfaces. Avoid making the layer too thick (it may crack), but cover enough to hide the brown areas of the dessert — find the right balance.

Lift the entremets with two offset spatulas...

...and place it on its serving platter.

You should get this result. At this stage, the entremets is still frozen in the centre.

Decorations (continued): Remove the sphere mould from the freezer and unmould the pearls by gently pressing from the back. This can only be done if the pearls are completely frozen. Place them on a tray lined with parchment paper and let them defrost. When frozen, they are white and opaque (as shown in the photo); once thawed, they become translucent, revealing the silver flakes inside.

First finish option: Gently pour the remaining blackcurrant jelly (at 30-35°C) with a spoon into the hollow centre of the entremets. This applies if your mould has a cavity on top.
Pour a thin layer of jelly over the still-frozen entremets — this will set quickly. If you do this on a defrosted entremets, refrigerate it for 10 to 15 minutes to allow the jelly layer to gel. If your jelly has a bit of foam on top, avoid placing it on the entremets.

Here's the result. You can leave your entremets decorated like this without proceeding to the next steps if you wish. You can also add a few extra silver flakes on top of the jelly.

Second finish option: Complete steps 169 and 170, then take the thawed blackcurrant jelly pearls (now translucent) and arrange them side by side (mixing sizes) directly on the jelly, which will act as an anchor to prevent them from sliding when cutting the cake. You can also do this with still-frozen pearls — they'll defrost on the entremets.

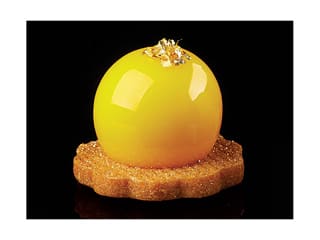
Here is our decorated blueberry, chocolate & vanilla entremets. Allow at least 5 hours of defrosting in the fridge.
Enjoy!
Please login to post a review