


Cookies 🍪
By clicking "Accept", you authorize Meilleur du Chef to store cookies on your device to personalize site content, analyze our traffic, and provide social media functionality.
Favourites


In one click, store and find all your favourite recipes.
Add this recipe >
To make this Galette des Rois with orange blossom and vanilla, start by preparing all the ingredients for the inverted puff pastry. Do not rely on the quantities shown in the photo; on that day I made several galettes.

Dough (détrempe): Here I am using traditional type 65 wheat flour, which is essential for making this pastry.

Pour the water into the stand mixer bowl.

Add the white vinegar...

...as well as the fine salt...

...and mix everything with a whisk so that the salt dissolves in the water, which must be very cold.

The fine salt must be completely dissolved in the water, as shown in the photo.

Add the type 65 flour all at once...

...and the laminating butter at room temperature.

Knead all these ingredients together using the dough hook...

...until a homogeneous dough is obtained.

Stop the mixer as soon as the dough comes together. Do not overwork it, otherwise it will become too elastic. Here we are not looking to develop a gluten network, unlike brioche dough for example.

Detach the dough from the sides of the bowl...

...and transfer it onto a baking tray lined with plastic wrap, shaping it into a square.

Cover the dough directly with plastic wrap...

...and place it in the fridge for at least 1 hour. The plastic wrap must be pressed firmly against the dough to ensure full protection.

'Beurre manié' (butter and flour mix): Place the butter in the mixer bowl.
Here again, the quantities shown are larger than what you would normally make at home. The butter must be at room temperature.

Add the type 65 flour...

...and mix these two ingredients using the paddle attachment (or the dough hook) of the mixer...

...until a perfectly smooth and homogeneous mixture is obtained, with no visible lumps of butter remaining.

Transfer the beurre manié onto the work surface lined with plastic wrap and wrap it completely.

Flatten the beurre manié by pressing with both hands on the work surface, shaping it into a roughly square or slightly rectangular form. Refrigerate for 1 hour.

After this resting time, flour the work surface...

...and roll out the dough into a square shape using a rolling pin, to a thickness of 1.5 to 2cm. Be sure to square off the four sides as shown in the photo to obtain clean right angles. Set aside at room temperature.

Remove the beurre manié from the fridge, remove the plastic wrap, and place it on a lightly floured work surface.

Roll out the beurre manié with the rolling pin, making sure it does not stick to the surface, and shape it into a rectangle. The beurre manié should be the same width as the dough and twice its length.

This is what you should obtain. Try to keep the corners as square as possible to make the lamination easier.

Place the dough in the centre of the beurre manié. Here we can clearly see the rectangle of beurre manié, which is the same width as the dough and twice as long.

Fold one side of the beurre manié over the first half of the dough...

...and fold the other side over the remaining half of the dough, so that the two edges of the beurre manié meet. Press firmly with your fingertips to seal the seam.

Give the dough a quarter turn so that the seam is facing you, as shown in the photo. Make sure the two edges are well sealed.

Start rolling out the dough with the rolling pin, lengthwise. Avoid rolling it wider.

You should obtain a dough sheet about 1cm thick. This thickness will depend on the quantity of dough you are making. Lightly flour the dough if necessary to prevent sticking.

Remove excess flour using a flour brush and fold the top of the dough down by about 10cm.

Then bring the bottom of the dough up so that the two edges meet.

Fold everything in half to form a double turn.

Here is a cross-section view showing the four layers of dough obtained after folding.

Wrap the dough in plastic wrap to protect it from air. Refrigerate for at least 1 hour.

After this resting time, remove the dough from the fridge and unwrap it. Place it on the work surface like a book, with the opening on the right.

Roll out the dough with the rolling pin, lengthening it without widening it.

Proceed gradually, without pressing too hard, so that the dough rolls out smoothly without sticking to the work surface.

Fold the top of the dough down by about 10cm and bring the bottom up so that the two edges meet, as before. Remove excess flour if necessary.

Then fold the bottom up over the top, as shown in the photo. This completes the second double turn.

Wrap the dough in plastic wrap and refrigerate for at least 1 hour.

Once well chilled, remove the dough from the fridge and unwrap it. Place it again on the work surface like a book, with the opening on the right.

Roll out the dough lengthwise, avoiding widening it...

...until you obtain an even layer of about 1cm thick.

Bring the top of the dough down by 10 to 15cm...

...and bring the bottom of the dough up so that the two edges meet.

Fold everything in half.

Wrap the dough in plastic wrap. You have just completed the third double turn. Refrigerate for at least 1 hour.

When the dough is very firm, remove it from the fridge and place it once again on a lightly floured work surface, like a book with the opening on the right. By proceeding this way, the dough is rotated a quarter turn each time, ensuring perfect lamination.

Roll out the dough lengthwise with the rolling pin, avoiding widening it...

...and proceed gradually so as not to crush the layers.

Fold the top of the dough down by 10cm...

...and bring the bottom of the dough up so that the two edges meet.

Fold everything in half one last time.

Wrap the inverted puff pastry obtained in plastic wrap. You have just completed the fourth double turn. At this stage, the dough is finished and must be kept refrigerated until use.

Pastry cream: Prepare all the ingredients.

Pour the whole milk into a saucepan and heat it.

Add the Tadoka vanilla. You may also use a vanilla pod, vanilla powder, or vanilla extract, which would be added after the cream is made and cooled.

Pour the egg yolks into a mixing bowl.

Add the caster sugar...

...and blanch until you no longer hear the sugar grains rubbing against the bottom of the bowl.

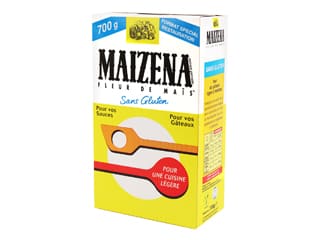
The mixture should become smooth and slightly pale. Add the custard powder (or Maïzena, see tips at the bottom of the recipe) and whisk again.

When the milk comes to a boil, pour half of it over the blanched mixture, whisking continuously.

Place the saucepan containing the remaining milk back on the heat, and when it begins to simmer, pour in the mixture while whisking.

Cook the cream over moderate heat, whisking continuously to prevent it from sticking to the bottom of the saucepan.

The cream will gradually thicken. Maintain cooking for 3 to 4 minutes over moderate heat until a slight loosening occurs (a brief impression of thinning), which indicates that the pastry cream is fully cooked.

Transfer the pastry cream to a food-grade container...

...and smooth it evenly over the entire surface of the container to ensure fast and optimal cooling.

Cover the pastry cream directly on the surface with a sheet of plastic wrap to prevent a skin from forming and allow it to cool at room temperature before refrigerating.

Orange blossom, vanilla almond cream: Prepare all the ingredients. Here again, the quantities shown in the photo are larger than what you would make at home.

Place the softened butter in the mixer bowl.

Add the icing sugar...

...and mix these ingredients using the paddle attachment to cream the mixture...

...until it is perfectly smooth.

Add the ground almonds. Here I am using blanched ground almonds...

...as well as the custard powder, which can be replaced with Maïzena or potato starch. Mix until the powders are fully incorporated.

Add the whole eggs while continuing to mix with the paddle attachment.

Add the orange blossom water...

...and the vanilla extract.

Mix again until a smooth texture is obtained.

Weigh 90 grams of pastry cream then add it to the preparation and mix. This pastry cream should be at room temperature and previously smoothed with a whisk for better incorporation.

We obtain a smooth and homogeneous orange blossom and vanilla almond cream.

Transfer this cream into a food-grade container, spreading it in a thin layer for optimal cooling.

Cover the cream directly on the surface with a sheet of plastic wrap. Refrigerate to firm up for 1 to 2 hours.

Assembly: Once the orange blossom and vanilla almond cream has cooled, take a mousse ring Ø 16cm...

...and draw a circle on a sheet of baking parchment. Here I made two circles because I prepared two galettes that day.

Turn the baking parchment over so that the pencil graphite is underneath, ensuring it does not come into direct contact with the cream...

...as shown here.

Remove the orange blossom and vanilla almond cream from the fridge and remove the plastic wrap.

Transfer this cream into a piping bag. Here, using a nozzle is not necessary.

Cut the tip of the piping bag with a pair of scissors to obtain an opening 1.5 to 2cm in diameter.

Pipe the cream following the pencil outline, forming a spiral.

You should obtain a disc of orange blossom and vanilla almond cream.

Smooth the surface lightly with a mini offset spatula and insert a trinket directly into the cream.

Cover the trinket with cream using the mini offset spatula to ensure it is well hidden.

Slide the sheet of baking parchment holding the cream disc onto a baking tray...

...and cover everything with a second sheet of baking parchment.

Gently press this sheet of baking parchment with an offset spatula so that it is in full contact with the orange blossom and vanilla almond cream disc. Place in the freezer.

Remove the inverted puff pastry from the fridge and roll it out with a rolling pin...

...into a large rectangle about 4 to 5mm thick. Roll it out so that you can cut two pastry discs Ø 24cm.

You should obtain a pastry sheet that is not too thick, otherwise it will be difficult to bake properly (4 to 5mm).

Cut two pastry discs using a mousse ring Ø 24cm, avoiding using it as a cutter. It is preferable to use the stainless-steel ring as a guide and cut the pastry with the blade of a very sharp knife, so as not to damage the pastry layers.

Lift the first inverted puff pastry disc and place it on a baking tray lined with baking parchment.

Cover this pastry disc with a second sheet of baking parchment and place the second inverted puff pastry disc on top, stacking them. Refrigerate so that the pastry remains well chilled.

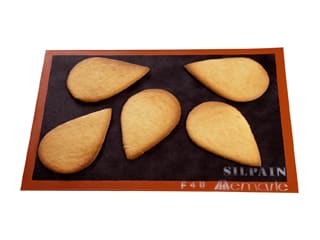
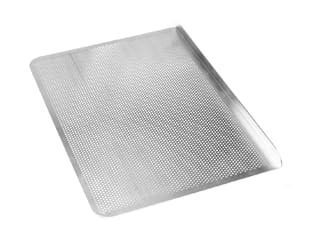
Take a perforated baking tray and line it with a Silpain baking mat.

Place the spiral galette stencil on the silicone mat...

...and cover it with the first inverted puff pastry disc, positioning it carefully in the centre and pressing gently so that the pastry slightly sinks into the stencil cavities.

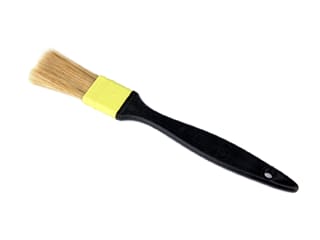
Prepare some egg wash by mixing one egg yolk with one tablespoon of cream. Brush the entire surface of the inverted puff pastry with a pastry brush...

...as shown in the photo.

Once the orange blossom and vanilla almond cream disc is frozen, remove it from the freezer and peel off the top sheet of baking parchment.

Detach the cream disc from the bottom sheet of baking parchment...

...and place it in the centre of the inverted puff pastry.

Place the second inverted puff pastry disc over the frozen orange blossom and vanilla almond cream insert...

...lining the edges up perfectly with the bottom pastry disc.

Gently stretch the top pastry disc so that the edges overlap perfectly all around.

Then press the edges firmly to seal the two pastry discs together. The egg wash acts as glue here. It is important to fully enclose the still-frozen cream disc and to avoid trapping air bubbles inside.

Pierce the surface of the pastry with a few knife cuts, piercing only the first layer of inverted puff pastry.

This is what the result should look like.

Cover the assembled galette directly on the surface with plastic wrap and refrigerate for at least 1 hour before baking, to prevent the pastry from shrinking. This recipe can be prepared up to this stage the day before baking. The galette can also be frozen for later baking.

Once the galette has chilled well, remove it from the fridge, remove the plastic wrap and place four stainless steel rings of equal height at the corners of the baking tray. The rings should be between 3.5 and 4.5cm high, depending on the thickness you want for the galette.

Place a second perforated silicone mat on top...

...as well as a heavy baking tray (here made of blued steel) to prevent the inverted puff pastry from lifting during baking.

This is what the result should look like.

Bake in a fan-assisted oven preheated to 170°C and cook for about 1 hour. Note that baking time may vary depending on the oven.
If the galette was frozen at step 122, extend the baking time by 10 to 15 minutes.

30° Baumé syrup: Prepare the ingredients.

Pour the water into a saucepan and heat it. Then add the caster sugar...

...and bring to a boil. Maintain the boil until the sugar is completely dissolved.

Remove the saucepan from the heat once the sugar is fully dissolved. Allow to cool at room temperature.

At the end of baking, remove the tray from the oven.

Remove the blue steel tray from the top...

...as well as the perforated silicone mat.

You should obtain a galette with a nice golden colour.

Place a cold baking tray on top of the galette...

...and flip everything over carefully to avoid burning yourself, working in a quick motion so that the galette does not slide out of the tray.

Remove the tray that is now on top...

...as well as the baking mat.

Also remove the stencil. You will notice that the pattern is clearly printed on the puff pastry. If the stencil was centred, the design will be perfectly centred as well.

Apply the 30° Baumé syrup in a thin layer using the pastry brush on the hot galette (just out of the oven), so that it dries quickly on contact with the heat. This syrup will glaze the surface of the galette, giving it a very glossy finish.

Transfer the galette to a pastry rack for optimal cooling at room temperature.

Our Galette des Rois with orange blossom and vanilla is now done. Enjoy!

Please login to post a review
