


Cookies 🍪
By clicking "Accept", you authorize Meilleur du Chef to store cookies on your device to personalize site content, analyze our traffic, and provide social media functionality.
Favourites


In one click, store and find all your favourite recipes.
Add this recipe >
Preparing the chicken: Place one chicken on a cutting board. It should be positioned as shown in the photo, with the tail facing you.

Start by cutting into the upper part of the chicken using a sole filleting knife, positioning yourself to the left of the breastbone. First cut through the skin before cutting the flesh.

Then cut gently while following the carcass to lose as little meat as possible.

Gradually half of the chicken detaches until reaching the joint of the wing and thigh.

When that happens, take the chicken in your hands and break the joint by twisting the chicken.

Finish cutting the joint with the knife, starting with the thigh joint...

...and then the wing joint.

Continue to follow the carcass with the knife. Using a sole filleting knife is ideal thanks to the flexible blade.

Once the chicken is detached from the carcass, turn it over and cut along the backbone...

...by cutting the skin and detaching the wing-and-thigh section, which must remain in one single piece.

Do not forget to detach the "oysters", a delicious part of the chicken that is often forgotten.

Half of the chicken has been removed; repeat the operation on the other side. Turn the chicken over and cut to the left of the breastbone again with the filleting knife.

Then follow the contour of the carcass until reaching the thigh and wing joints...

...cutting in such a way that you can detach them after breaking them.

Finally detach the thigh and wing, which must remain in one piece.

You are left with the carcass, which can be used to make a chicken white stock for the rest of the recipe. Otherwise, it can simply be frozen raw and used later.
Repeat the whole operation (steps 1 to 16) with the second chicken.

On one of the first chicken halves, remove the wing while keeping only the drumette. The remaining parts will go with the carcass to prepare the white stock.

Take the drumette and cut it lengthwise with the knife, following the bone.

Pull the flesh apart to expose the bone.

Then slide the knife blade under the bone to detach it...

...and free the wing from its bone, keeping only the flesh and skin.

Do the same with the thigh. Here we start with the upper thigh, cutting along the bone of the upper thigh.

Cut down to the bone, like this.

Free the bone with the knife tip, and slide the blade under the bone...

...to cut and release the bone while losing as little flesh as possible.

Then cut off the joint with the knife.

Do the same with the thigh, cutting along the bone...

...and sliding the blade under it to cut at the joint.

Then completely free the bone.

If any pieces of cartilage remain, remove them with scissors.

This is what the result should look like. The red (or pinkish) part is the fully deboned thigh. The part on the right, the chicken breast, is also fully deboned.

Season the chicken meat with freshly ground pepper...

...and with fine salt.

Fold the deboned half-chicken in two.

Do not roll the chicken meat into a cylinder; simply fold the wing over the thigh, or the thigh over the wing, so that the skin wraps the meat and no skin remains inside the ballotine...

...as shown in the photo.

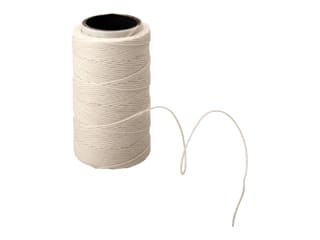
Tie the chicken roll with cooking string without tightening too much, just enough to keep its shape during cooking.

Continue along the entire length of the chicken piece, making 4 or 5 loops of string.

When you're done in one direction, also place one string lengthwise along the chicken, like this.

Do the same with all chicken pieces. Here I am cooking two large 2kg chickens, which will serve 8 to 10 people.

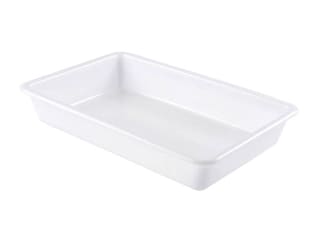
Place these tied chicken pieces in a food tray and set aside.

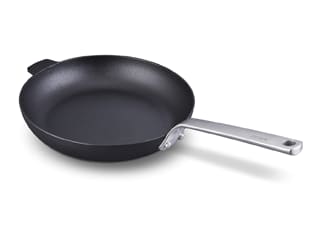
Heat the butter and a little olive oil in a large non-stick frying pan.

When the butter has completely melted and starts sizzling, place the chicken pieces in the hot fat, and add 4 large cloves of garlic, previously peeled.

Add slightly crumbled sprigs of fresh thyme.

Brown the chicken pieces on the skin side and on all sides.

To do this, turn the chicken halfway through so it browns evenly. The goal is to sear the outside of the chicken, not to cook the inside.

Once the chicken pieces are browned, transfer them to a food container.

Take one chicken ballotine and remove all the strings.

Place this chicken piece on a sheet of plastic wrap...

...and roll it to form a smooth, tight cylinder. Here I am working with 45cm wide plastic wrap to have enough margin on the sides. If your wrap is smaller, roll it in the other direction as well.

Tighten both ends to form a uniform cylinder so the chicken is compact inside.

Repeat the operation with all chicken ballotines. We end up with 4 chicken rolls. If you make the recipe with only one chicken, you will have 2 ballotines.

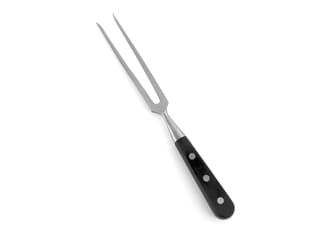
Prick each chicken ballotine using a carving fork or the tip of a knife, to make the wrapping permeable.

Take a vacuum sealer bag and place the roasted garlic cloves inside...

...as well as a little thyme and one ballotine per bag.

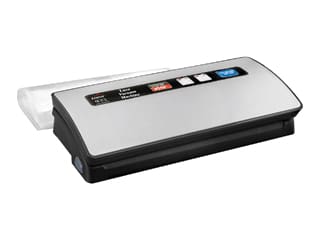
Vacuum-seal the bag using a vacuum sealer, so the chicken ballotine becomes perfectly trapped and compressed inside the pouch.

For cooking, take a immersion heater and place it on the edge of a pot filled with water at room temperature.

Set the immersion heater to 65°C. This device will allow us to cook with perfect temperature precision.

Gradually the water temperature rises, as shown on the display.

When the water reaches 65°C, immerse the 4 vacuum-sealed bags containing the chicken ballotines.

Keep the heater programmed at 65°C so the water maintains this temperature. This slow, gentle cooking method ensures the chicken will be super moist and tender.

Set a cooking time of 1 hour and 15 minutes for the ballotines. This should be done the day before. Once cooked, remove the ballotines from the water and place them — still sealed — in the fridge.

Crust: Place the gingerbread slices on a cooling rack.

Place the rack in a convection oven preheated to 150°C and dry them for 10 to 15 minutes depending on the oven.

The gingerbread should have lightly browned and dried. Note that when gingerbread is hot, it remains soft. It becomes crisp like a rusk as it cools.

Remove the rack from the oven and let the gingerbread cool at room temperature.

When the gingerbread has cooled, break it into pieces and place it in the bowl of a mixer...

...and blend quickly until you obtain gingerbread crumbs.

Once the crumbs are ready, you may pass them through a sieve to obtain a uniform texture. This step is optional depending on the consistency you wish to achieve.

Transfer the gingerbread crumbs to a food container. You may have a bit of irregularity in texture; what matters is that the crumb is generally fine without large chunks. Set aside.

Butternut and red kuri squash purée: Cut the butternut in half on a chopping board...

...and cut it in half again as shown in the photo.

Remove the central part containing the seeds using a tablespoon.

Remove the skin with a knife, taking care as it is quite tough.

Now cut the red kuri squash in half and remove the centre and seeds with the spoon.

Peel the red kuri squash as well, using a knife and being careful not to cut yourself.

Once peeled, cut the red kuri squash into pieces. Place these pieces in a saucepan and set aside.

Roasted butternut cubes: Take the butternut flesh and with a knife...

...cut regular cubes of about 1cm. Set aside.

Butternut pickles: Take one piece of butternut and slice it using a mandoline, in order to obtain fairly thin slices, 1 to 2mm thick and 7 to 8cm long. Set aside.

Red kuri chips: Do the same with a piece of red kuri squash; these thin slices will be used to make the chips.

This is what the result should look like.

Place the red kuri squash slices on a baking tray lined with a sheet of parchment paper...

...spreading them well over the entire tray without overlapping them too much.

Place the tray in a fan-assisted oven preheated to 100°C, and let them dry for 10 minutes.

Once the red kuri squash chips have dried, remove them from the oven and allow them to cool at room temperature.

Butternut and red kuri squash purée (continued): Meanwhile, add the trimmings from the previous cuts into the saucepan containing the pieces of red kuri squash and butternut, with about 1cm of water at the bottom.

Season with fine salt...

...and freshly ground black pepper.

Make a parchment paper lid by folding the paper in half, then in quarters, then folding again to form a triangle. Cut it at the radius using scissors. You will also need to make a small cut at the tip to create a chimney.

Place the parchment paper lid in the saucepan, directly in contact with the pieces of squash and butternut. Cook over medium heat.

Butternut pickles (continued): Prepare all the ingredients.

Pour the cider vinegar and water into a saucepan.

Add the caster sugar...

...the fine salt...

...as well as one or two pinches of whole cumin seeds...

...and a few yellow mustard seeds.

Also add two small sprigs of fresh rosemary...

...and bring everything to a boil.

Once boiling is reached...

...pour the boiling liquid over the butternut slices previously placed in a mixing bowl.

Then wrap the bowl tightly with cling film stretched over the edges. Let cool for at least 1 hour at room temperature before use.

Roasted butternut cubes (continued): Heat a little olive oil in a frying pan.

When the pan is hot, place the butternut cubes into the hot oil.

Season with fine salt...

...freshly ground black pepper, as well as sugar to enhance browning.

Brown the butternut cubes on all sides...

...until they get an even colour, turning them regularly with a spatula.

Butternut and squash purée (continued): When the pieces of butternut and squash are tender, remove the parchment paper lid...

...and grate a little nutmeg on the surface using a Microplane spice grater.

Then blend everything using a hand blender to obtain a smooth purée.

Adjust the seasoning if needed with fine salt and freshly ground pepper.

Finally add the butter and blend again until completely incorporated.

Once the purée is ready, pass it through a fine sieve to remove any remaining lumps.

Use a maryse spatula to press the mixture well through the sieve.

You now have a smooth, homogeneous butternut and squash purée, which should be set aside until plating. It may be kept warm, covered, in an oven preheated to 150°C.

Red kuri squash chips (continued): Heat frying oil in a saucepan.

Then immerse the oven-dried squash slices into the hot oil.

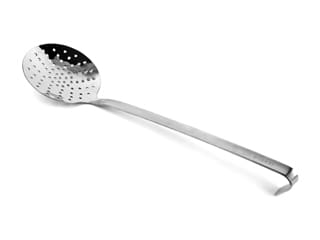
Stir regularly during the entire frying time using a skimmer, so that the chips do not stick together.

When the squash chips are golden, transfer them to a food tray lined with paper towel. Season with fine salt and keep warm in the oven at 150°C.

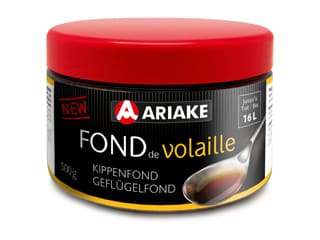
Black truffle sauce: Pour the water and the Ariake poultry stock paste into a saucepan. If you previously prepared a poultry stock using the chicken carcasses, you will use that stock to make your sauce.

Dissolve the poultry stock paste well in the water by mixing with a whisk...

...and bring to a boil.

In another saucepan, melt the butter with a little oil.

Add the finely chopped shallots...

...and sweat them for a few minutes over moderate heat, without browning.

Add the Madeira wine...

...bring everything to a boil...

...and allow to reduce by half.

Then add the poultry stock...

...bring to a boil and reduce until you obtain a syrupy consistency.

Finish the sauce with butter (without boiling) by adding the cold butter to the sauce and shaking the saucepan to create a wave motion that helps incorporate the butter gradually.

Strain the sauce through a fine strainer into a small saucepan.

Press the chopped shallots firmly with the back of a small spoon in the strainer to extract all their flavour.

Finally add the finely chopped black truffle to the sauce. Keep warm in a simmering bain-marie.

Remove the chicken ballotines from the fridge and take them out of their vacuum bags.

Remove the cling film.

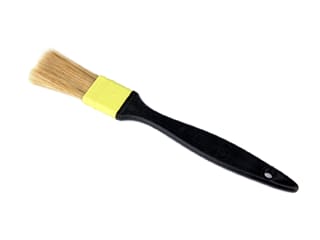
Crust (continued): Brush the outside of the chicken ballotines with honey using a pastry brush. Make sure the honey coats the entire surface, including the sides.

Once the chicken is well coated with honey...

...roll the chicken in the gingerbread crumbs...

...so that the gingerbread adheres perfectly. It's important that the honey is applied evenly so the chicken is fully covered in crumbs without gaps.

Repeat with all the chicken ballotines.

Place the breaded chicken ballotines on a baking tray.

Place the tray in a fan-assisted oven preheated to 180°C and caramelize the ballotines for 10 to 15 minutes.

When the ballotines are golden brown, you may keep them in a warm oven at 120°C for 10 to 15 more minutes, just to reheat the centre since the chicken pieces were originally cold.

Finish: Transfer a chicken ballotine onto the cutting board and hold it with the carving fork to avoid damaging the crust...

...and cut slices 1 to 1.5cm thick using a filleting knife. Note: the pink part of the chicken is the thigh, and the white part is the breast. The chicken ballotine is perfectly cooked and tender thanks to the low-temperature cooking.

Place the butternut and squash purée in a serving dish.

Then arrange the slices of chicken ballotine on the purée, overlapping them as shown in the photo.

Drain the butternut pickles on paper towel.

Place a few roasted butternut cubes around the serving dish, on top of the purée.

Insert the squash chips and the butternut pickles into the purée.

Here I add a few mustard seeds taken from the pickling liquid to enhance the dish.

Arrange all elements harmoniously, adding a few roasted butternut cubes on top of the chicken slices.

Here are our Christmas chicken ballotines in gingerbread crust, squash and butternut with black truffle sauce. Finish decorating with a sprig of fresh rosemary. The extra purée and side vegetables will be served separately in another dish. The black truffle sauce can be served in a gravy boat so guest can help themselves as desired. Enjoy!
Please login to post a review
